

제조공정

산업 제조
 |
| × | 1 | |||
 |
| × | 1 | |||
 |
| × | 1 | |||
 |
| × | 1 | |||
 |
| × | 1 | |||
| × | 1 | ||||
| × | 1 | ||||
| × | 1 | ||||
| × | 1 | ||||
 |
| × | 1 |
 |
|
 |
| |||
 |
| |||
 |
|
스마트 시티 및 대기질
세계은행은 스마트시티를 기술 집약적 도시로 정의한다. 이는 매우 효율적인 공공 서비스를 의미합니다.
스마트 시티의 기본 기능 중 하나는 지속 가능한 환경을 제공하는 것입니다. 지속 가능한 환경을 위해서는 환경 조건을 모니터링하여 오염원을 식별하고 완화할 필요가 있습니다. 이러한 맥락에서 수천 개의 공기질 센서가 정부와 시민 모두에게 실시간 정보를 제공하기 위해 배치됩니다. 이 데이터는 유용한 정보로 전환되어 교통 계획과 관련이 있는지 아니면 걸어서 출근하는 것이 가장 좋은 경로인지 등 더 나은 결정을 내릴 수 있습니다.
대기 질 감지는 스마트 도시의 비전에 잘 맞습니다. 즉, 이전에는 사용할 수 없었던 도시에 대한 정보를 제공하여 사람들이 삶의 질을 향상시킬 수 있는 결정을 내릴 수 있도록 합니다.
문제 및 솔루션
대도시에서 증가하는 대기 오염 수준은 인간 건강에 대한 위험 때문에 주요 관심사가 되었습니다. 이러한 맥락에서 기술은 오염 모니터링과 그 영향의 가능한 완화에 매우 유용한 도구가 되었습니다. 특히, 서로 다른 오염 물질을 측정하기 위해 상호 연결된 센서를 사용하는 사물 인터넷(IoT) 패러다임을 사용하는 다양한 제안이 있습니다. 저비용 대기질 모니터링 센서 노드 네트워크를 구축하여 대기질 및 기상 매개변수를 모니터링할 수 있습니다. 따라서 오염원 탐지를 통해 도시는 시정 조치를 취하고 환경 건강을 개선할 수 있습니다. 홍수 및 강우 모니터링 솔루션과 같은 재난 감지 시스템을 주변에 설치합니다. 재난이 발생하면 시민들에게 미리 알릴 수 있습니다. 전체론적 관점을 도출할 수 있으므로 당국이 데이터 기반 인프라 및 정책 계획 결정을 내릴 수 있습니다.
프로젝트 계획
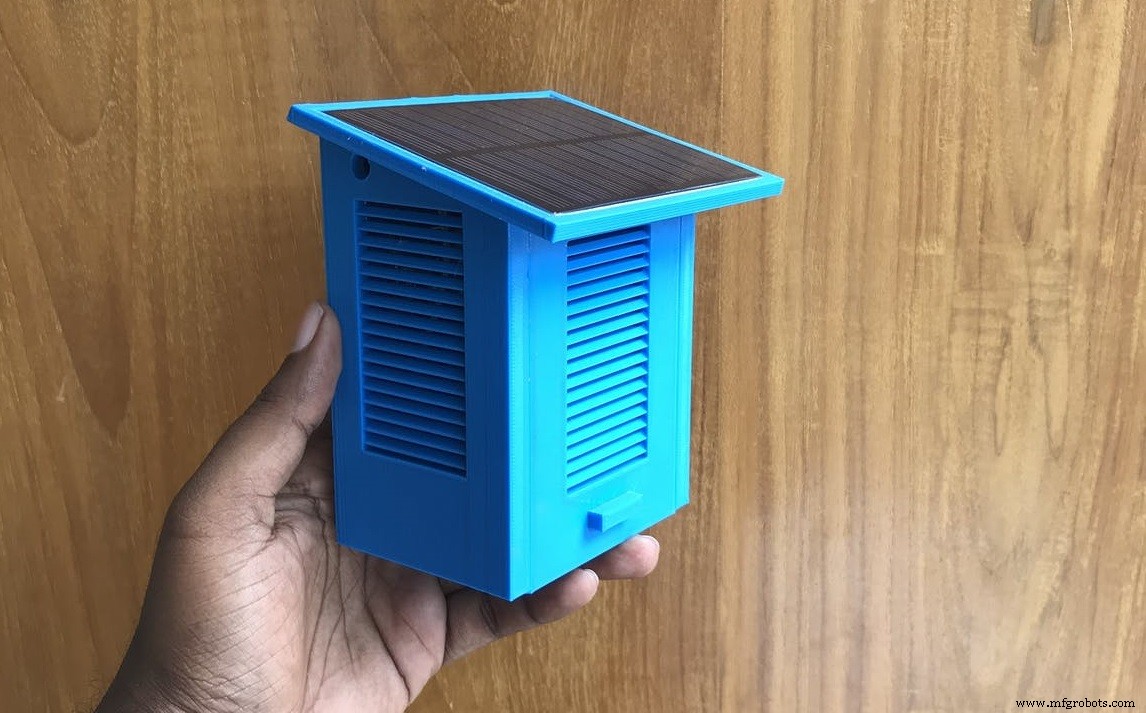
이 프로젝트에서 우리는 소음, 온도, 습도 및 공기 품질과 같은 몇 가지 가장 중요한 환경 매개변수를 모니터링할 것입니다. 무선 통신 프로토콜을 통해 실시간 데이터를 클라우드 플랫폼으로 전송합니다. 장비는 배터리 백업으로 태양열 발전으로 완전히 실행됩니다. 장치의 데이터는 원하는 형식으로 데이터를 시각화하고 분석하는 대시보드에서 액세스할 수 있습니다.
스마트 도시의 공기질 모니터링을 위해서는 센서 노드를 다른 위치에 배치해야 합니다. 전력 소모와 비용 측면에서 모든 센서 노드를 개별적으로 클라우드에 연결하는 것은 좋은 생각이 아닙니다. 오히려 작은 영역의 모든 센서 노드에서 데이터를 수집하고 단일 게이트웨이에서 모든 데이터를 클라우드에 게시하는 것이 좋습니다. LoRa는 이러한 이점을 제공할 수 있으며 이것이 제가 제 프로젝트에 LoRa를 선택한 이유입니다.
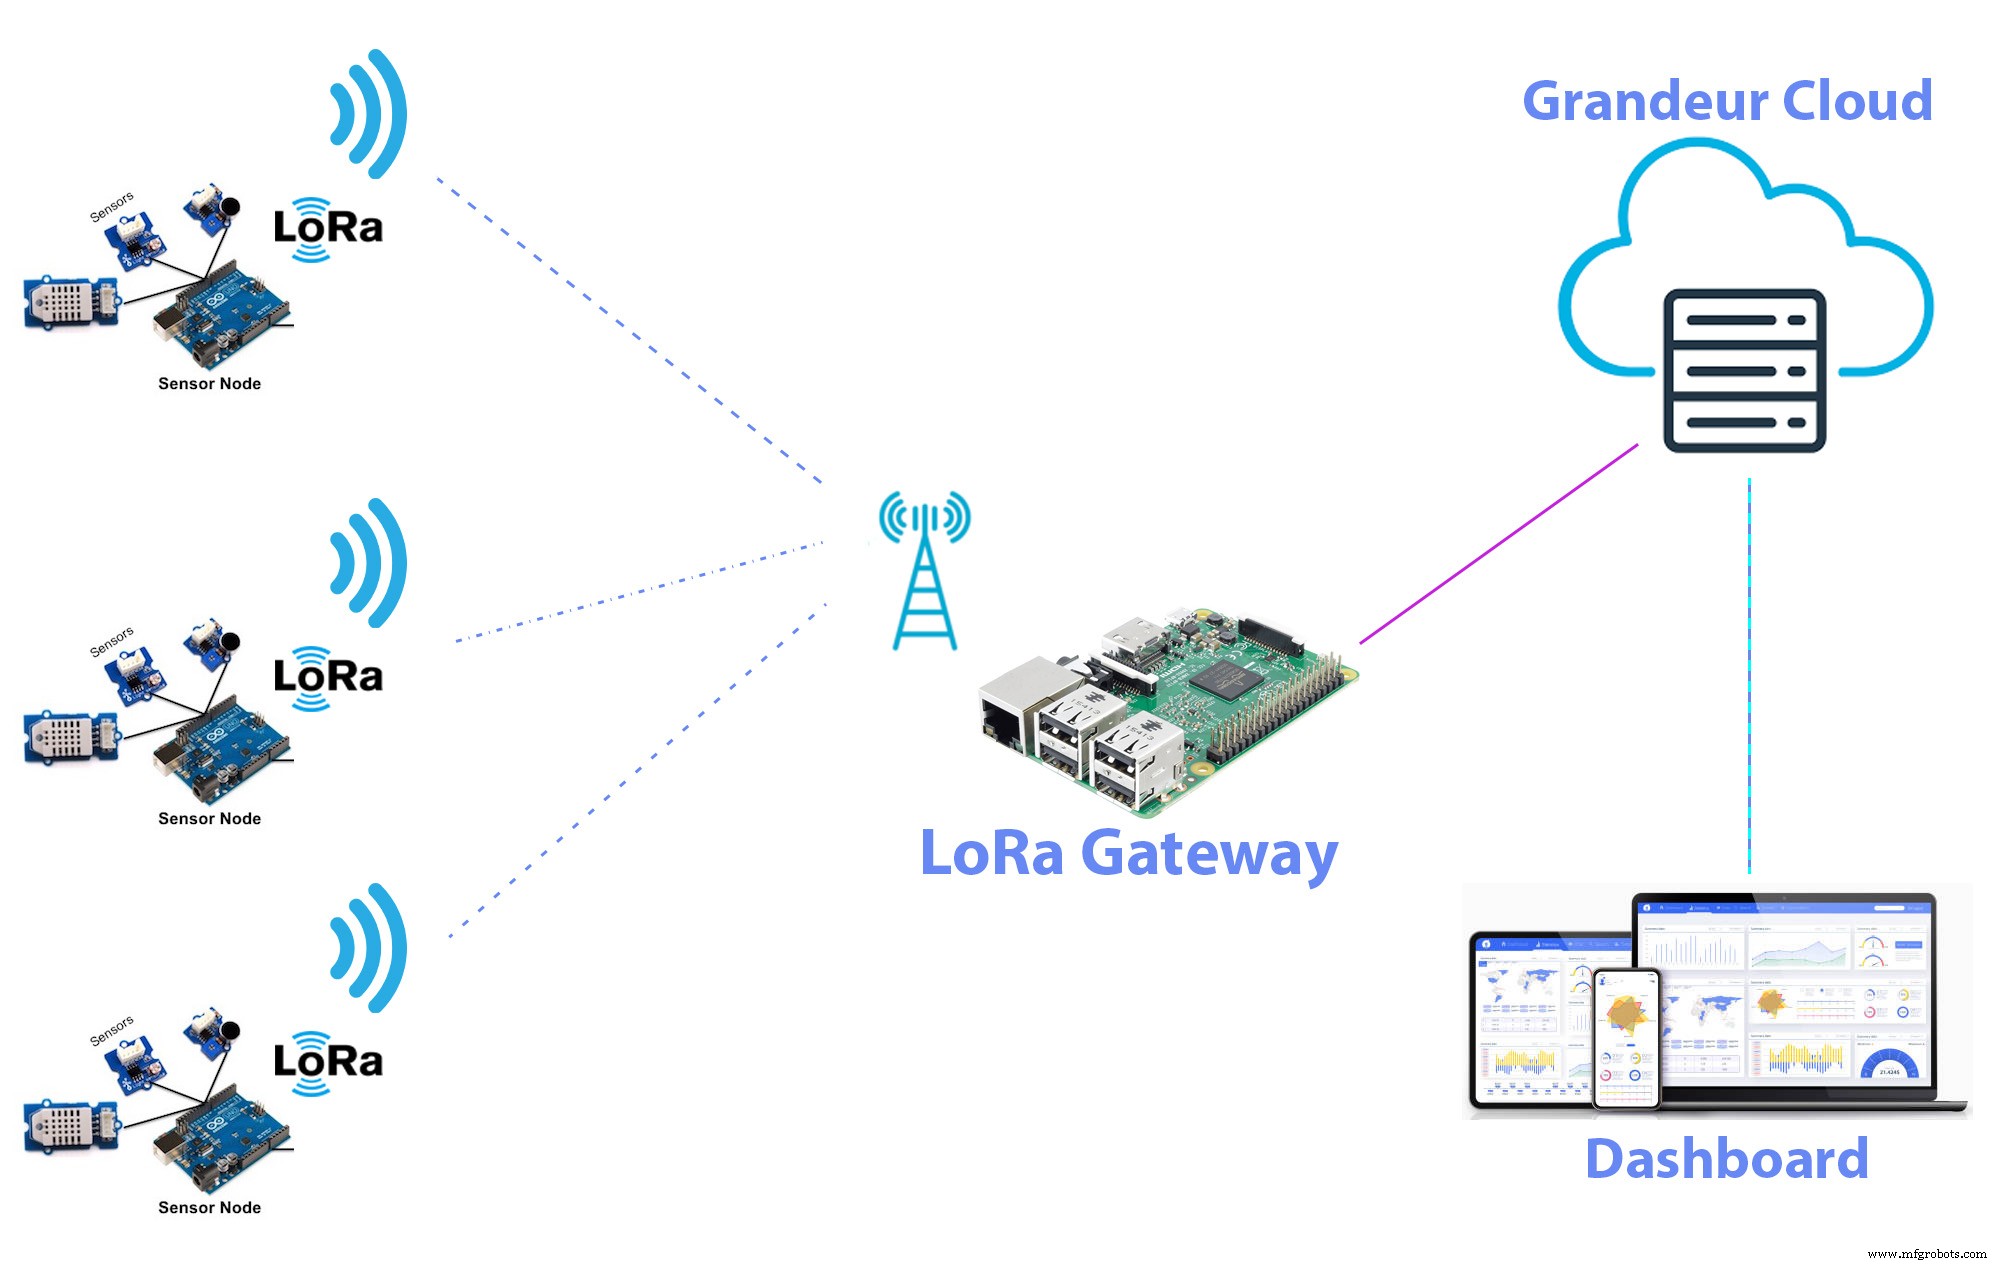
클라우드 서비스의 경우 프로젝트에 Grandeur를 사용하고 있습니다. 그랜저는 드래그 앤 드롭 방식으로 그래프 위젯을 만들어 데이터를 저장하고 데이터를 시각화할 수 있는 비교적 새로운 메이커 친화적인 IoT 플랫폼입니다. 또한 예제 코드와 함께 Arduino, JavaScript 및 Python SDK를 제공합니다. 따라서 Arduino, NodeMCU 및 Raspberry Pi를 사용하여 쉽게 그들의 서비스에 연결할 수 있습니다.
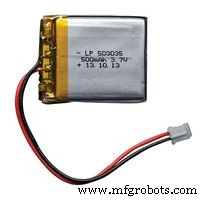
센서 노드에 전원을 공급하는 가장 좋은 방법은 태양 전지판을 사용하는 것입니다. 센서 노드는 다른 원격 위치에 배치되고 배터리를 자주 교체하거나 유틸리티 소스에서 전원을 공급하는 것이 항상 가능한 것은 아닙니다. 태양 전지판과 리튬 이온 배터리를 사용하여 센서 노트에 전원을 공급하고 있습니다.
센서 노드 만들기
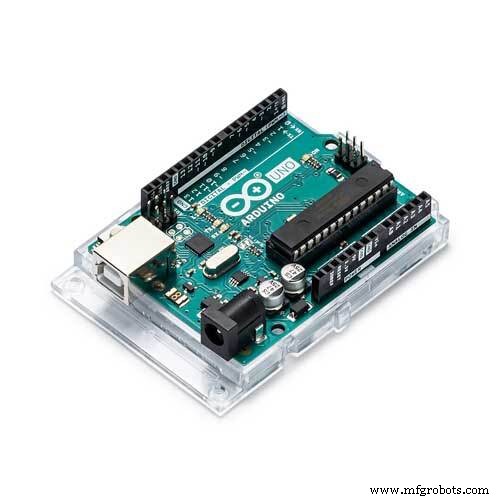
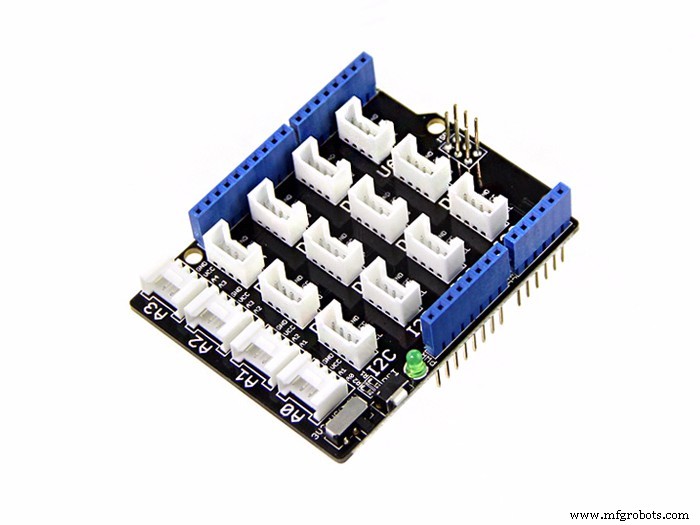
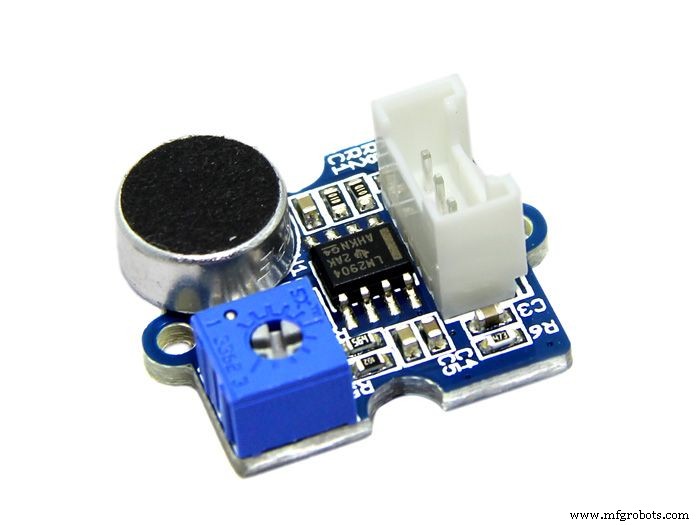
공기질, 소음 수준, 온도 및 습도를 모니터링하고 싶습니다. 그래서 Grove 공기질 센서, Grove 소음 센서, Grove DHT11 온습도 센서를 사용했습니다. Grove 센서의 좋은 점 중 하나는 Grove 베이스 실드를 사용하여 납땜 없이 모든 Grove 센서를 Arduino에 연결할 수 있다는 것입니다.
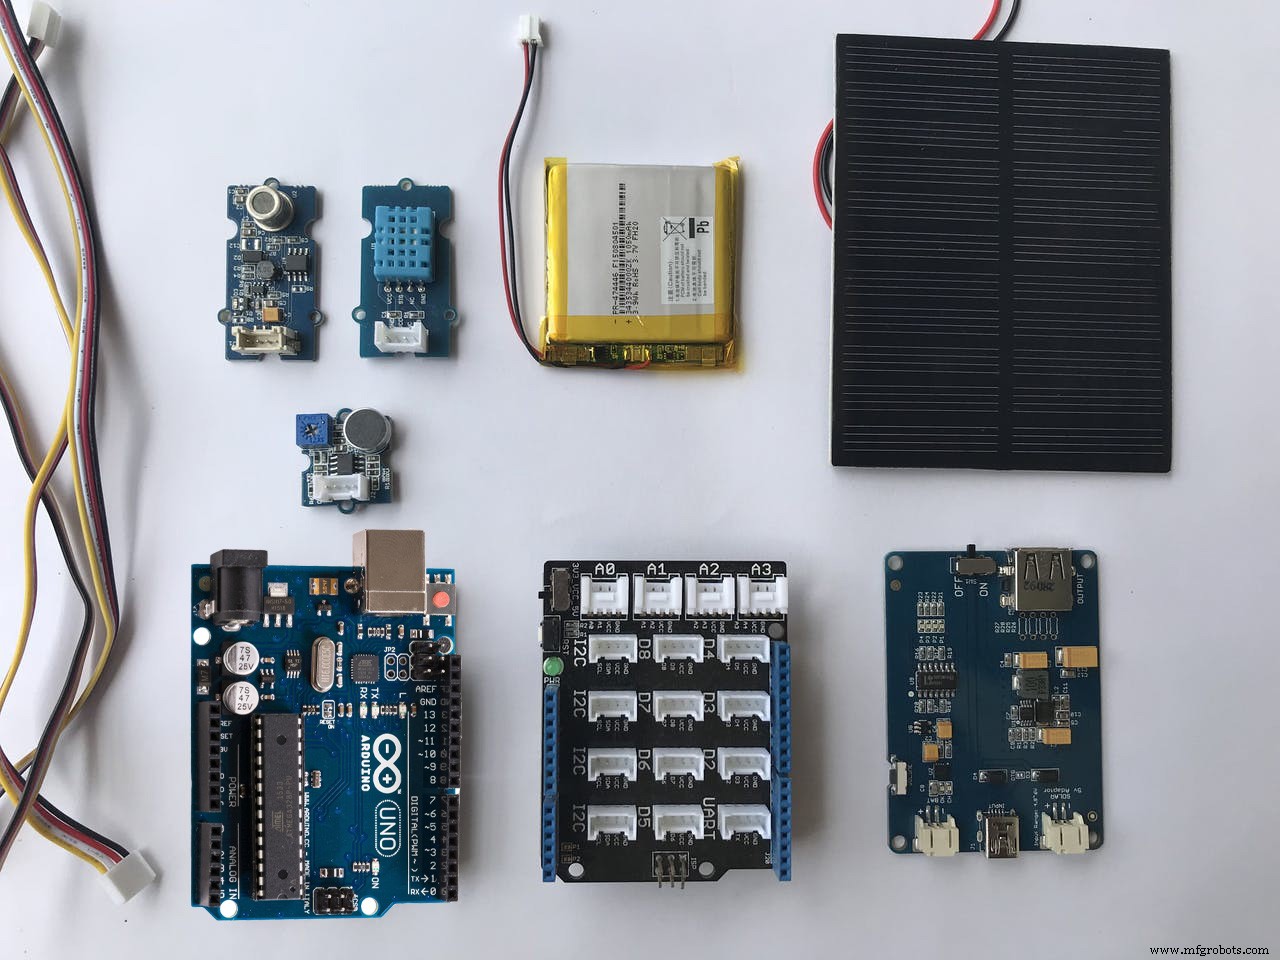
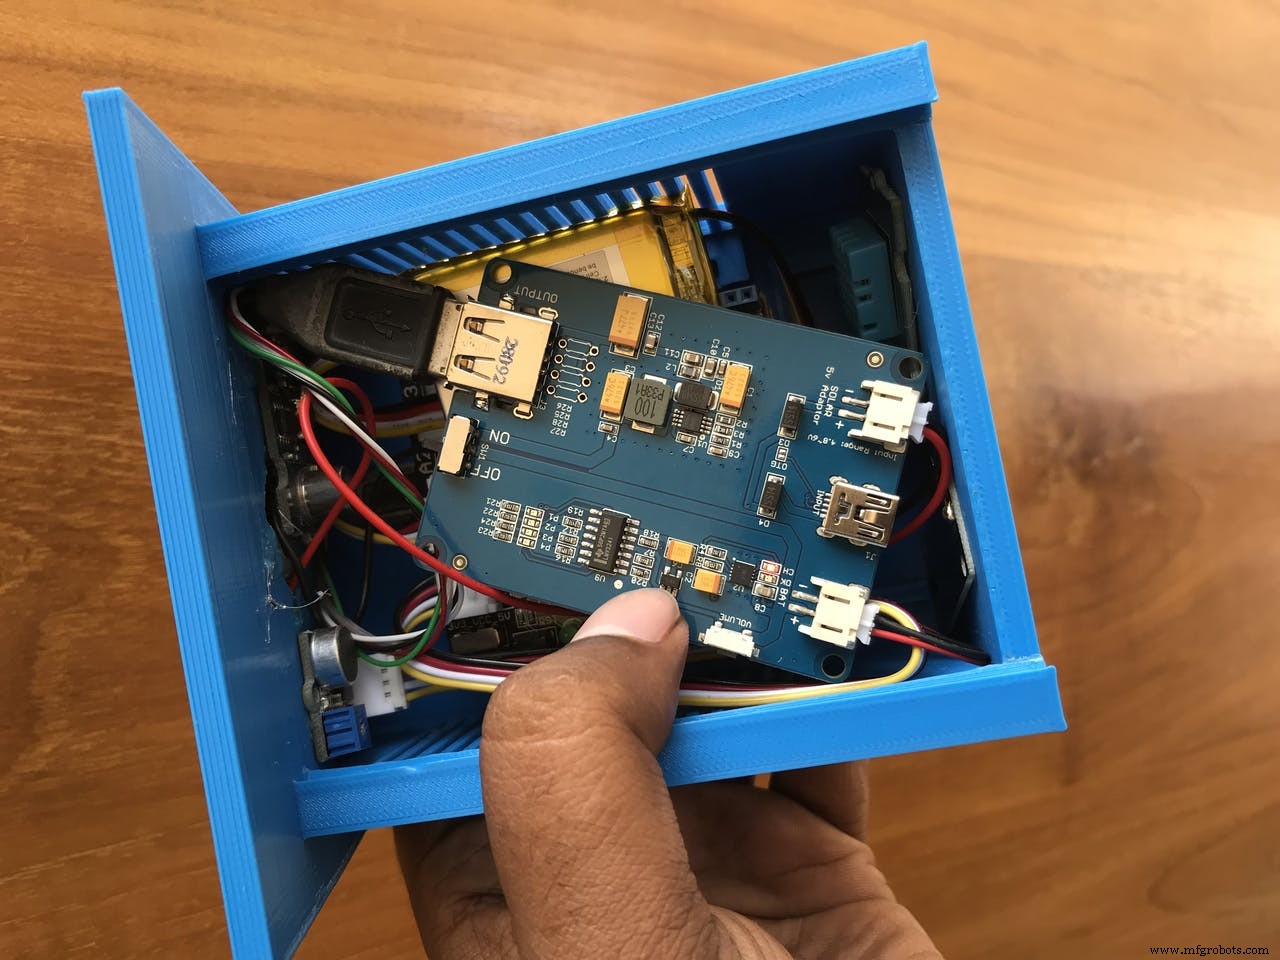
회로에 전원을 공급하기 위해 Grove 1W 태양 전지 패널과 리튬 이온 배터리를 사용했습니다. 태양 전지판을 사용하여 배터리를 충전하기 위해 5V 부스트 컨버터가 내장된 Seeed LiPo Rider Pro 태양열 충전기를 사용했습니다. 그래서 우리는 LiPo Rider의 출력을 이용하여 Arduino를 쉽게 실행할 수 있습니다.
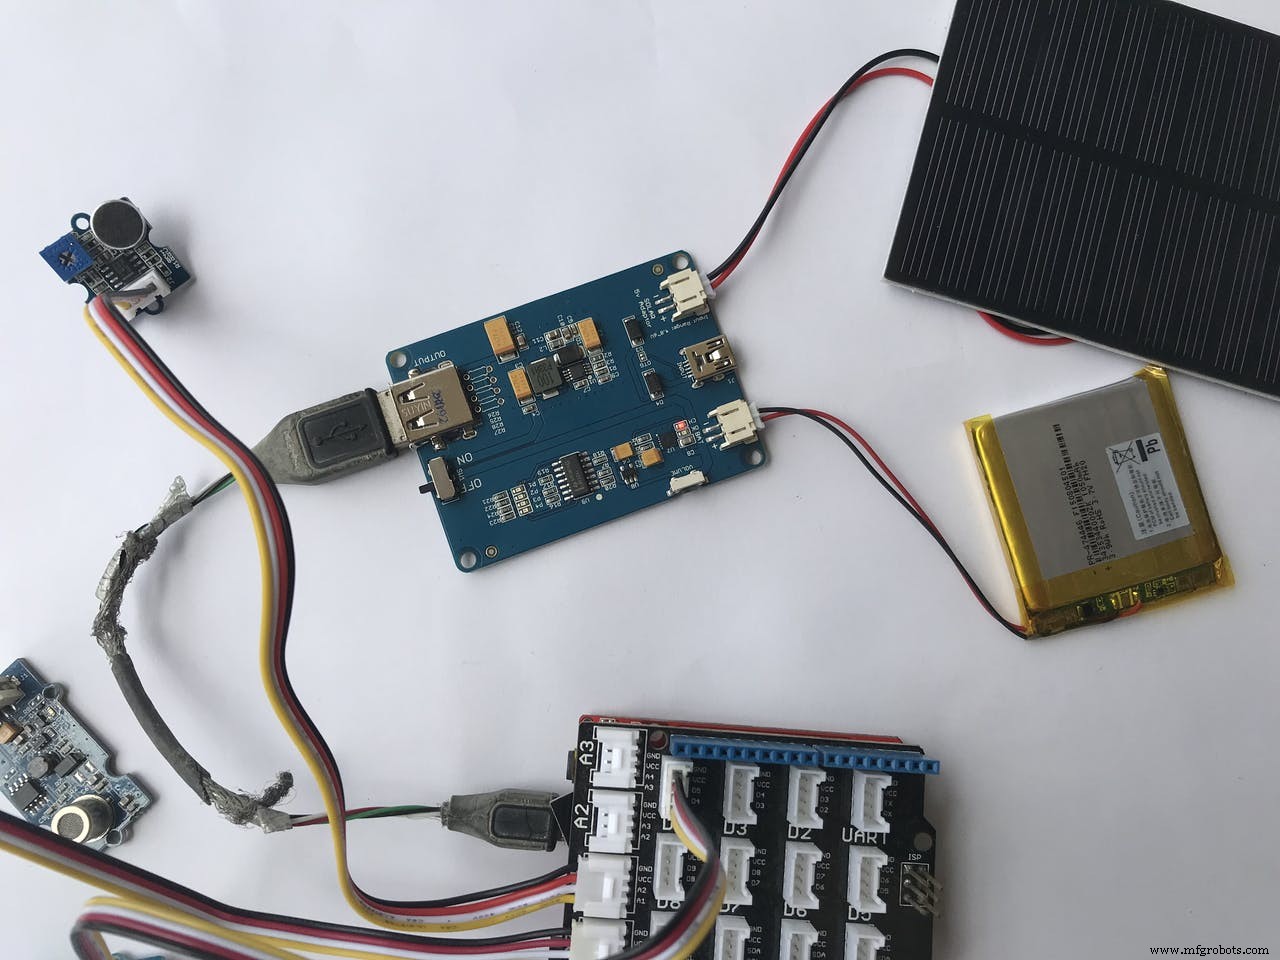
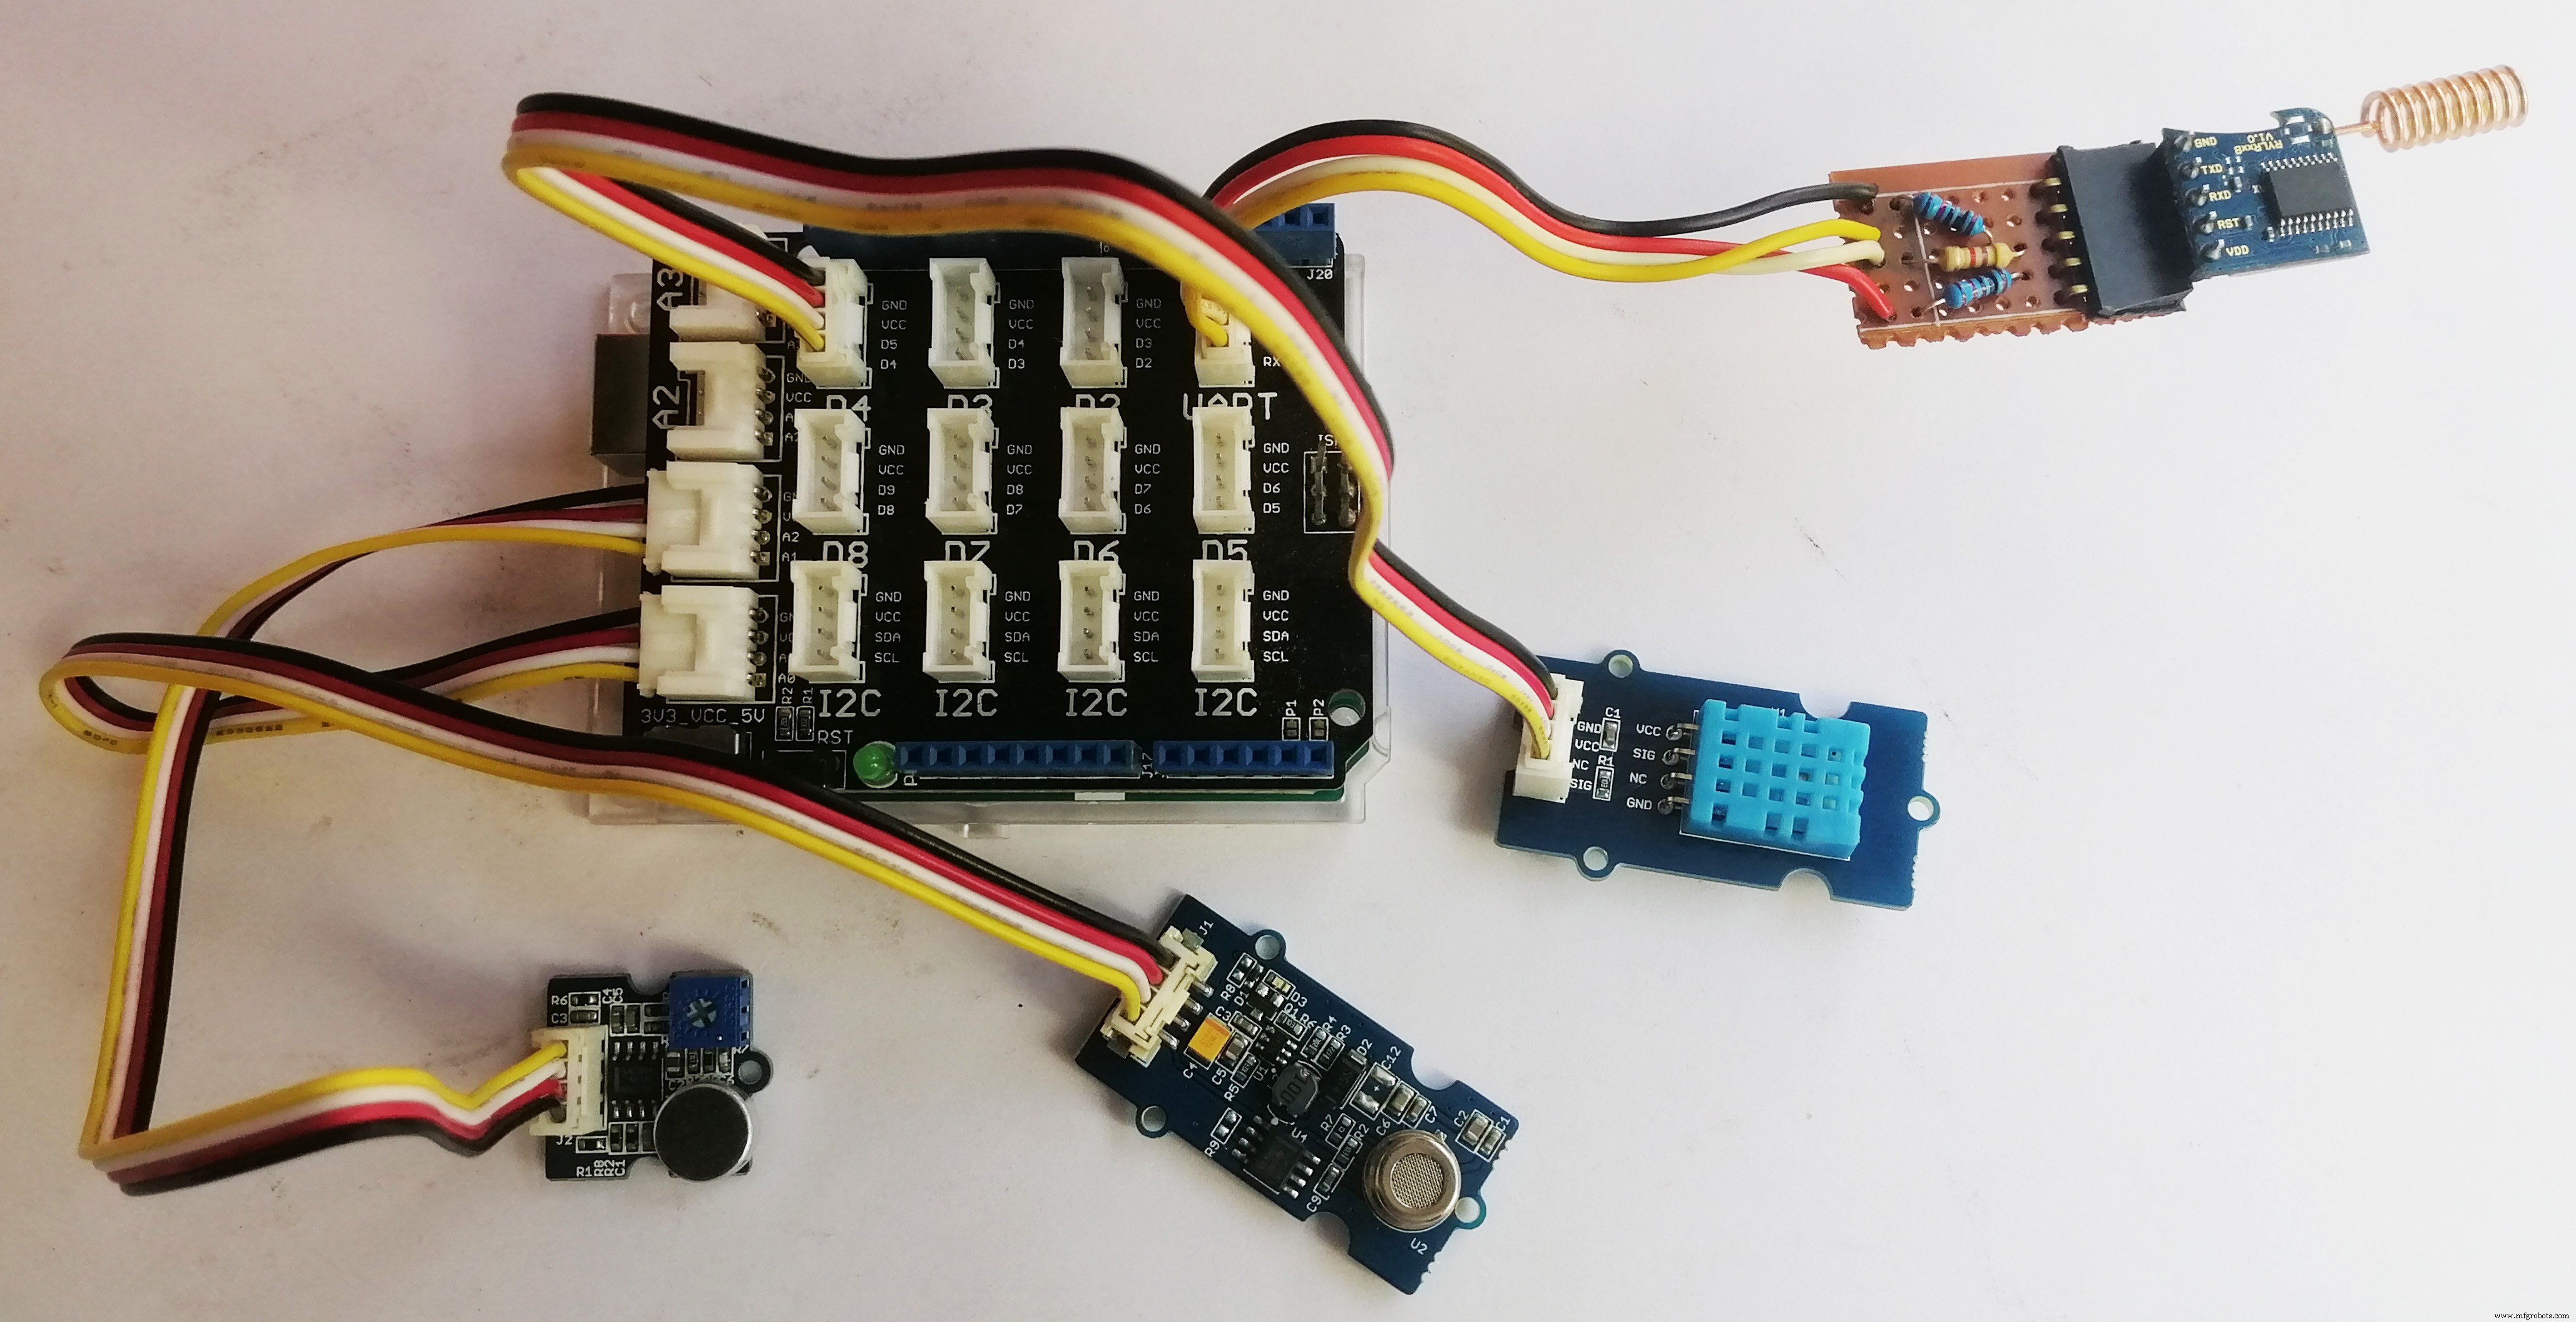
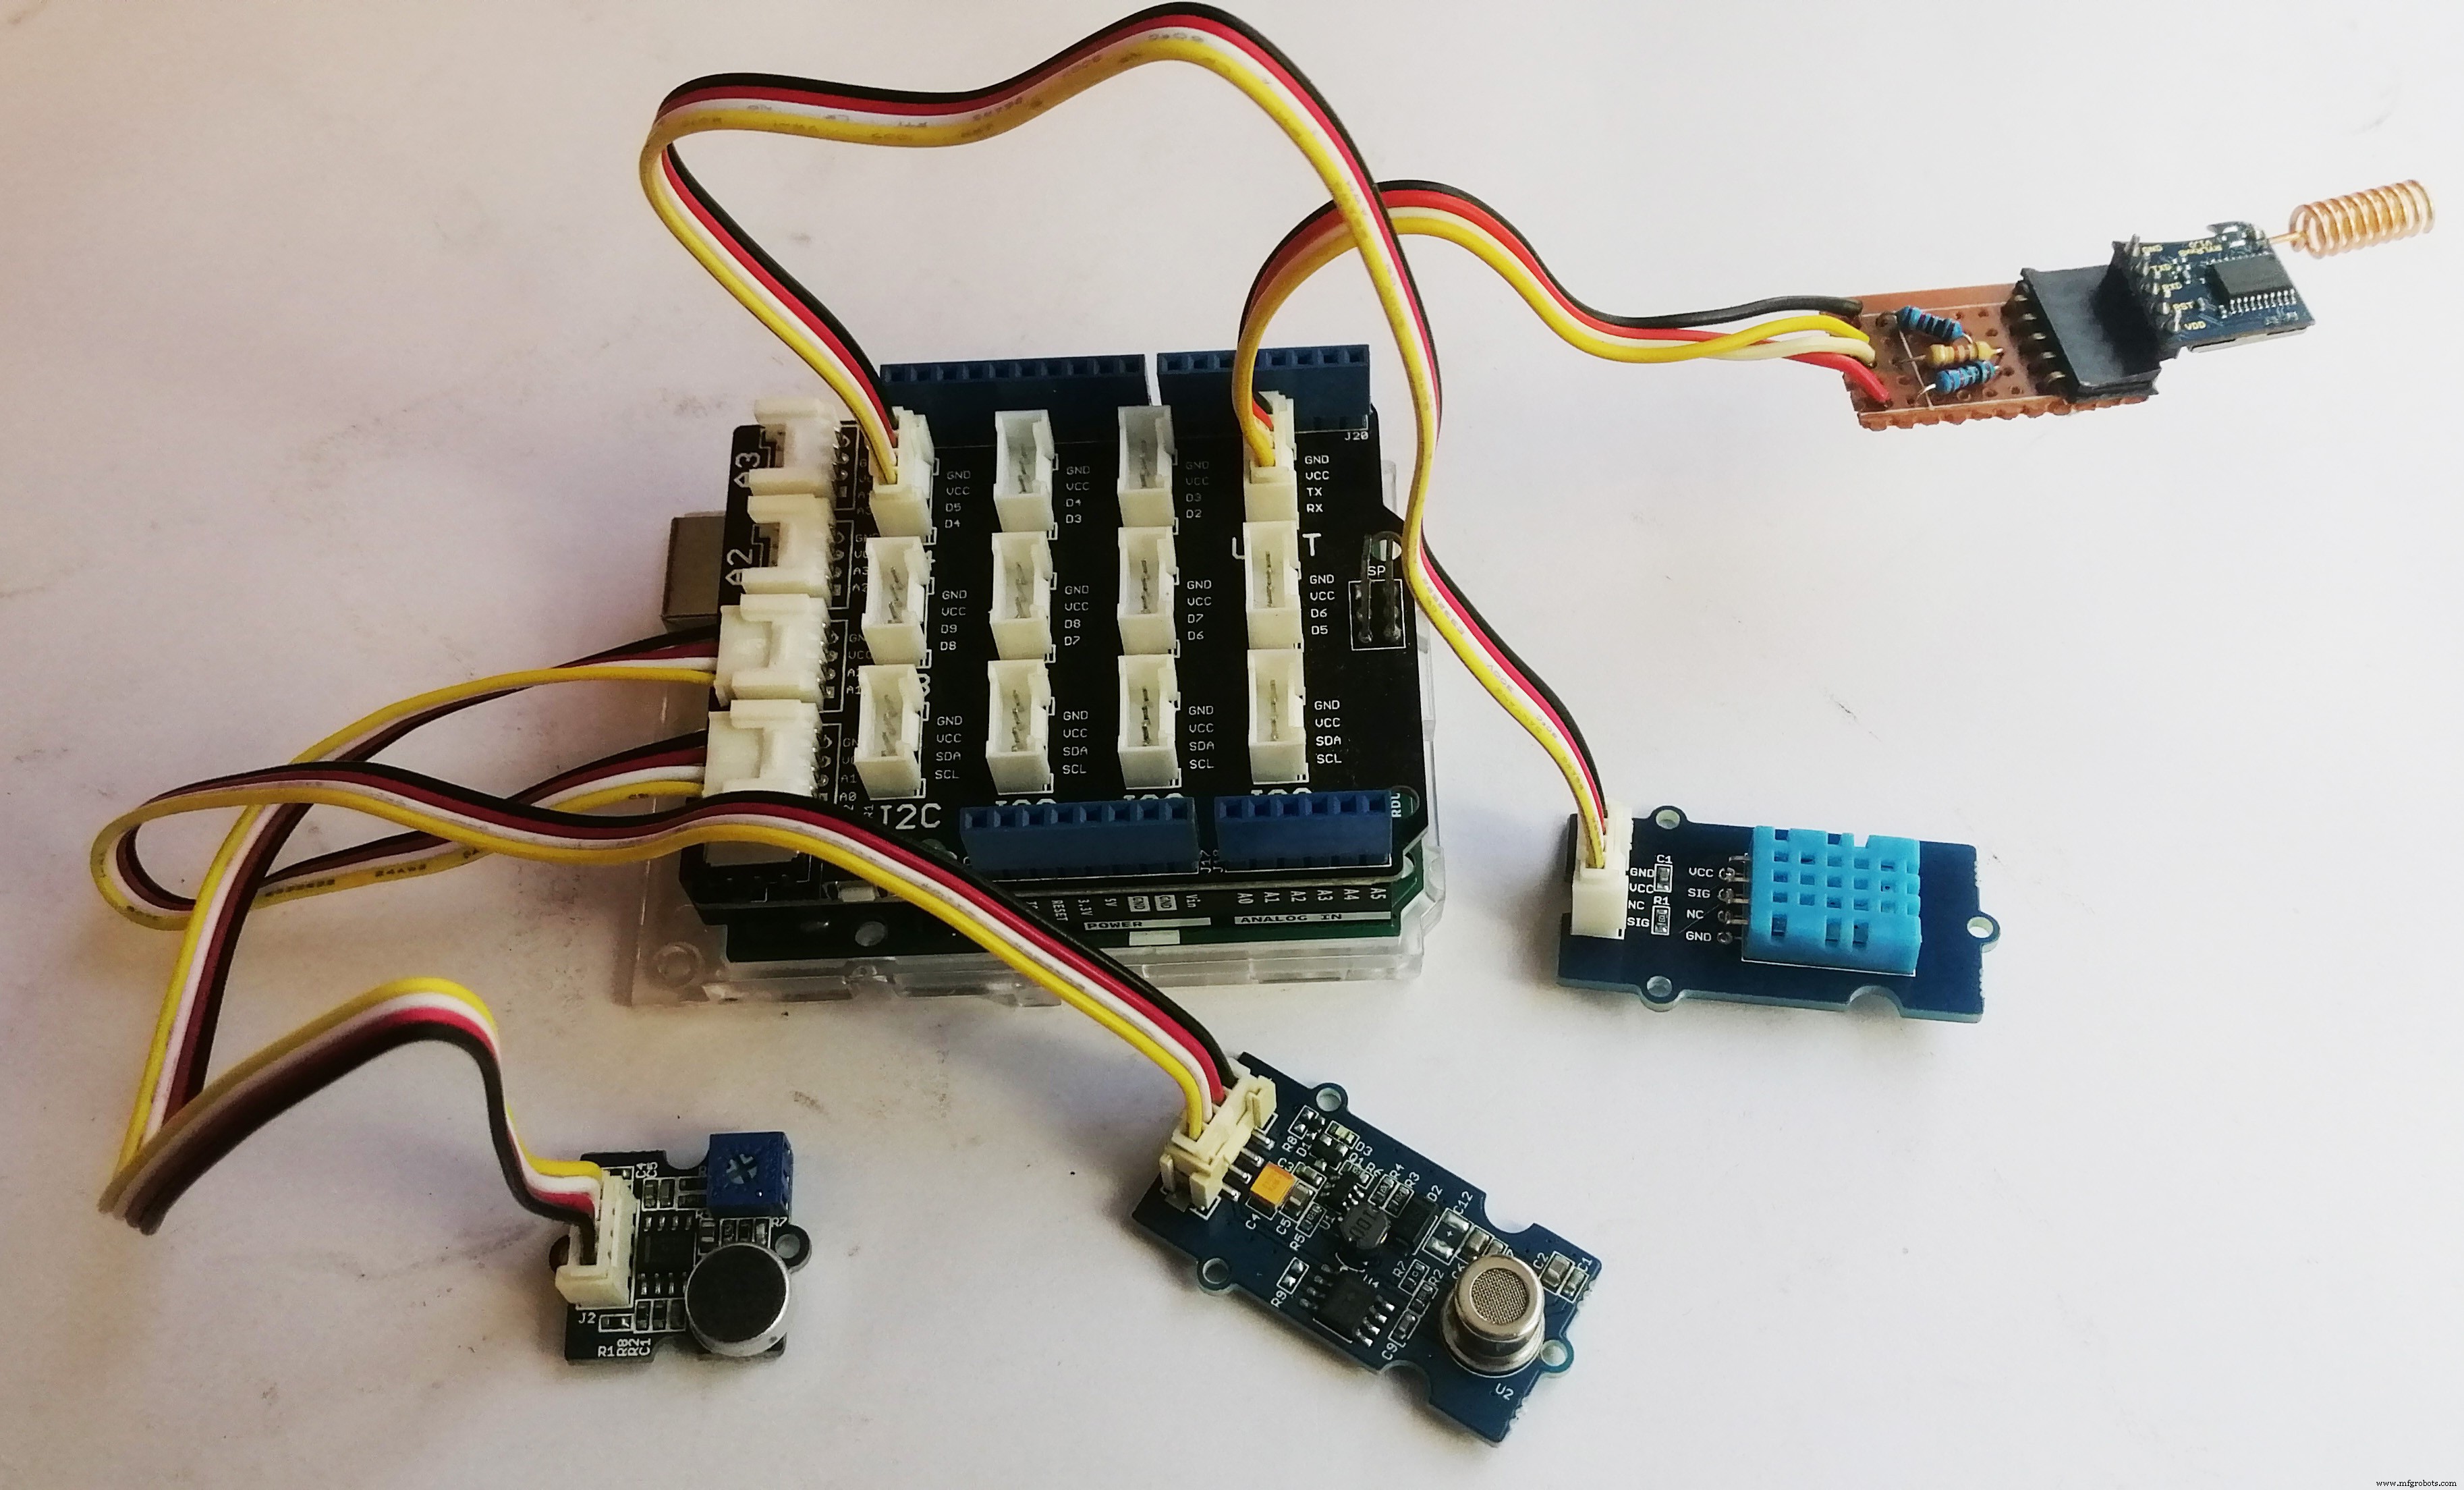
여기에 사용된 대부분의 구성 요소는 Seeedstudio.com에서 사용할 수 있습니다. 다음 이미지는 센서 노드의 모든 구성 요소에 대한 플러그 앤 플레이 테스트 연결을 보여줍니다.
센서 데이터를 IoT 게이트웨이로 전송하기 위해 Reyax LoRa 트랜시버를 사용했습니다. 다음 이미지는 핀 다이어그램이 있는 Reyax RYLR998 Lora 모듈을 보여줍니다.
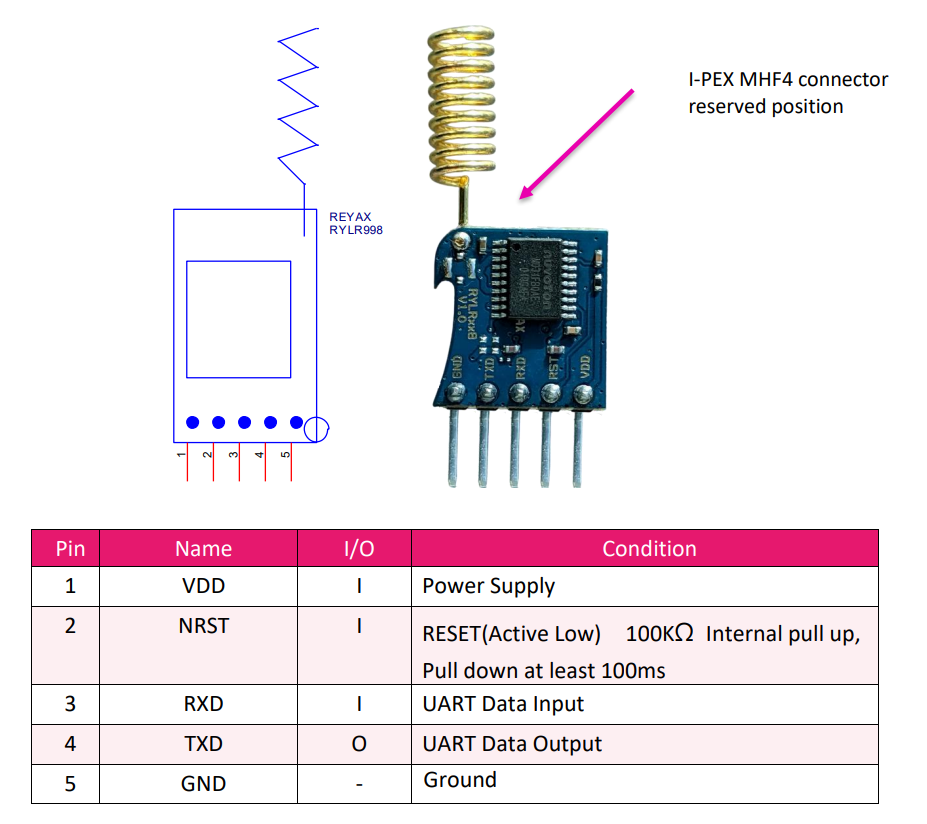
Reyax RYLR998 LoRa 엔진을 Arduino Base Shield와 연결하기 위한 준비
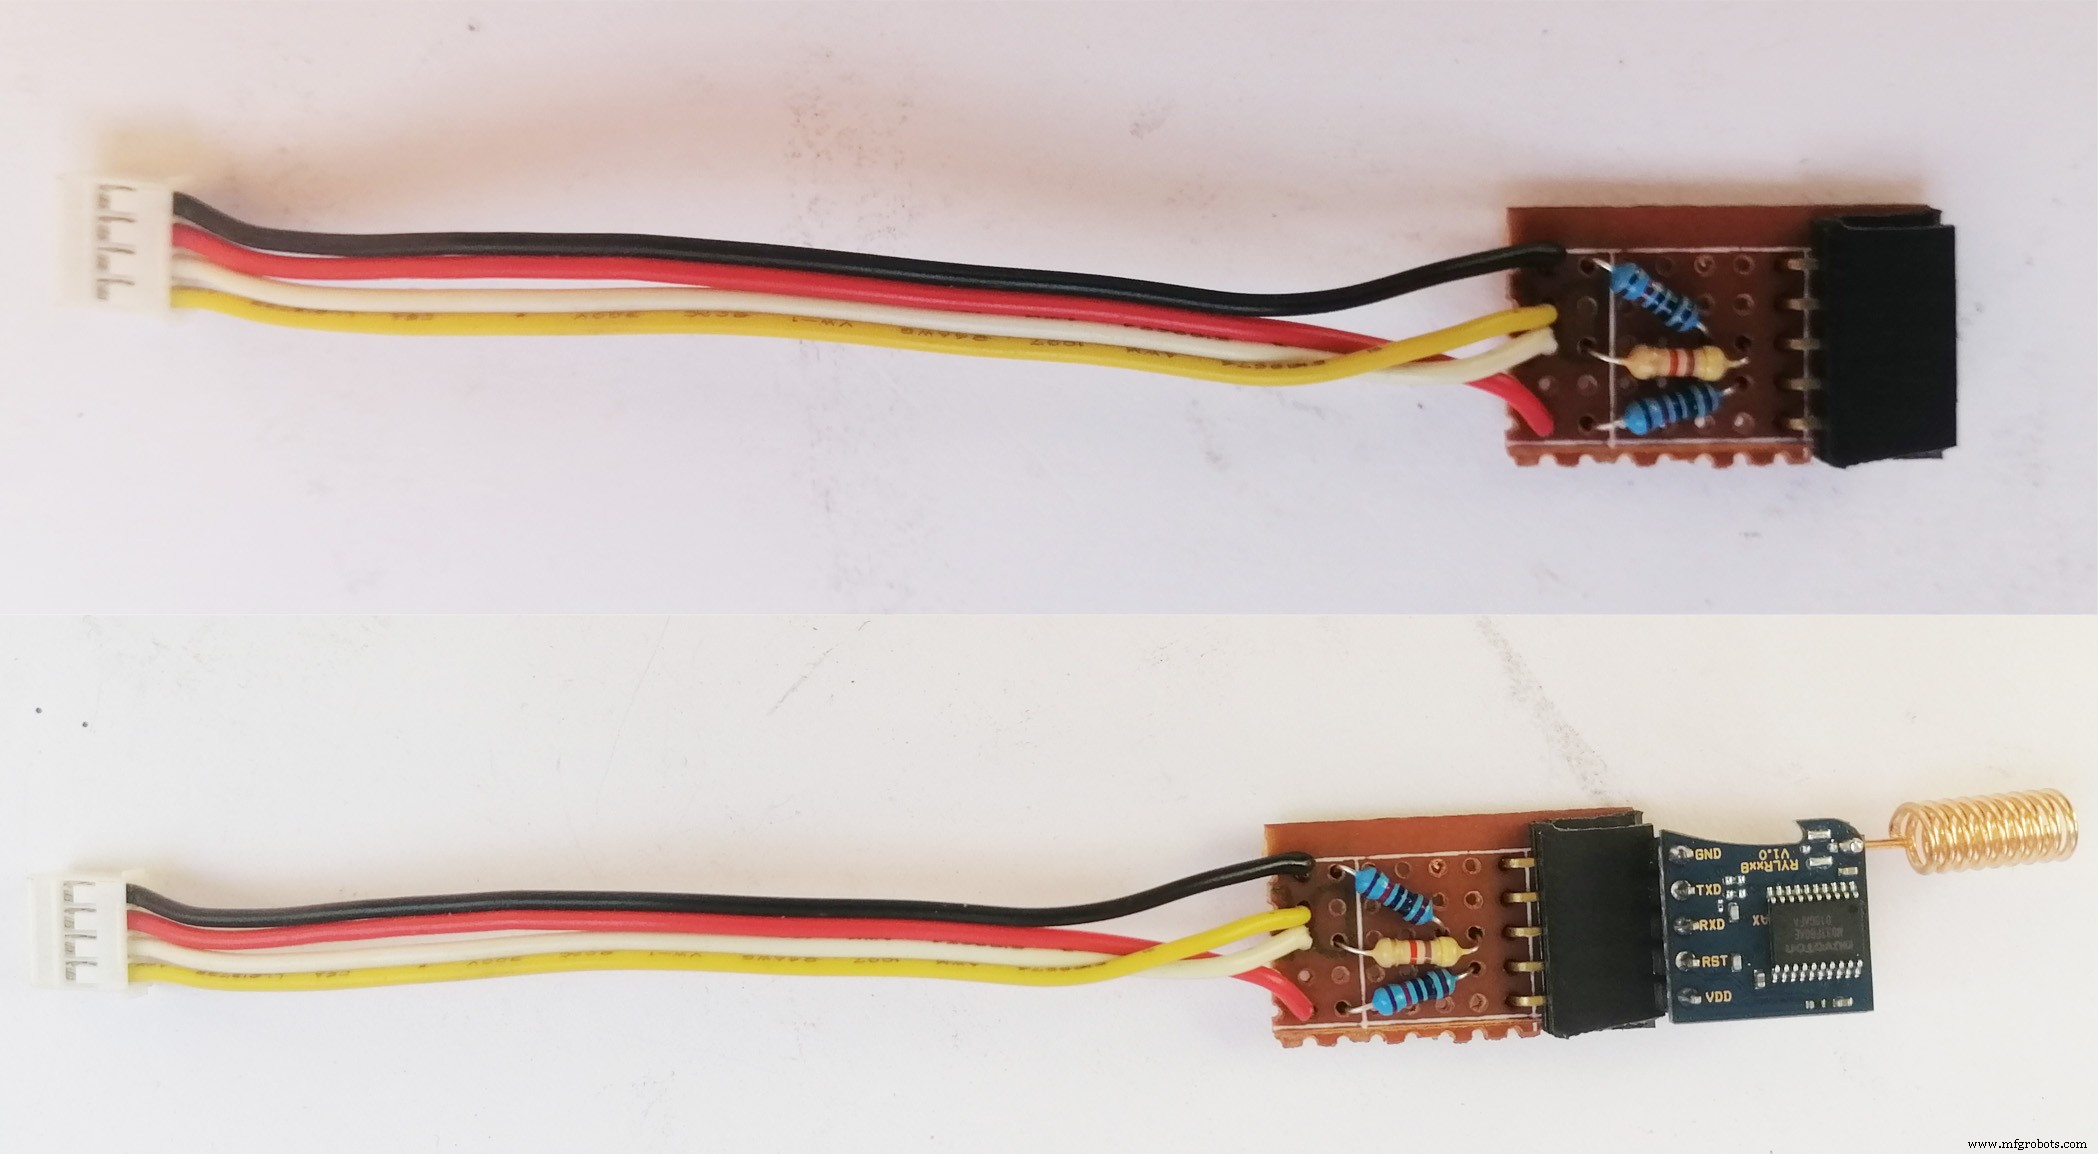
RYLR998에는 5개의 수 핀 출력이 있으며 Grove 베이스 실드와 호환되지 않습니다. Grove Shield에 연결하기 위해 5핀 암 헤더가 있는 perfboard에 Grove 케이블을 납땜했습니다. 회로 연결은 다음과 같습니다.
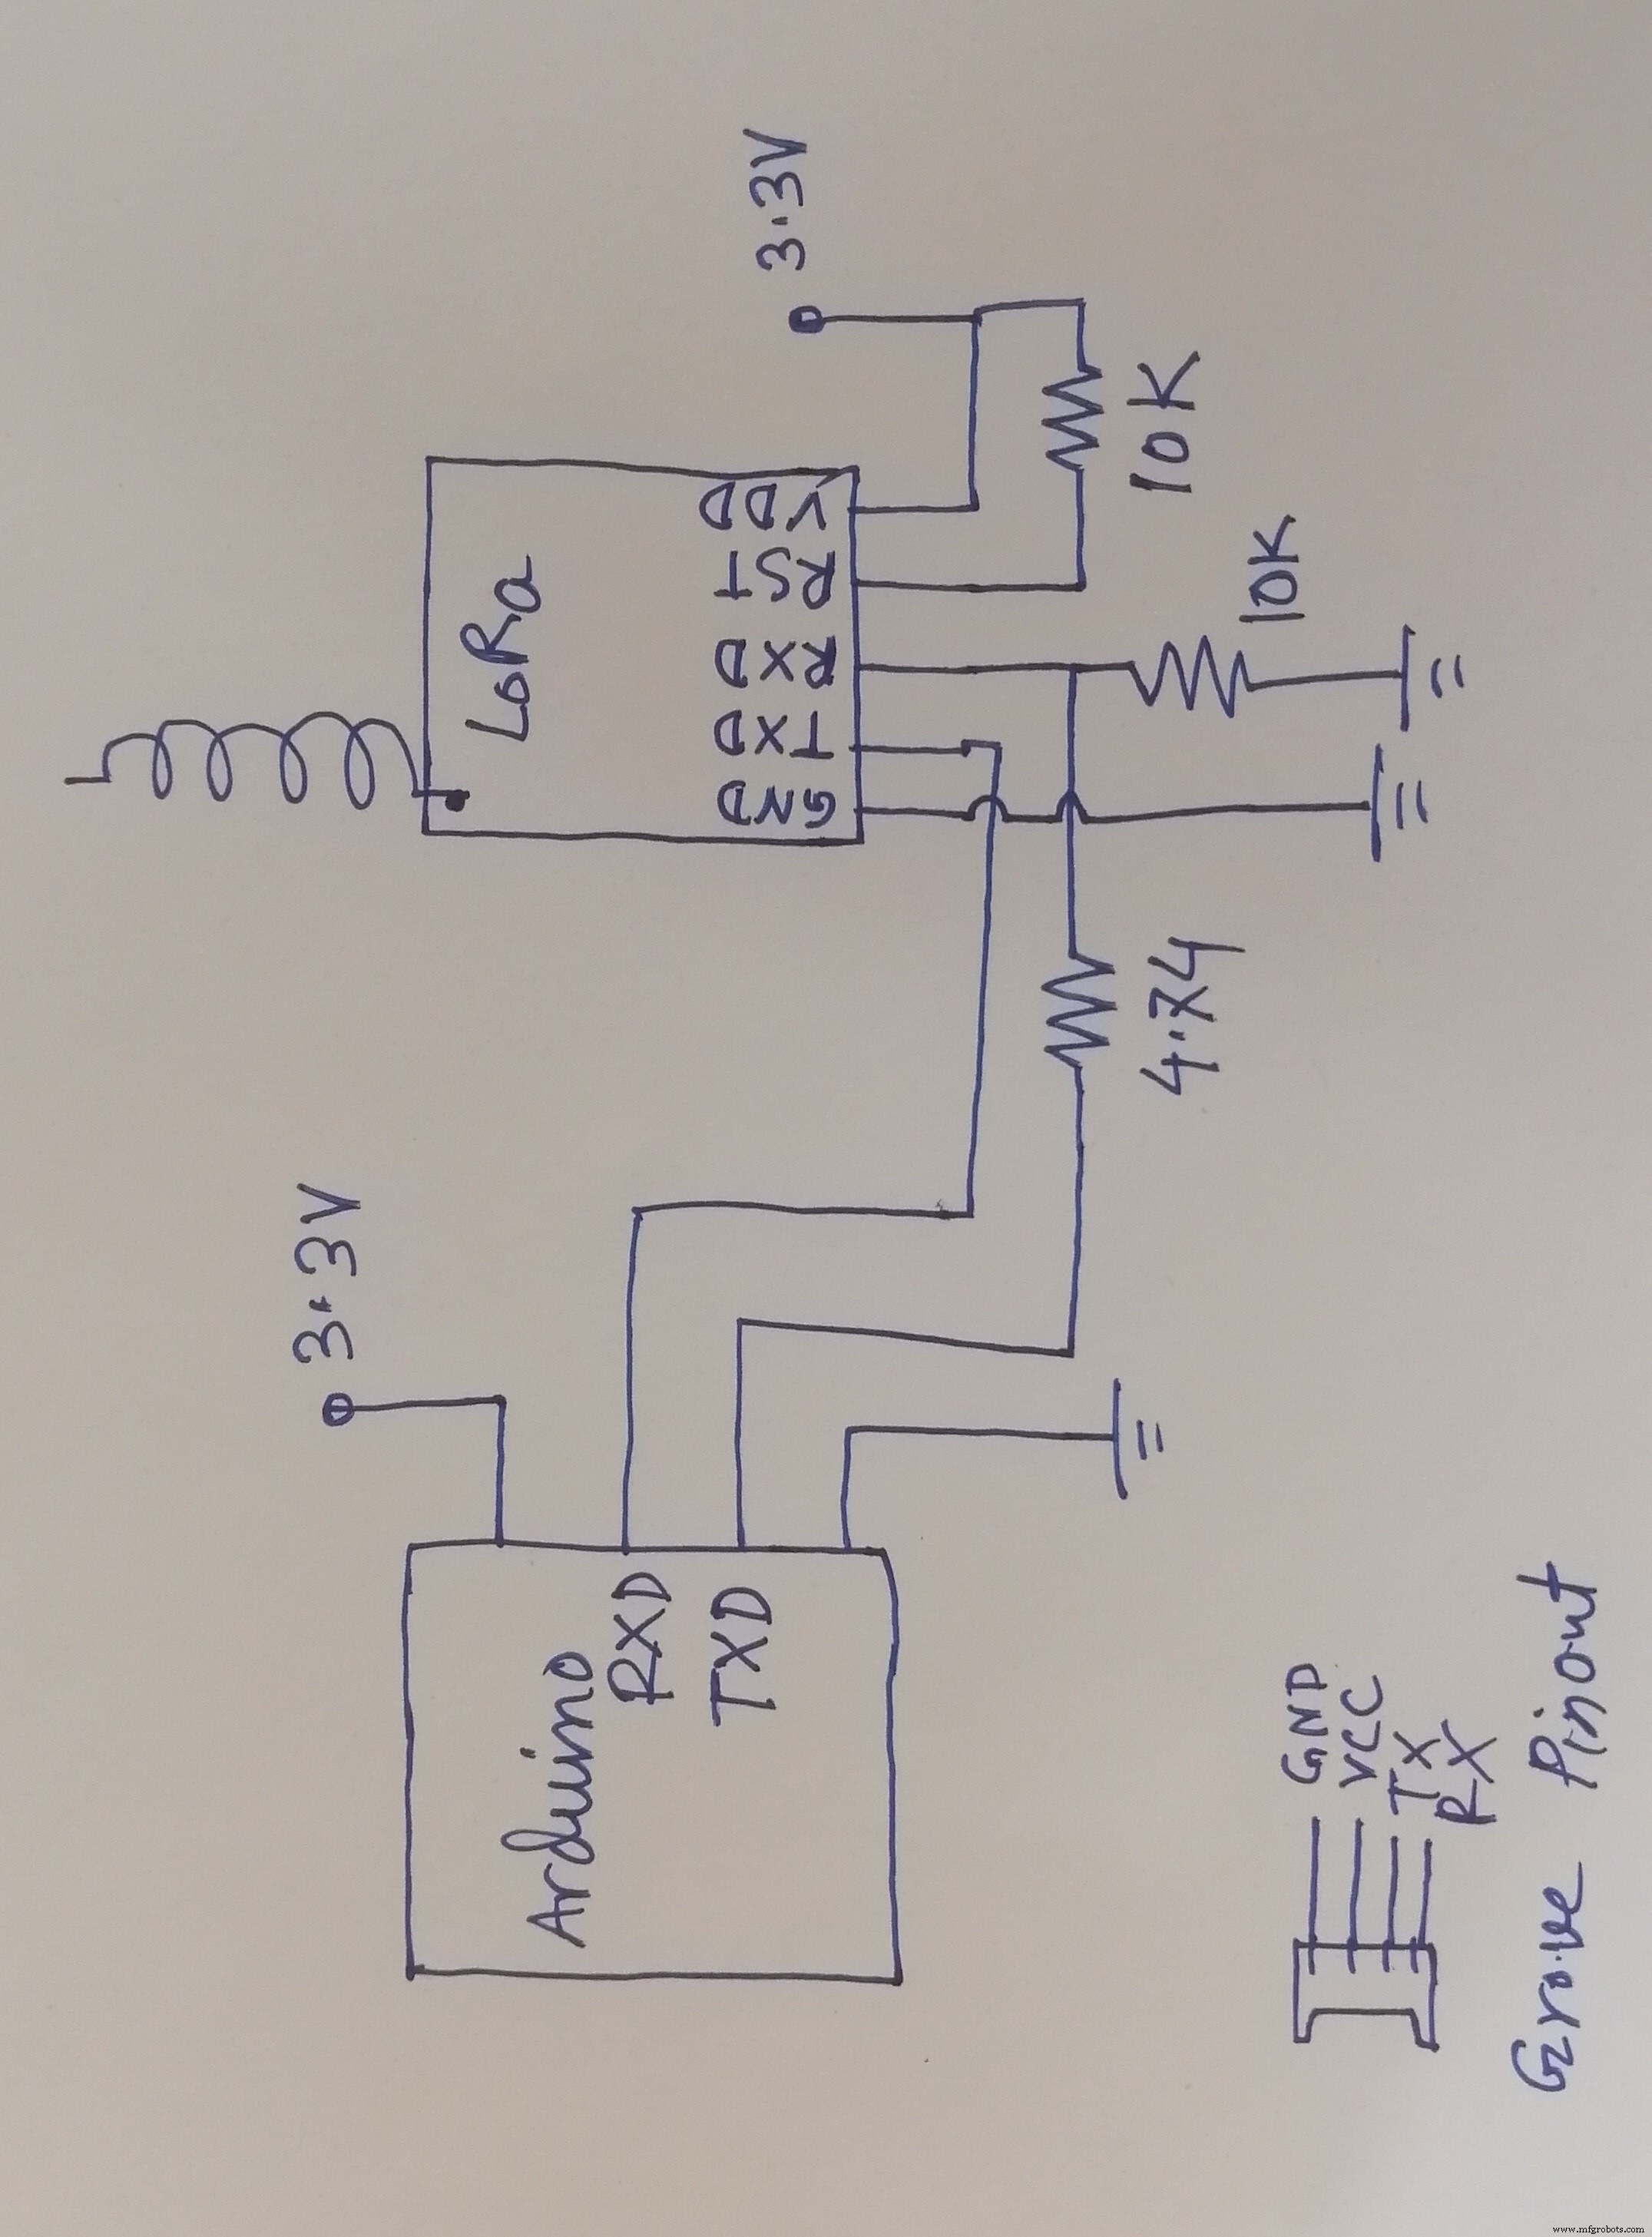
RYLR998 LoRa 모듈은 최대 3.6V까지 안전하게 작동할 수 있습니다. Arduino TX 핀은 LoRa에 안전하지 않은 5V 출력을 생성합니다. 그래서 전압 분배기를 사용하여 Arduino TX 핀에서 3.4V를 얻었습니다. 반면 Arduino RX 핀은 3.3V 로직에서 완벽하게 작동합니다. 그래서 LoRa의 TX 핀을 Arduino의 RX 핀에 직접 연결했습니다. 정상 동작을 위해서는 LoRa의 RST 핀이 High 상태여야 합니다.
이제 위의 LoRa 모듈을 다음 변환기 회로를 사용하여 베이스 쉴드에 쉽게 연결할 수 있습니다.
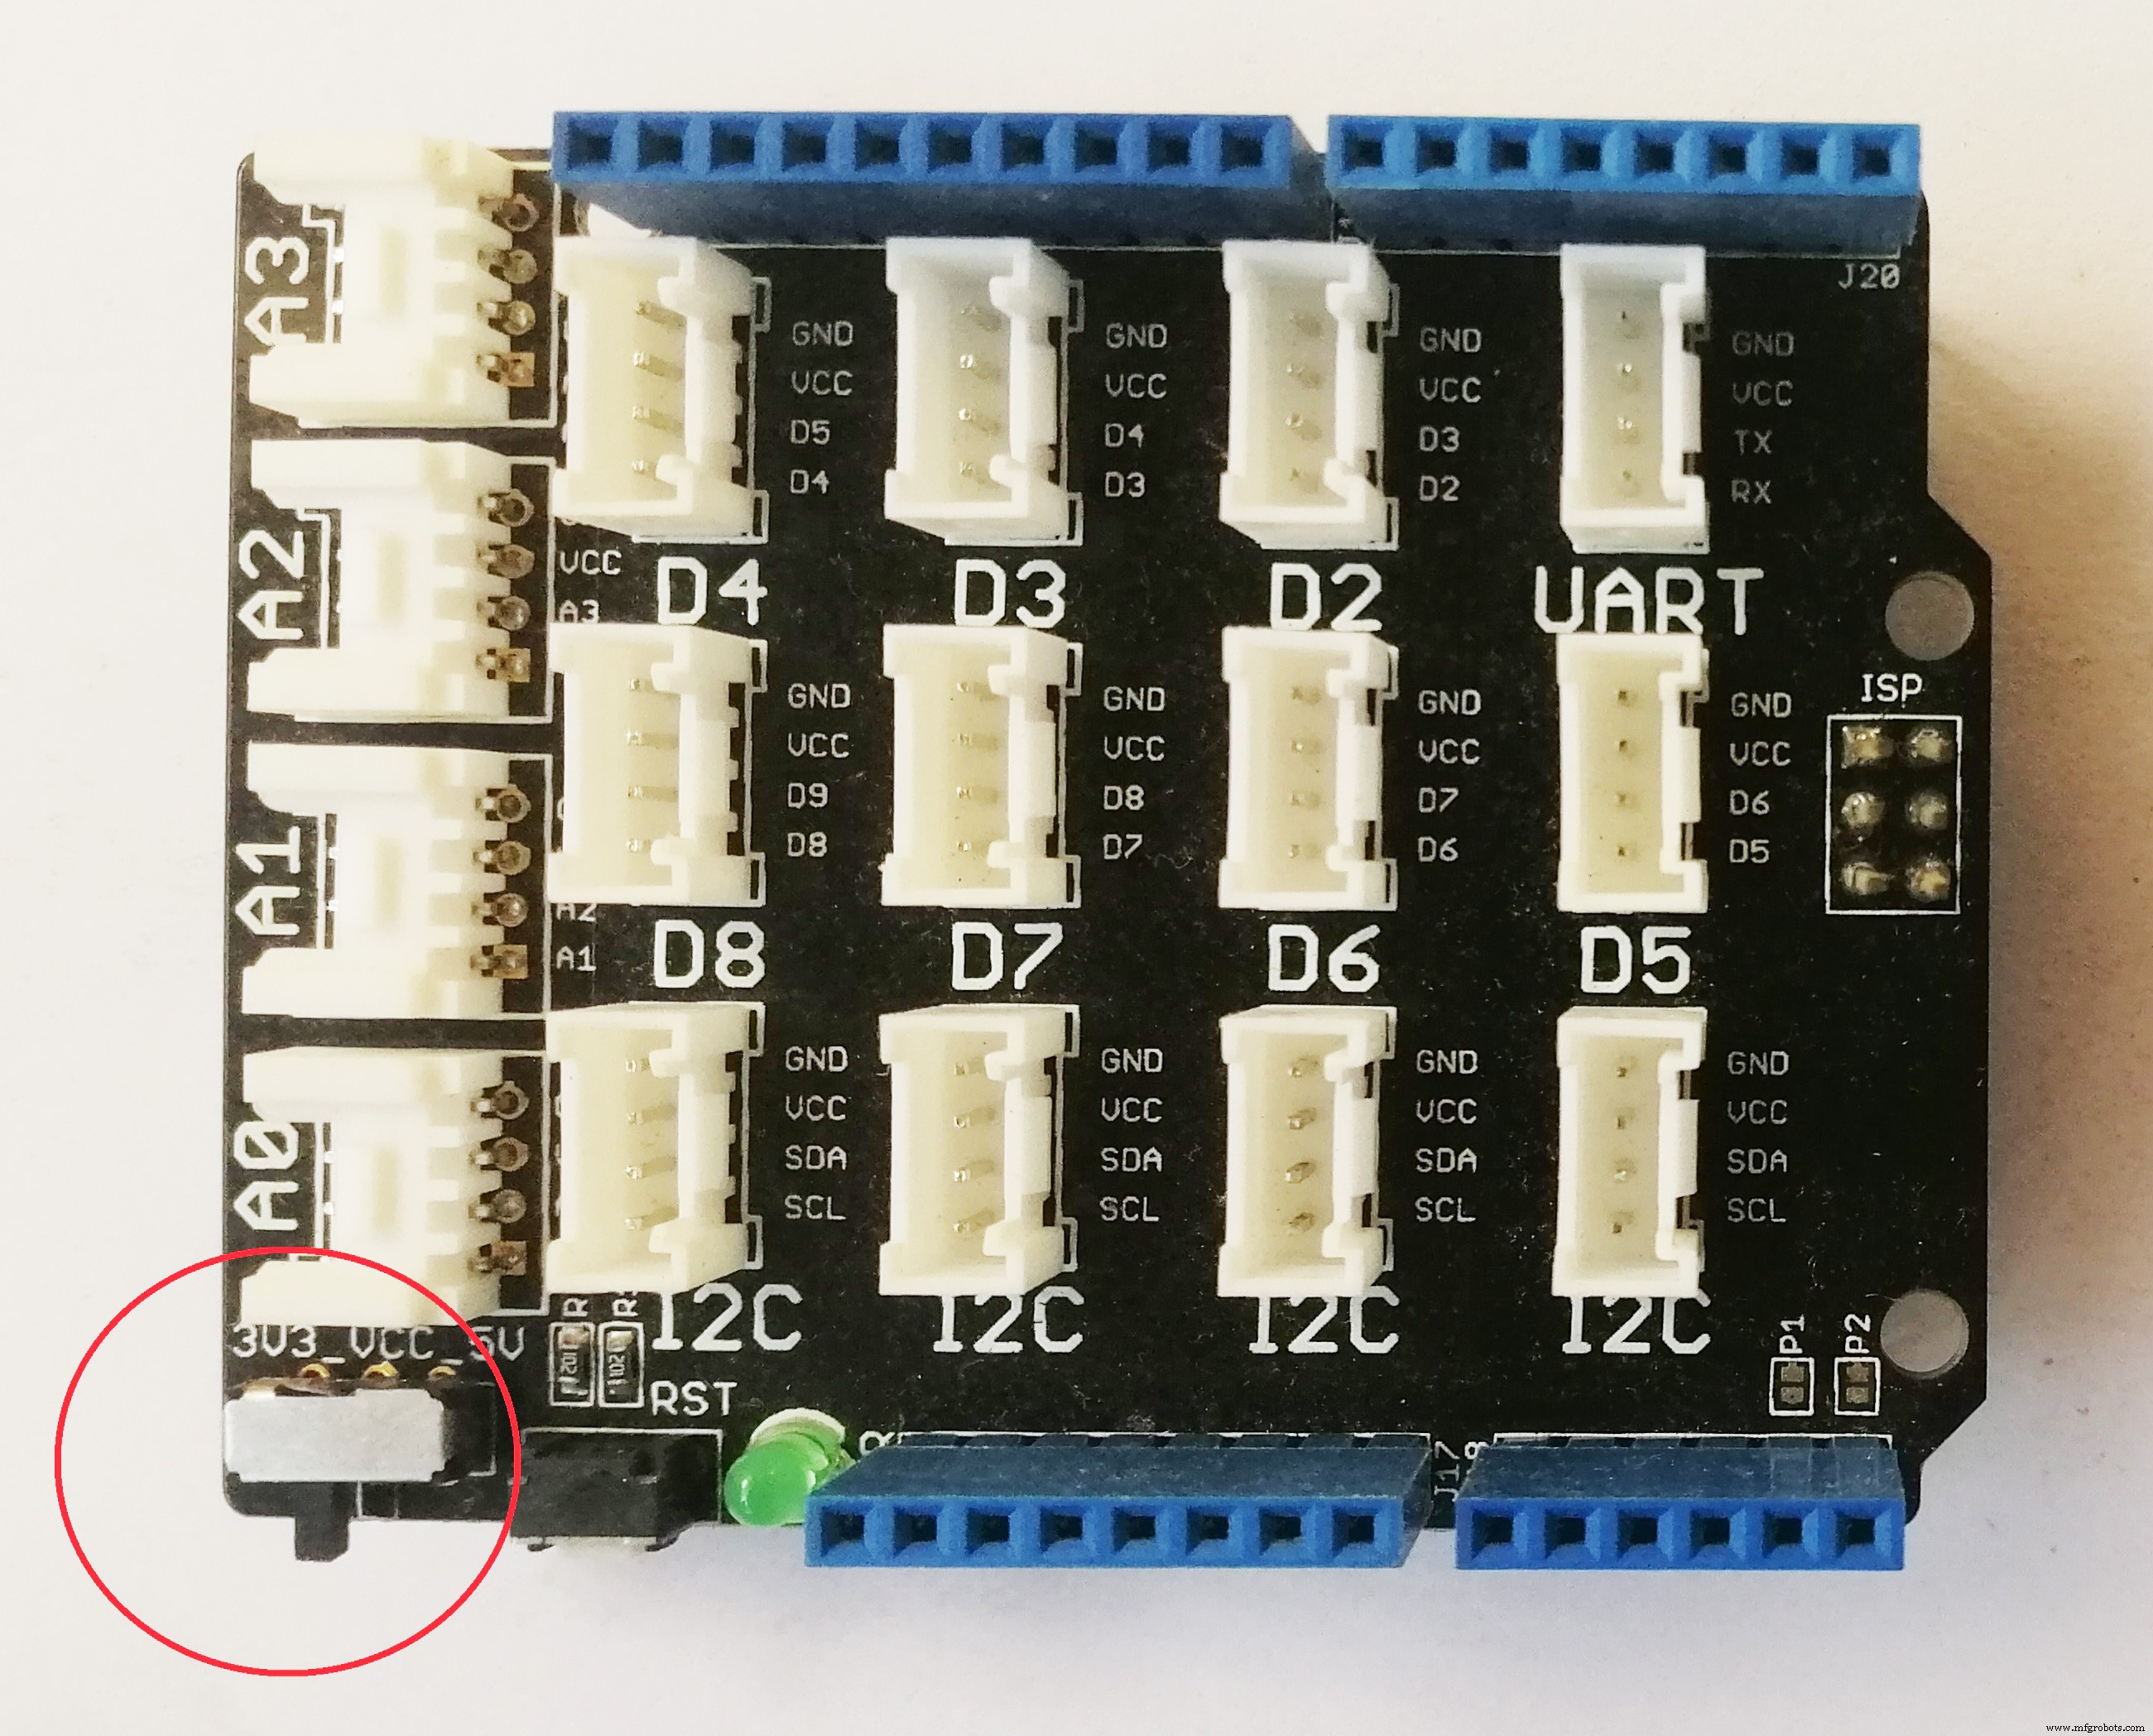
그러나 모듈을 베이스 실드에 연결하기 전에 베이스 실드 전원 버튼이 아래 이미지와 같이 3.3V 위치에 있는지 확인하십시오.
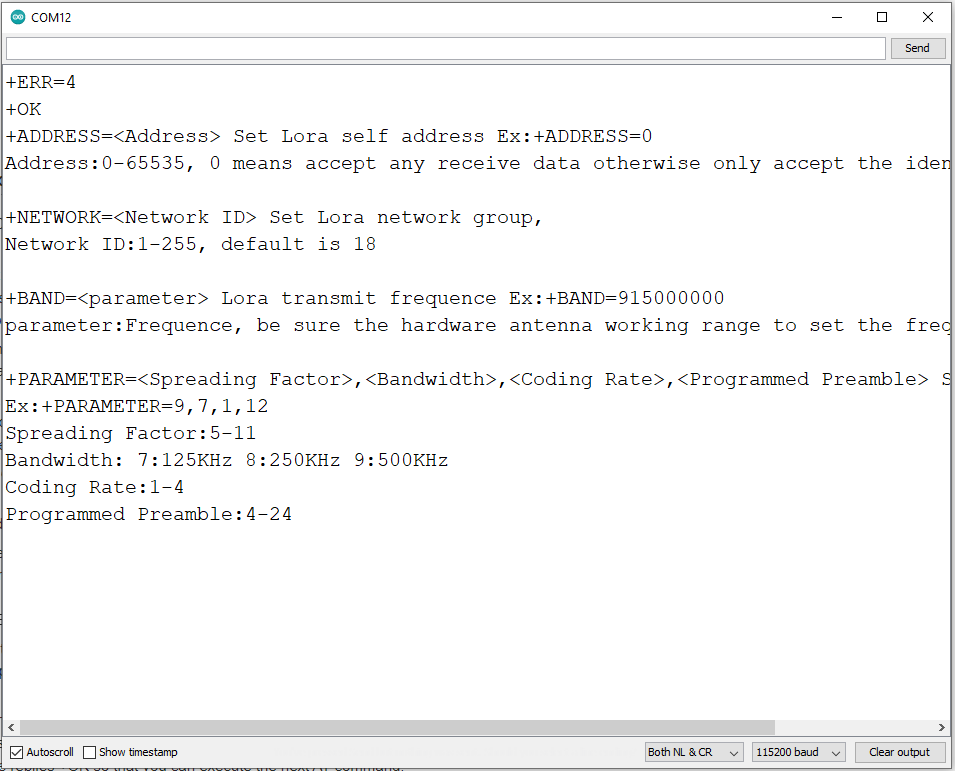
LoRa 모듈을 베이스 쉴드에 연결한 후 Arduino에서 모듈로 AT 명령을 보내 테스트할 수 있습니다.

RYLR896 LoRa 트랜시버를 사용한 통신
두 LoRa 모듈 간의 통신을 설정하려면 주소로 서로를 찾을 수 있어야 합니다. LoRa 생태계의 주소 지정 체계는 모듈과 구현에 따라 약간 다릅니다. 간단히 말해서 이 모듈을 사용하면 네트워크 ID와 주소를 설정할 수 있습니다. 동일한 네트워크(동일한 네트워크 ID)에 있는 모듈은 서로 통신할 수 있습니다. 각 모듈은 네트워크 내에서 고유한 ID(주소)를 가져야 합니다. 모듈의 주소가 0이면 해당 모듈은 네트워크의 모든 장치에서 데이터를 수신할 수 있습니다.
모든 모듈은 기본 주파수, 네트워크 ID 및 주소와 함께 제공되지만 기본값을 변경해야 할 수도 있습니다. 위 모듈의 기본 네트워크 ID는 18이고 주소는 0입니다.
지금 데모 프로젝트를 위해 아무것도 변경할 필요가 없습니다. 그러나 매개변수를 변경하려면 AT 명령에 대한 자세한 내용은 데이터시트를 확인하십시오.
메시지(HELLO RECEIVER!)를 보내려면 "AT+SEND=0, 15, HELLO RECEIVER!" 명령만 보내면 됩니다. 모듈의 직렬 연결에서. 첫 번째 파라미터 값 '0'은 수신기 모듈의 주소입니다. 다음 값 '15'는 보낼 문자/바이트 수입니다. 세 번째 매개변수 값은 보낼 메시지 'HELLO RECEIVER!'(15자)입니다.
센서 노드용 코드
다음 코드는 센서 노드가 모든 센서 데이터를 수집하여 IoT 게이트웨이로 전송하도록 개발되었습니다.
#include "AirQuality.h" //grove 대기 질 라이브러리
#include "Arduino.h"
#include "DHT.h"
# DHTPIN 4 정의 // DHT 센서가 연결된 디지털 핀
#define DHTTYPE DHT11 // 센서 DHT11 모델
DHT dht(DHTPIN, DHTTYPE);
AirQuality 공기 품질 센서;
int current_quality =-1;
const int sampleWindow =50; // 샘플 창 너비(mS)(50mS =20Hz)
unsigned int sample;
float noise;
float temp, 습기;
int airQuality;
//---------------------------------------------------------- ----------------------------------------------
// 설정
//----------------------------------------- -------------------------------------------------- -
무효 설정()
{
Serial.begin(115200); //lora용 직렬
airqualitysensor.init(14);
dht.begin();
}
//----- -------------------------------------------------- -------------------------------------
// 메인 루프
/ /---------------------------------------------------- -------------------------------------------
void 루프()
{
노이즈 =compute_sound_in_db();
airQuality =compute_air_quality();
compute_temp_humid();
문자열 온도 =문자열 (temp);
String 습도 =String(humid);
String sound =String(noise);
String air =String(airQuality);
문자열 값 =문자열(온도)+","+ 문자열(습도)+","+ 문자열(소리)+","+ 문자열(공기);
문자열 cmd ="AT+SEND=0,"+문자열 (values.length())+","+값; //AT+SEND=<주소>,<페이로드 길이>,<데이터>
Serial.println(cmd); //lora로 전송
delay(15000);
}
//이 함수는 dB 단위로 사운드 레벨을 계산합니다.
float compute_sound_in_db(){
unsigned long startMillis=millis(); // 샘플 창의 시작
float peakToPeak =0; // 피크 대 피크 레벨
unsigned int signalMax =0; //최소값
unsigned int signalMin =1024; //최대값
// 50mS 동안 데이터 수집
while (millis() - startMillis
sample =analogRead(A1); //마이크에서 판독값 가져오기
if (sample <1024) // 잘못된 판독값 버리기
{
if (sample> signalMax)
{
signalMax =sample; // 최대 레벨만 저장
}
else if (sample
signalMin =sample; // 최소 레벨만 저장
}
}
}
peakToPeak =signalMax - signalMin; // 최대 - 최소 =피크-피크 진폭
//Serial.println(peakToPeak); //보정된 데시벨 쓰기
float db =map(peakToPeak,0,1000,48,120); //데시벨 보정
//Serial.print(db); //보정된 데시벨 쓰기
//Serial.println(" dB"); //쓰기 단위
return db;
}
int compute_air_quality(){
current_quality=airqualitysensor.slope();
/*
if (current_quality>=0)// 유효한 데이터가 반환된 경우.
{
if (current_quality==0)
Serial.println("높은 오염! 강제 신호 활성화");
else if (current_quality==1)
Serial.println("높은 오염!");
else if (current_quality==2)
Serial.println("낮은 오염 !");
else if (current_quality ==3)
Serial.println("신선한 공기");
}
*/
return current_quality;
}
void compute_temp_humid(){
// 온도 또는 습도를 읽는 데 약 250밀리초가 걸립니다!
// 센서 판독이 최대 2초가 될 수도 있습니다. 매우 느린 센서)
float h =dht.readHumidity();
// 온도를 섭씨로 읽습니다(기본값)
float t =dht.readTemperature();
// 읽기에 실패했는지 확인하고 일찍 종료합니다(다시 시도).
if (isnan(h) || isnan(t)) {
//Serial.println("DHT 센서에서 읽지 못했습니다!");
return;
}
temp =t;
습기 =h;
/*
Serial.print("습도:");
Serial.print(h);
Serial.print(" %\t");
Serial.print("온도:");
Serial.print(t);
Serial.print(" *C ");
*/
}
//대기질 센서의 서비스 루틴 중단
ISR(TIMER1_OVF_vect)
{
if(airqualitysensor.counter==61)//감지된 듀티로 2초 설정
{
airqualitysensor.last_vol=airqualitysensor.first_vol;
airqualitysensor.first_vol=analogRead(A0);
airqualitysensor.counter=0;
airqualitysensor.timer_index=1;
PORTB=PORTB^0x20;
}
else
{
airqualitysensor.counter++;
}
} 코드는 15초마다 센서 데이터를 보냅니다. 요구 사항에 따라 타이밍을 변경하십시오.
업로드 및 테스트
이제 모든 센서를 연결하고 위의 코드를 업로드하고 직렬 모니터에서 테스트하십시오. 소스 파일은 코드 섹션에 첨부되어 있습니다.
상자 안에 구성 요소 배치
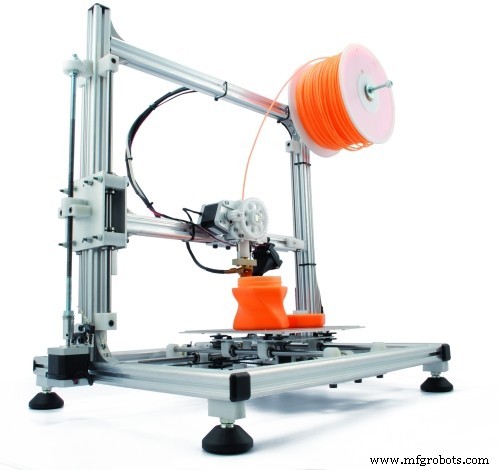
이제 모든 센서와 배터리를 상자 안에 넣습니다. 먼저 첨부 섹션에 첨부된 두 개의 STL 파일을 3D 인쇄합니다. 인쇄된 이미지는 다음 이미지와 같습니다.

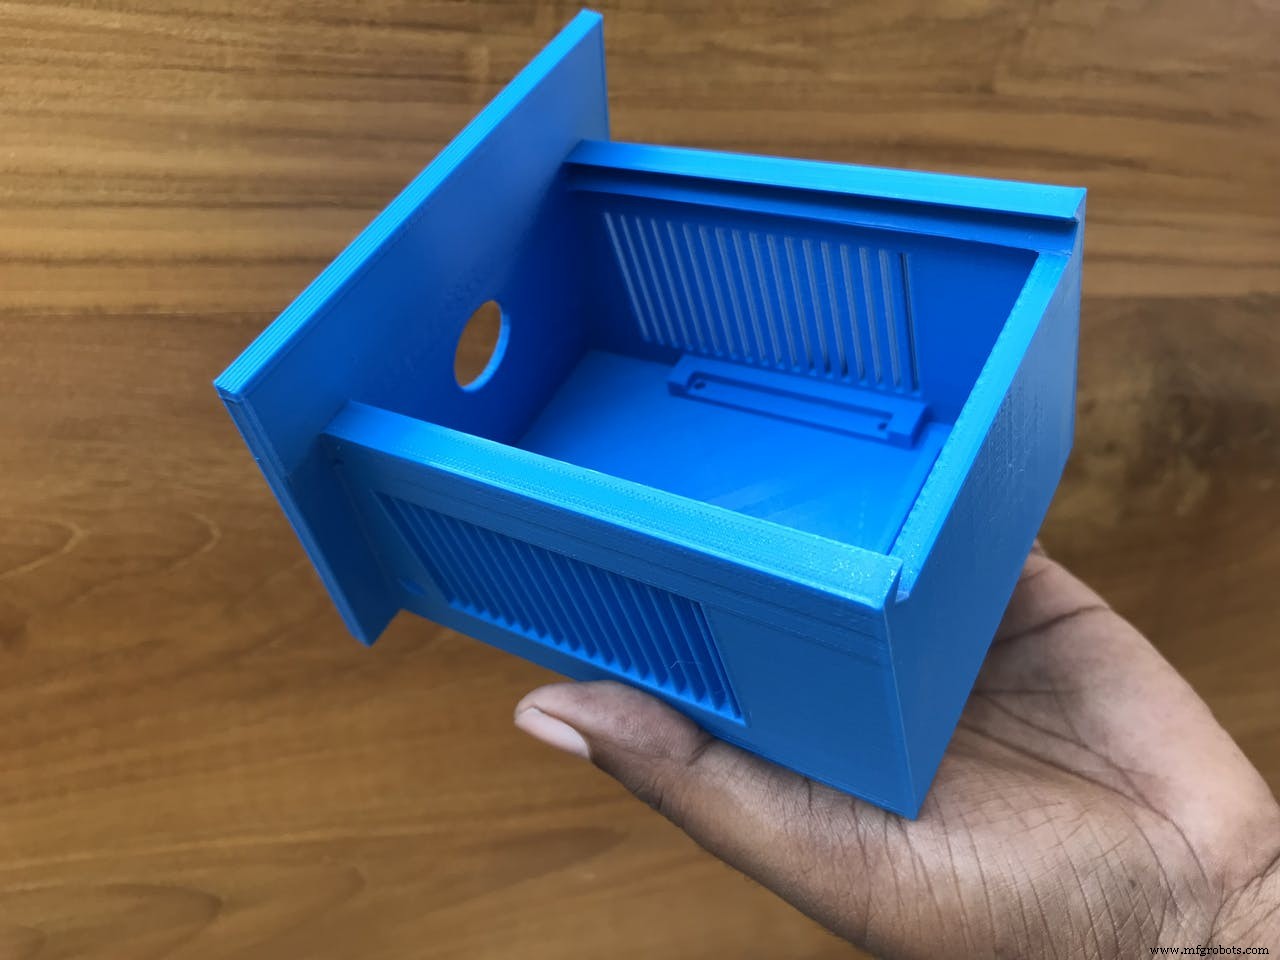
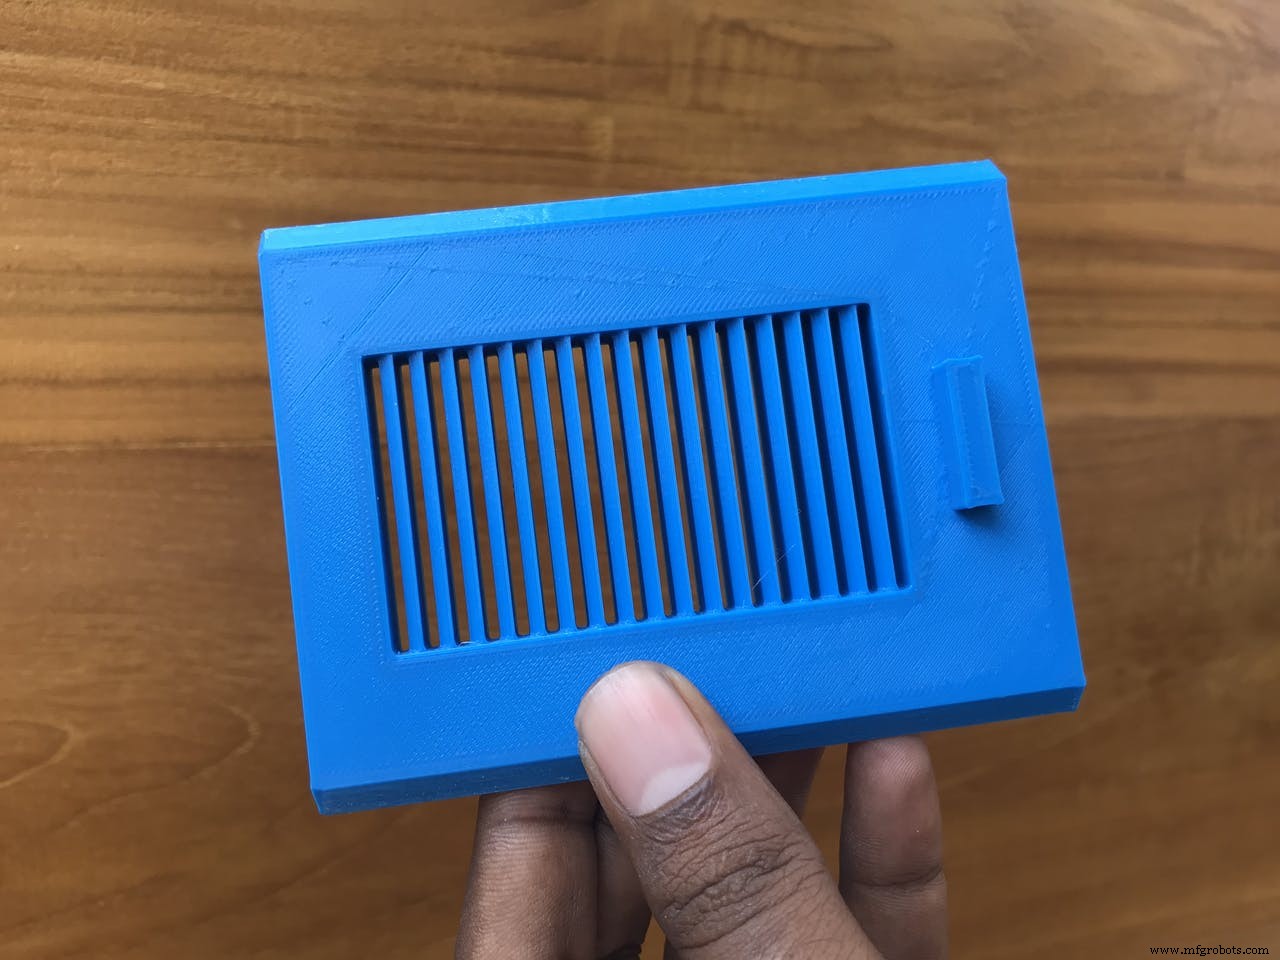
전체 상자는 다음과 같습니다. 프린터 품질에 따라 일부 전송 기반이 필요할 수 있습니다.

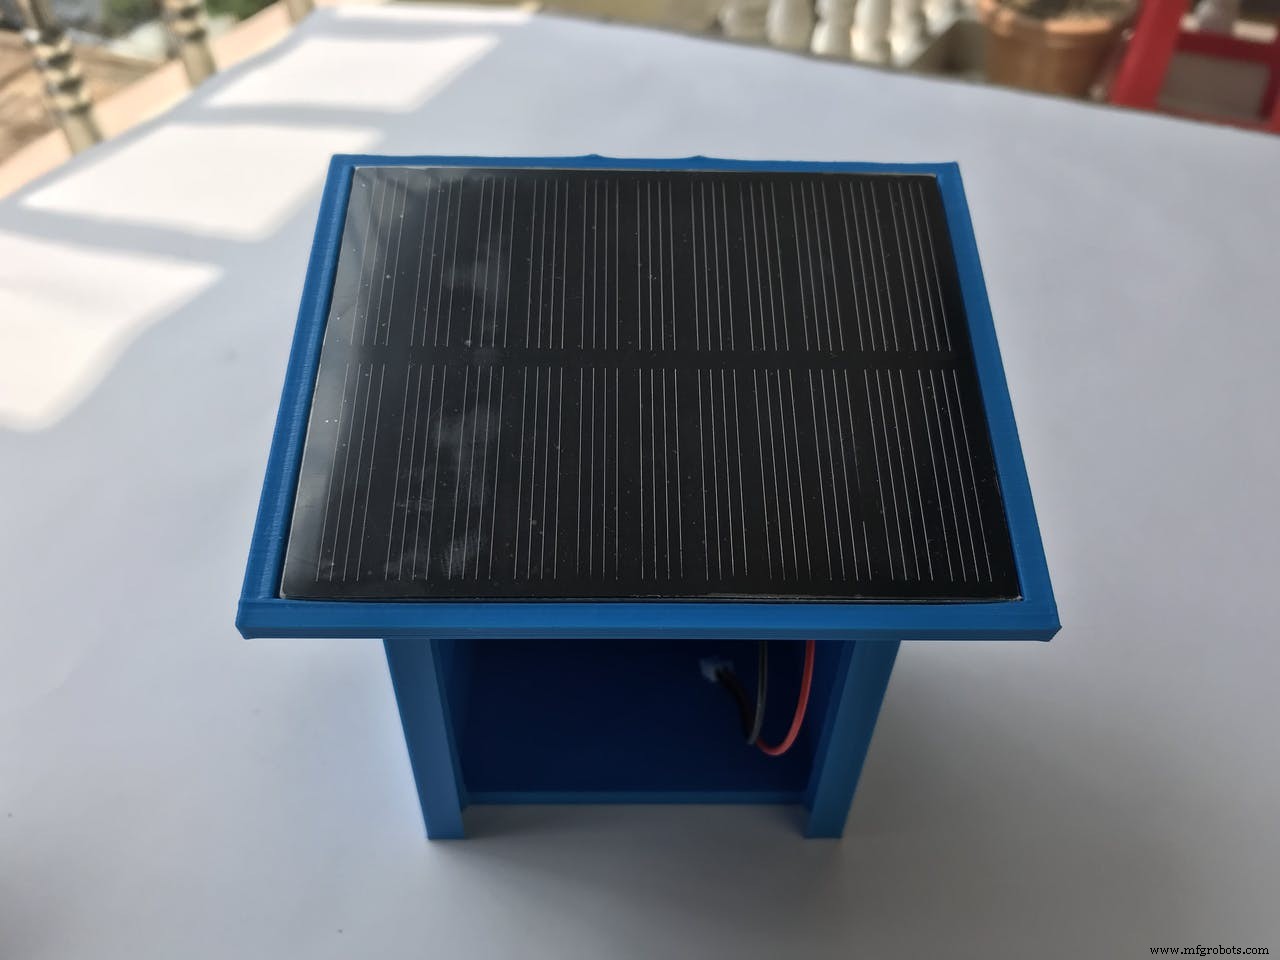
상자를 준비한 후 먼저 상자 상단에 태양 전지판을 부착했습니다. 상단 구멍을 통해 상자 내부의 연결 와이어.
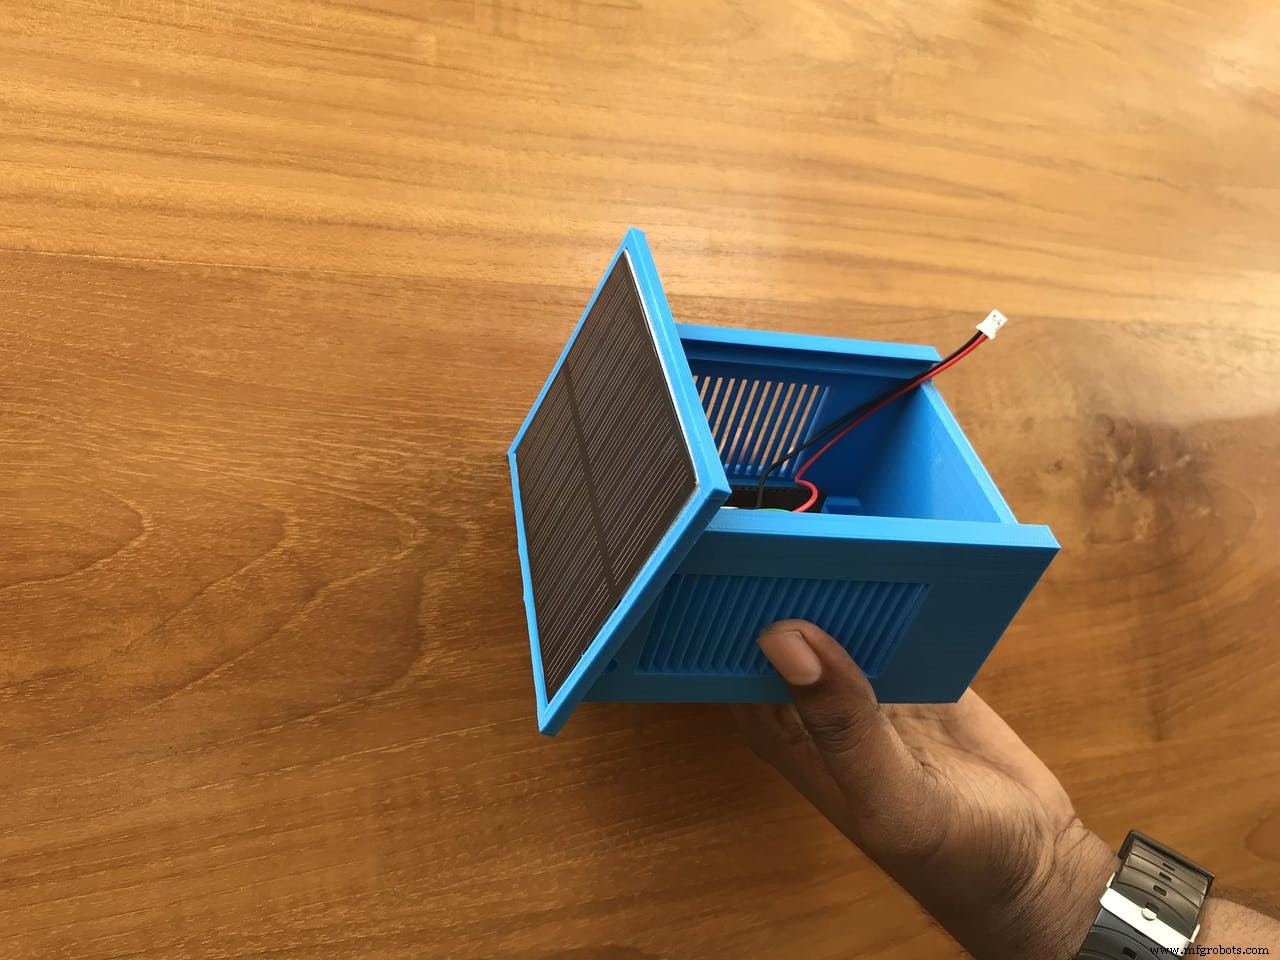
그런 다음 베이스 쉴드가 부착된 Arduino를 뜨거운 접착제나 양면 테이프로 먼저 놓습니다. 다른 센서를 하나씩 놓고 뜨거운 접착제를 사용하여 고정된 위치에 부착합니다.
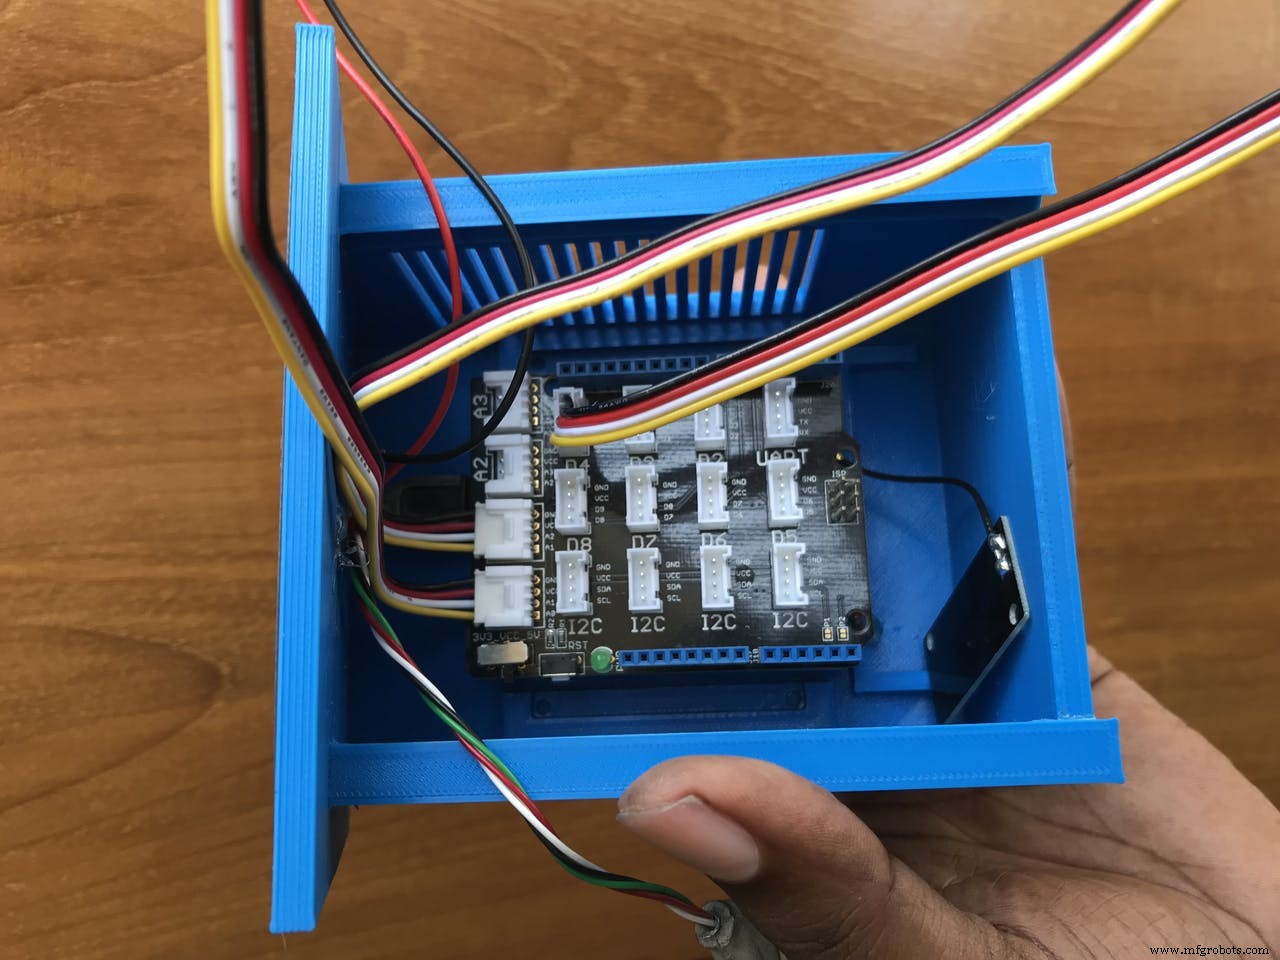
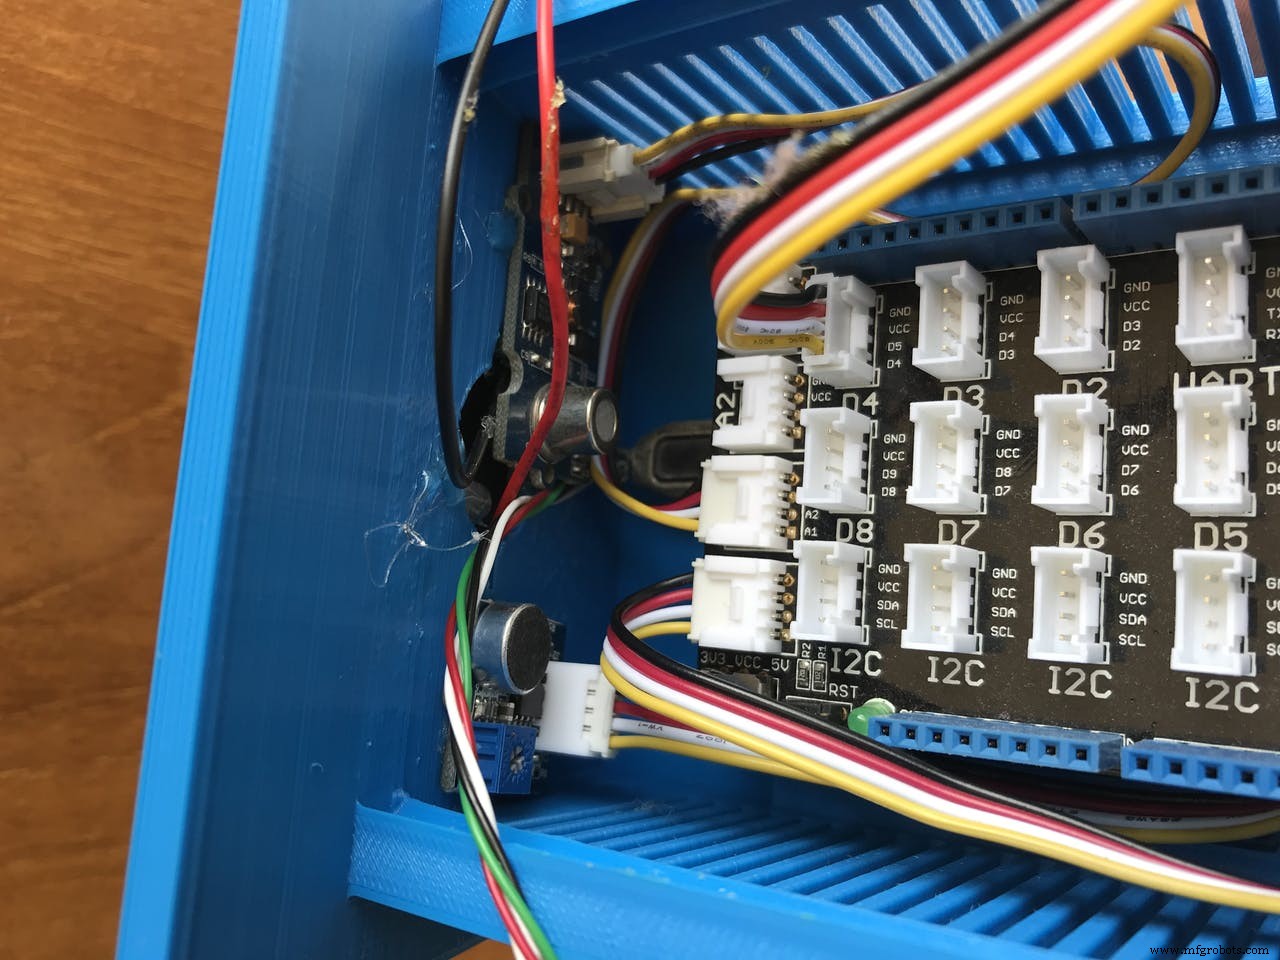
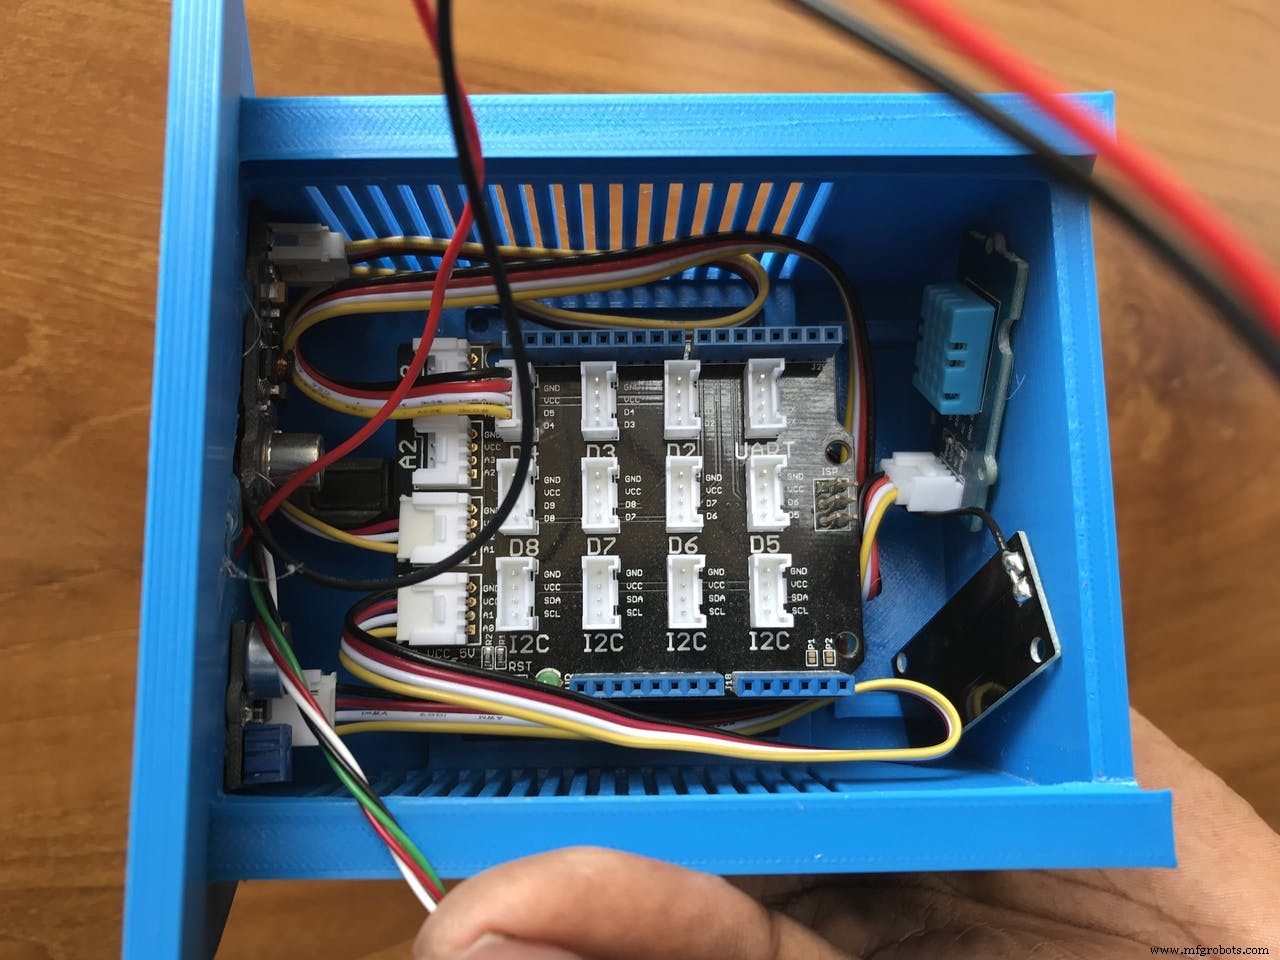
배터리와 리포라이더 프로를 넣고 마지막으로 LoRa 모듈을 추가하세요.
센서 노드를 배포할 준비가 되었습니다.
그랜저 구성
그랜저는 가상 기기-사용자 쌍이 생성되는 IoT 기기를 위한 백엔드 서비스를 제공합니다. 장치 모델은 생성 시 읽고 쓸 수 있는 다양한 변수(우리의 경우 온도, 습도, noise_level, air_quality)를 포함하는 JSON 객체로 설명됩니다. Grandeur Canvas는 그래픽 위젯을 사용하여 페어링된 장치의 장치 상태를 시각화하는 데 사용할 수 있는 웹 앱입니다.
Grandeur를 사용하려면 계정을 만들고 플랫폼에서 몇 가지 중요한 구성을 수행해야 합니다. 웹사이트 https://grandeur.dev/를 확인하세요. 게임에 들어가기 위해.
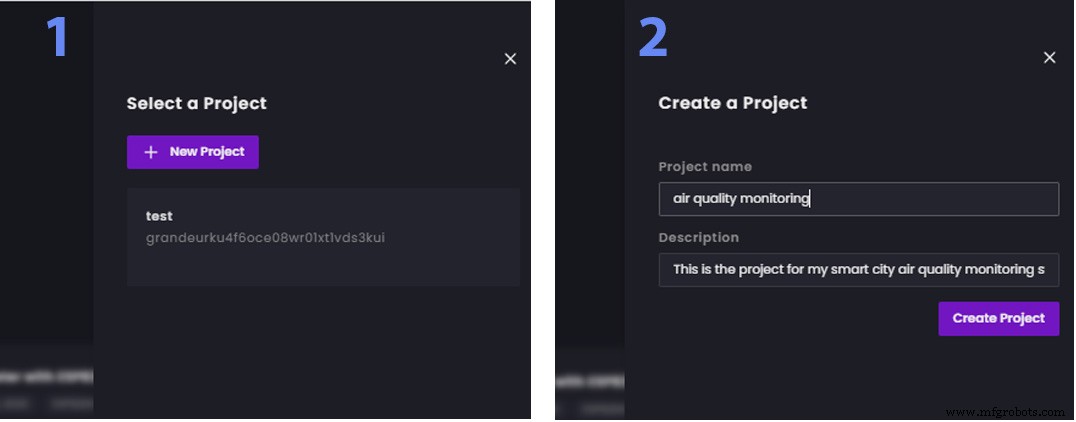
1. 루트 계정에 로그인한 후 새 프로젝트를 만듭니다. :
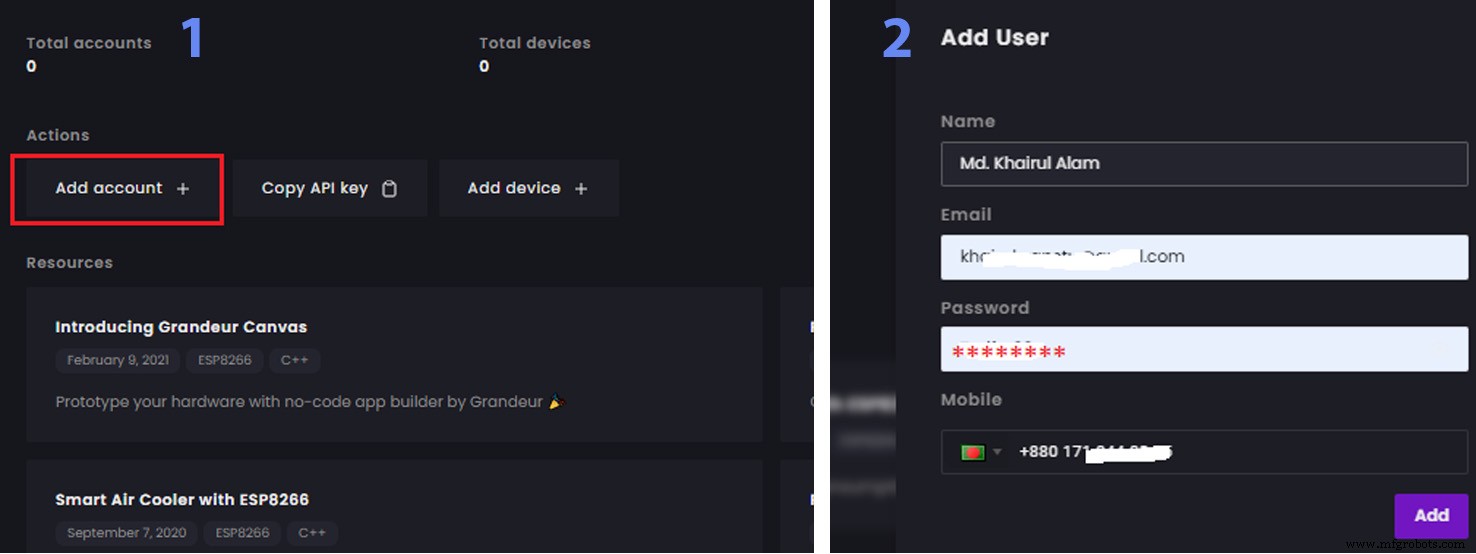
2. 새 사용자 계정 만들기 계정 추가에서 홈 탭 또는 계정 탭에서 옵션을 선택합니다. 나중에 지금 생성한 이메일과 비밀번호로 앱에 로그인할 것입니다. 이것은 Grandeur의 또 다른 멋진 기능입니다. 여러 사용자가 이메일과 비밀번호로 로그인하여 앱을 사용할 수 있습니다. . 각 사용자는 자신의 장치를 페어링할 수 있으며 한 사용자가 페어링한 장치는 다른 사용자가 사용할 수 없게 됩니다. 인증은 Grandeur의 핵심에 구축됩니다. 사용자 생성은 다음과 같습니다.
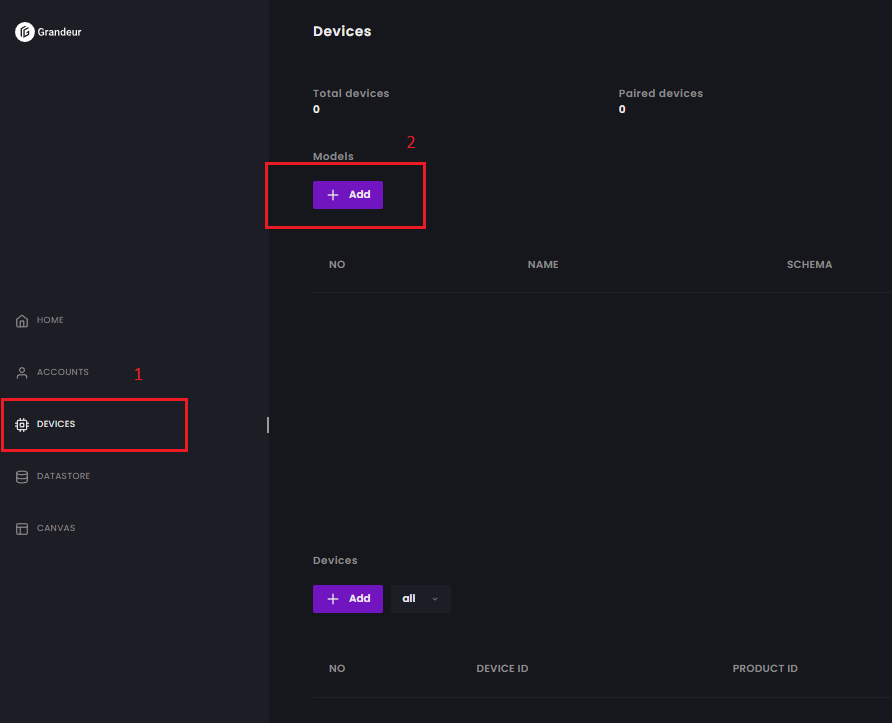
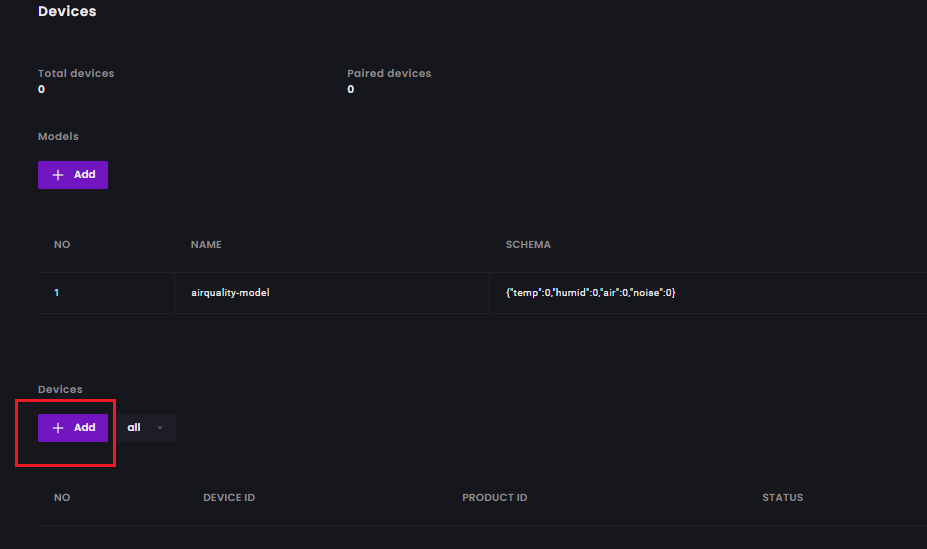
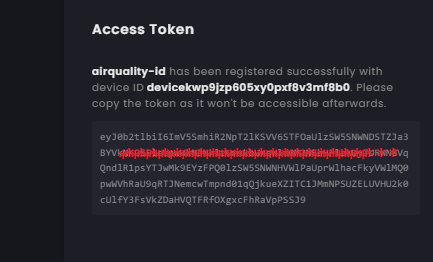
3. 이제 새 기기를 만드십시오. 장치 탭을 통해 이 작업은 하드웨어용 코드를 작성하는 동안 사용할 새로운 고유한 장치 ID를 생성하며 이 장치 ID는 API를 사용하여 Grandure에 연결하는 데 필요합니다. 장치를 생성하면 accessToken도 생성됩니다. 복사하는 것을 잊지 마세요. 그러면 하드웨어 코드에서 활용되며 대화 상자를 닫은 후에는 액세스할 수 없습니다. . 다음 절차에 따라 장치를 추가하기 전에 장치 모델을 추가해야 합니다. 장치 모델은 장치에 의해/장치에 전달될 수 있는 변수를 설명하는 데 사용됩니다.
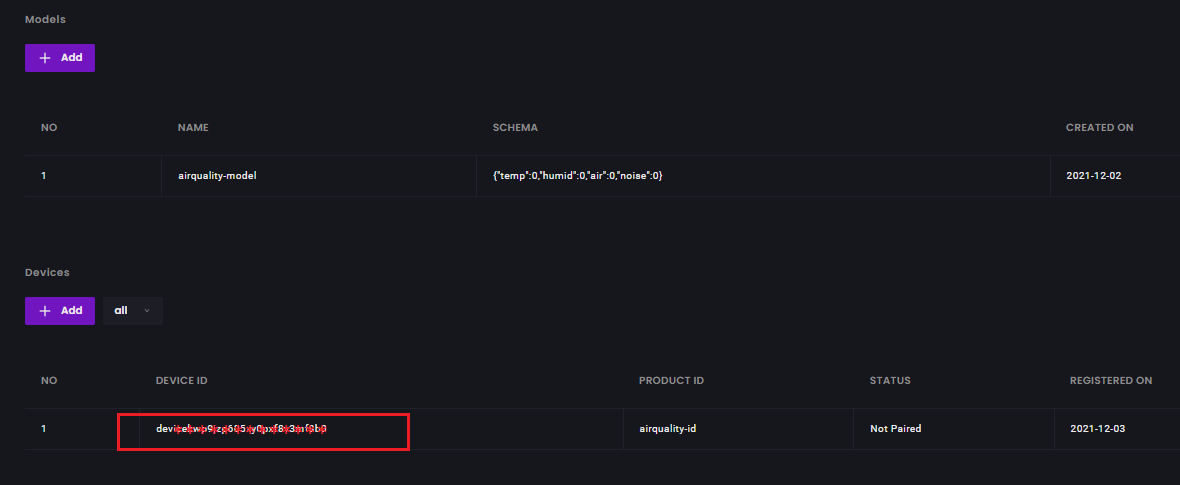
모델에서 추가를 클릭합니다. 그리고 모델명을 알려주세요. 스키마에서 모든 변수(이 경우 4)를 JSON 형식으로 지정합니다. 이때 값을 0으로 유지합니다. 이 변수는 장치 노드에서 데이터를 보낼 때 자동으로 업데이트됩니다.
{"temp":0, "humid":0, "air":0, "noise":0} 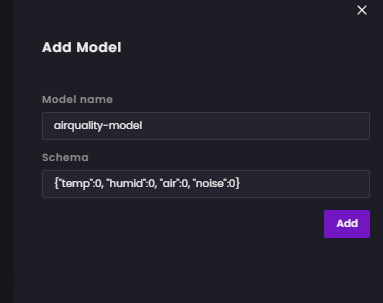
스키마를 입력한 후 추가를 클릭합니다.
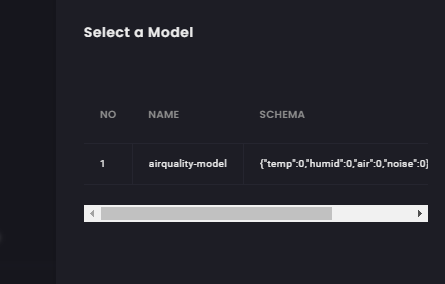
장치 모델을 추가한 후 장치에서 추가 옵션을 클릭하고 방금 생성한 모델을 선택하여 모델을 장치에 연결합니다.
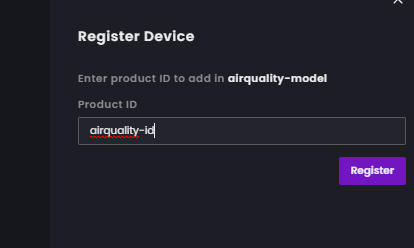
장치 ID를 제공하고 등록을 클릭합니다.
액세스 토큰을 복사하면 하드웨어 코드에서 활용되며 대화 상자를 닫은 후에는 액세스할 수 없습니다.
장치가 성공적으로 생성되었으며 DEVICE ID도 기록해 둡니다. 코딩에도 필요합니다.

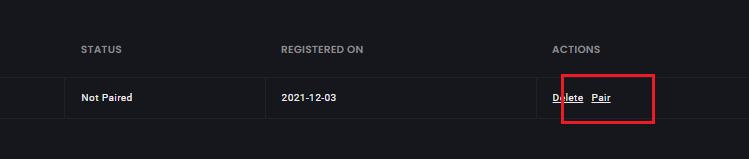
사용자는 장치와 페어링되어 있지 않으면 장치와 상호 작용할 수 없습니다. 두 가지 방법으로 기기를 페어링할 수 있습니다. :1) 클라우드 대시보드를 사용하거나 2) pairDevice()를 사용하여 웹 앱을 통해 장치 API의 기능. 이 두 번째 방법은 생산적인 관점에서 보면 매우 강력한 의미를 지닌다. 이제 하드웨어 제품을 배송할 수 있고 사용자는 앱에 로그인하고 페어링하여 하드웨어에 대한 소유권을 선언할 수 있습니다. 클라우드 대시보드를 사용하여 기기를 사용자와 페어링하는 방법은 다음과 같습니다.
장치를 페어링하려면 페어링을 클릭하고 계정을 선택하십시오. 다음 단계로 이동할 준비가 되었습니다.

4. 이제 캔버스를 만듭니다.
대시보드의 왼쪽 메뉴에서 캔버스를 클릭하거나 https://canvas.grandeur.tech로 이동합니다. Canvas를 처음 방문하는 경우 승인 버튼이 나타납니다. 권한 부여는 Canvas에 프로젝트의 사용자 및 장치에 대한 액세스 권한을 부여합니다. "승인" 버튼을 클릭하면 Canvas를 바인딩할 프로젝트를 선택하라는 메시지가 표시되는 Grandeur 대시보드로 다시 리디렉션됩니다.
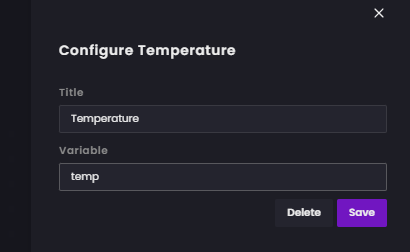
그래프 위젯을 선택하고 클릭하십시오. 구성 메뉴가 나타나면 구성을 클릭하여 그래프의 제목을 지정하고 이 그래프에 표시할 값의 변수를 설정합니다.
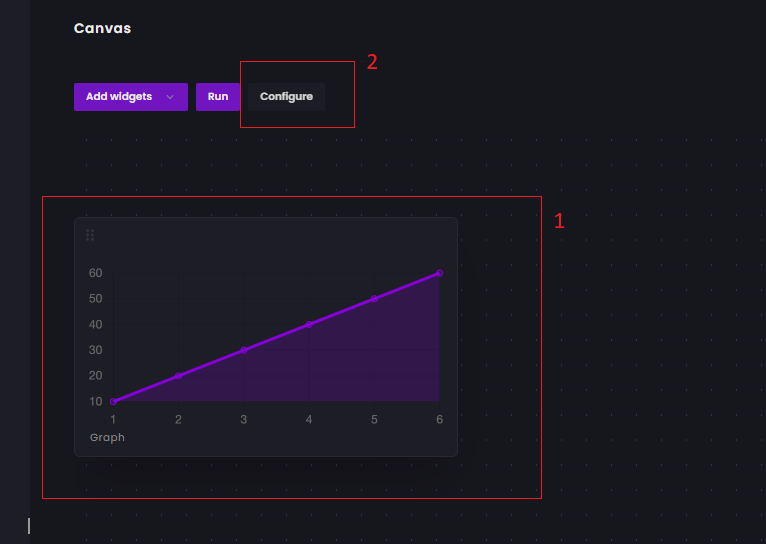
저장하려면 클릭하세요.
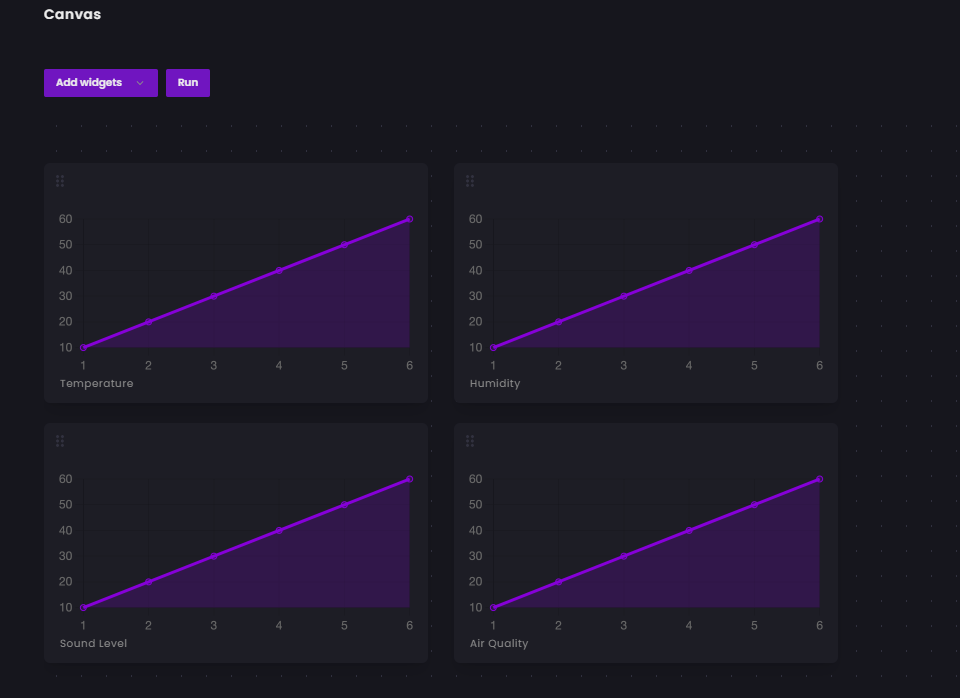
동일한 절차에 따라 4개의 변수에 대해 4개의 그래프 위젯을 추가합니다.
Canvas를 프로젝트에 연결하면 로그인 화면이 나타날 수 있습니다. 이전에 생성한 프로젝트의 사용자로 여기에 로그인해야 하며, 이를 위해 프로젝트에서 사용자 계정을 생성해야 합니다. 대시보드의 계정 페이지를 방문하면 됩니다. Then you can log in to Canvas by using the credentials of this new user.
Preparing IoT LoRa Gateway
In a simple way, an IoT Gateway is like home or office network router or gateway that connects sensors, IoT modules, and smart devices to the cloud. Such a gateway facilitates communication between your devices, maintains security, and provides an admin interface where you can perform basic functions.
A true IoT gateway contains communication technologies connecting end-devices (sensors, actuators, or more complex devices) and backend platforms (data, device, and subscriber management) to the gateway. It has a computing platform allowing pre-installed or user-defined applications to manage data (for routing and computing at the edge), devices, security, communication, and other aspects of the gateway.
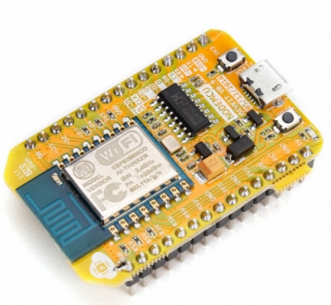
Raspberry Pi can be a good option for a gateway with lots of flexibility but to keep it simple I am using Node MCU as a gateway for this project. Node MCU will receive the data from the LoRa module using UART. Then using Arduino SDK we will upload the data to the Grandeur cloud platform.

Firmware for the Gateway
The following code was developed for the gateway using Arduino SDK provided by Grandeur cloud. Data is received in string form from the LoRa using the UART port. Then the received data is processed to separate the individual variable from the comma-separated string value. The values are then sent to Grandeur using WiFi. The following function was used to separate the variables.
void process_received_data(){

 start_pos =inputString.indexOf(start_val);
 end_pos =inputString.indexOf(end_val);
 String data_string =inputString.substring(start_pos+1, end_pos-1);
 //Serial.println(data_string);
 //identifying commas inn the string
 int firstCommaIndex =data_string.indexOf(',');
 int secondCommaIndex =data_string.indexOf(',', firstCommaIndex+1);
 int thirdCommaIndex =data_string.indexOf(',', secondCommaIndex+1);
 //seperating comma seperated value from the data string
 String temperature =data_string.substring(0, firstCommaIndex);
 String humidity =data_string.substring(firstCommaIndex+1, secondCommaIndex);
 String noise_level =data_string.substring(secondCommaIndex+1, thirdCommaIndex);
 String air_auality =data_string.substring(thirdCommaIndex+1);

 //Serial.println(temperature);
 //Serial.println(humidity);
 //Serial.println(noise);
 //Serial.println(air_auality);

 temp =temperature.toFloat();
 humid =humidity.toFloat();
 noise =noise_level.toFloat();
 air =air_auality.toFloat();

 Serial.println(temp);
 Serial.println(humid);
 Serial.println(noise);
 Serial.println(air);

 inputString ="";
 stringComplete =false;
 }
The complete code is attached in the code section.
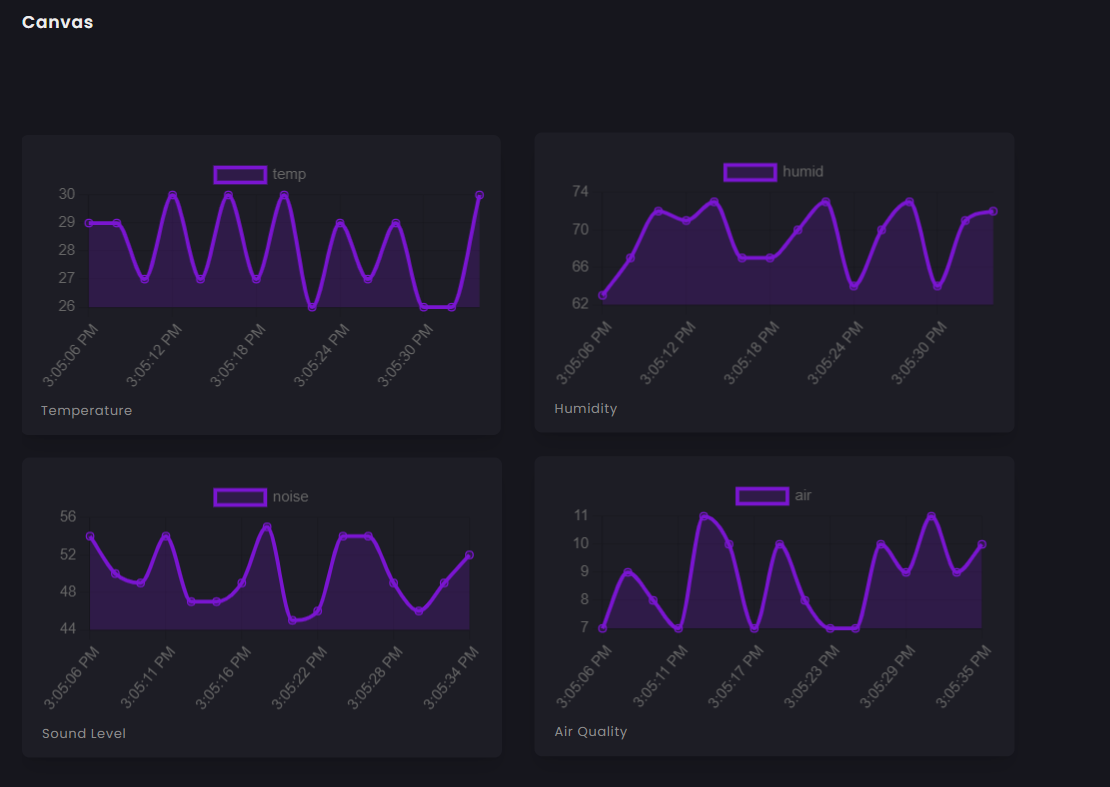
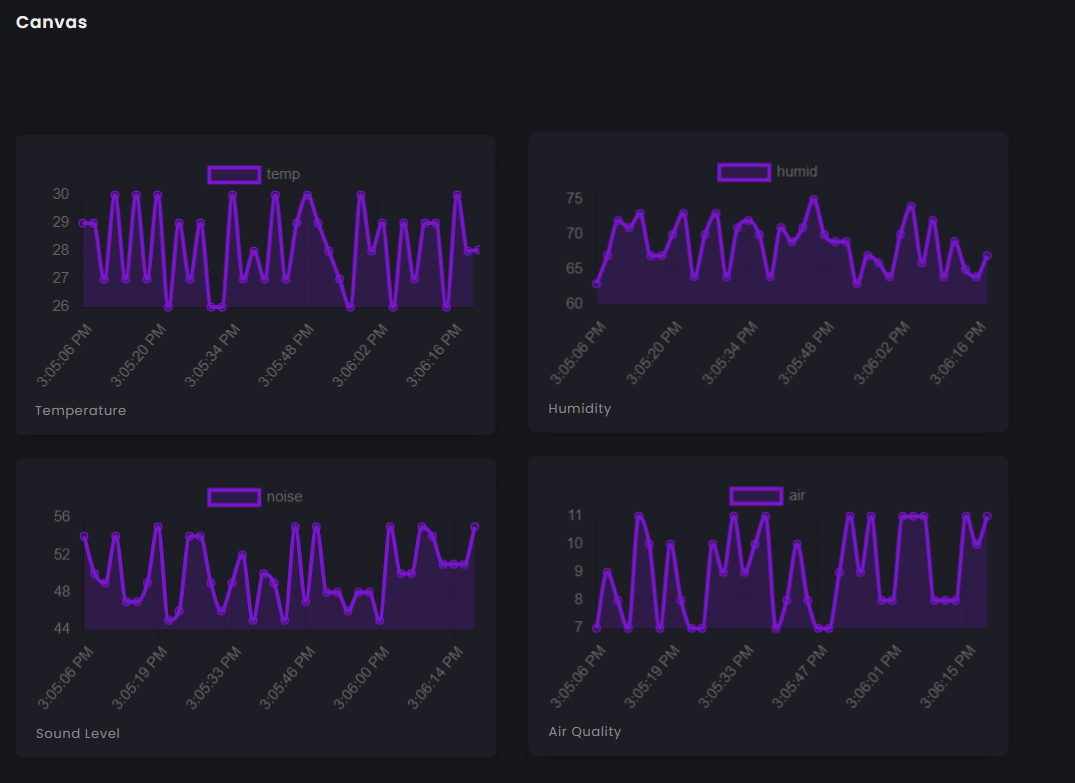
Data Visualization
#include "AirQuality.h" //grove air quality library#include "Arduino.h"#include "DHT.h"#define DHTPIN 4 // what digital pin DHT sensor connected to#define DHTTYPE DHT11 // model of the sensor DHT11 DHT dht(DHTPIN, DHTTYPE);AirQuality airqualitysensor;int current_quality =-1;const int sampleWindow =50; // Sample window width in mS (50 mS =20Hz)unsigned int sample;float noise;float temp, humid;int airQuality; //-------------------------------------------------------------------------------------------- // SETUP //--------------------------------------------------------------------------------------------void setup() { Serial.begin(115200); //Serial for lora airqualitysensor.init(14); dht.begin();} //--------------------------------------------------------------------------------------------// MAIN LOOP//-------------------------------------------------------------------------------------------- void loop() { noise =calculate_sound_in_db(); airQuality =calculate_air_quality(); calculate_temp_humid(); String temperature =String(temp); String humidity =String(humid); String sound =String(noise); String air =String(airQuality); String values =String(temperature)+","+ String(humidity)+","+ String(sound)+","+ String(air); String cmd ="AT+SEND=0,"+String(values.length())+","+values; //AT+SEND=,, Serial.println(cmd); //sent to lora delay(15000);}//this function calculate sound level in dBfloat calculate_sound_in_db(){ unsigned long startMillis=millis(); // Start of sample window float peakToPeak =0; // peak-to-peak level unsigned int signalMax =0; //minimum value unsigned int signalMin =1024; //maximum value // collect data for 50 mS while (millis() - startMillis signalMax) { signalMax =sample; // save just the max levels } else if (sample =0)// if a valid data returned. { if (current_quality==0) Serial.println("High pollution! Force signal active"); else if (current_quality==1) Serial.println("High pollution!"); else if (current_quality==2) Serial.println("Low pollution!"); else if (current_quality ==3) Serial.println("Fresh air"); } */ return current_quality;}void calculate_temp_humid(){ // Reading temperature or humidity takes about 250 milliseconds! // Sensor readings may also be up to 2 seconds 'old' (its a very slow sensor) float h =dht.readHumidity(); // Read temperature as Celsius (the default) float t =dht.readTemperature(); // Check if any reads failed and exit early (to try again). if (isnan(h) || isnan(t)) { //Serial.println("Failed to read from DHT sensor!"); return; } temp =t; humid =h; /* Serial.print("Humidity:"); Serial.print(h); Serial.print(" %\t"); Serial.print("Temperature:"); Serial.print(t); Serial.print(" *C "); */}//interrupt service routine for air quality sensorISR(TIMER1_OVF_vect){ if(airqualitysensor.counter==61)//set 2 seconds as a detected duty { airqualitysensor.last_vol=airqualitysensor.first_vol; airqualitysensor.first_vol=analogRead(A0); airqualitysensor.counter=0; airqualitysensor.timer_index=1; PORTB=PORTB^0x20; } else { airqualitysensor.counter++; }} /* Including the SDK and WiFi library */#include#include #include SoftwareSerial LORA(D7, D8);/* Configurations */String deviceID ="your device id";String apiKey ="your api key";String token ="your device token";/* WiFi credentials */String ssid ="your wifi ssid";String password ="your wifi password";/* Create variable to hold project and device */Grandeur::Project project;Grandeur::Project::Device device;/* Variable to keep track of connection state and time */int connected =0;uint32_t lastUpdate =0;String inputString =""; // a string to hold incoming databoolean stringComplete =false; // whether the string is complete//:and % was set from the transmitter node for the eage of data separationchar start_val =':';char end_val ='%';int start_pos =0;int end_pos =0;float temp =0;float humid =0;float air =0;float noise =0;/* Function to check device's connection status */void onConnection(bool status) { switch(status) { case CONNECTED:Serial.println("Device is connected to the cloud."); /* Record connection state and time */ connected =1; lastUpdate =millis(); return; case DISCONNECTED:Serial.println("Device is disconnected from the cloud."); connected =0; return; }}/* Function to connect to WiFi */void connectWiFi() { /* Set mode to station */ WiFi.mode(WIFI_STA); /* Connect using the ssid and password */ WiFi.begin(ssid, password); /* Block till the WiFi is connected */ while (WiFi.status() !=WL_CONNECTED) { delay(500); Serial.print("."); } /* Print message */ Serial.println(""); Serial.println("WiFi connected"); /* And IP address */ Serial.println(WiFi.localIP());}/* Function to confirm that data has been updated */void dataCallback(const char* code, Var res) { /* If the update was recorded successfully */ if(code =="DEVICE-DATA-UPDATED") { //Serial.println("Updated DATA"); /* Get data */ double temp_data =(double) res["update"]["temp"]; double humid_data =(double) res["update"]["humid"]; double noise_data =(double) res["update"]["noise"]; double air_data =(double) res["update"]["air"]; /* Print */ Serial.printf("Temperature:%f Humidity:%f Noise Level:%f Air Quality:%f\n", temp_data, humid_data, noise_data, air_data); return; } /* If the summary could not be updated. */ Serial.println("Failed to Update DATA"); return;}/* Function to send updated current and power readings */void sendUpdate() { Var data; //JSON data format set in Grandeur:{"temp":0, "humid":0, "air":0, "noise":0} data["temp"] =temp; data["humid"] =humid; data["noise"] =noise; data["air"] =air; /* Record update */ //device.data().set("", data, dataCallback); //send JSON device.data().set("temp", temp, dataCallback); device.data().set("humid", humid, dataCallback); device.data().set("noise", noise, dataCallback); device.data().set("air", air, dataCallback); //delay(2000);}void setup() { /* Begin the serial */ Serial.begin(9600); LORA.begin(115200); inputString.reserve(200); /* Connect to WiFi */ connectWiFi(); /* Initializes the global object "grandeur" with your configurations. */ project =grandeur.init(apiKey, token); /* Get reference to device */ device =project.device(deviceID); /* Sets connection state update handler */ project.onConnection(onConnection);}void loop() { serialEvent(); project.loop(WiFi.status() ==WL_CONNECTED); /* Send update to server */ if (stringComplete) { process_received_data(); if (connected) sendUpdate(); }}void serialEvent() { while (LORA.available()) { // get the new byte:char inChar =(char)LORA.read(); // if the incoming character is a newline, set a flag // so the main loop can do something about it:if (inChar =='\n') { stringComplete =true; } else // add it to the inputString:inputString +=inChar; }}void process_received_data(){ start_pos =inputString.indexOf(start_val); end_pos =inputString.indexOf(end_val); String data_string =inputString.substring(start_pos+1, end_pos-1); //Serial.println(data_string); //identifying commas inn the string int firstCommaIndex =data_string.indexOf(','); int secondCommaIndex =data_string.indexOf(',', firstCommaIndex+1); int thirdCommaIndex =data_string.indexOf(',', secondCommaIndex+1); //seperating comma seperated value from the data string String temperature =data_string.substring(0, firstCommaIndex); String humidity =data_string.substring(firstCommaIndex+1, secondCommaIndex); String noise_level =data_string.substring(secondCommaIndex+1, thirdCommaIndex); String air_auality =data_string.substring(thirdCommaIndex+1); //Serial.println(temperature); //Serial.println(humidity); //Serial.println(noise); //Serial.println(air_auality); temp =temperature.toFloat(); humid =humidity.toFloat(); noise =noise_level.toFloat(); air =air_auality.toFloat(); Serial.println(temp); Serial.println(humid); Serial.println(noise); Serial.println(air); inputString =""; stringComplete =false; }
제조공정
구성품 및 소모품 Arduino UNO × 1 A7 GPRS/GPS 모듈 × 1 수질 센서 × 1 필요한 도구 및 기계 납땜 인두(일반) 앱 및 온라인 서비스 Microsoft Azure Arduino IDE 이 프로젝트 정보 소개 2016년 9월, 오염된 물이 공장으로 유입되어 정수장을 폐쇄해야 했습니다. 상수도 회사는 오염원을 정확히 찾아낼 수 없었고 이로 인해 심각한
의심할 여지 없이 물은 지구상에서 가장 필수적인 자원입니다. 그것 없이는 삶은 더 이상 존재하지 않으며 며칠 안에 분명히 무너질 것입니다. 일반적인 용도뿐만 아니라 산업 분야에서의 응용은 우리의 존재와 지속 가능한 삶에 필수적인 기타 자원 및 제품의 생성 및 정제에도 도움이 됩니다. 그러나 우리는 수십 년 동안 이 대체할 수 없는 자원을 활용해 왔습니다. 지각을 덮고 있는 71%의 물 중 음용에 적합한 물은 2.5% 이하입니다. 이는 담수체의 오염 물질 농도 증가와 함께 전 세계 곳곳의 물 부족이라는 심각한 결과를 초래했습니다.