초보자를 위한 최고의 3D 프린터(2022년 업데이트)!
3D 프린팅을 시작하는 것은 생각보다 어려운 일입니다. 사실 첫 경험은 침대의 수평을 제대로 맞추는 방법을 몰랐고, 조립 과정이 기대한 대로 진행되지 않았고, 벨트가 너무 느슨해져서 프린터가 건너뛰는 바람에 너무 힘들었습니다. 기어 및 전체 인쇄가 한쪽으로 이동 등
이 기사에서는 프린터를 사용하여 시작하기가 더 쉬운 것과 모든 것을 설정하고 실행하는 데 시간이 조금 더 걸릴 수 있지만 일반적으로 3D 인쇄에 대해 더 많은 것을 배울 수 있는 프린터를 살펴보겠습니다. 바로 사용할 수 있습니다.
원하는 프린터 종류를 결정하는 것은 사용자의 몫입니다. 실행하기 쉬운 유형 또는 전문가가 되도록 강제하는 유형입니다.
내가 나열하는 두 가지 유형의 프린터
모든 FDM 3D 프린터는 동일하게 작동합니다. 다양한 플라스틱 층을 서로 겹쳐서 압출하여 최종 결과를 만듭니다.
그러나 일부 프린터는 자동 베드 레벨링, 일반적으로 개선된 워크플로 및 사용 편의성 등과 같이 이미 내장되어 있을 수 있는 기능으로 인해 다른 프린터보다 사용하기 쉽고 베드 레벨링은 일반적으로 올바른 작업을 수행하는 가장 어려운 부분입니다. 3D 프린팅을 막 시작했을 때.
두 가지 유형의 프린터를 나열하겠습니다. 사용하기 가장 쉽다고 생각하는 것 , 그러나 프린터 작동 및 문제 해결 방법을 배울 필요가 없기 때문에 3D 인쇄에 대해 가장 적게 가르치는 것과 초기 인쇄 프로세스를 더 어렵게 만들지만 3D 인쇄에 대해 더 많이 가르쳐 줄 것 일반적으로 침대 수평을 수동으로 조정하고 특정 문제를 해결하는 등의 방법을 배워야 하기 때문입니다.
Prusa MK3S+와 같이 완전한 기능을 갖추지 못한 프린터는 매우 쉽게 업그레이드 및 수정되므로 나중에 업그레이드할 수 있을 뿐만 아니라 실제로 교체하는 방법을 배우는 데 도움이 됩니다. 모든 기능과 교체 방법을 알 수 있으므로 프린터에 문제가 발생한 경우 나중에 문제를 더 쉽게 수정할 수 있습니다.
제 경우에는 프린터를 만지작거리는 것을 더 좋아하기 때문에 사랑합니다. 내 Ender 3 Pro는 시간이 지남에 따라 BLTouch(침대 수평 조절 센서)를 설치하고 모든 냉각 팬을 교체하여 더 조용하게 만들고 새 압출기를 설치하고 많은 추가 모드를 인쇄했습니다.
간단하게 인쇄할 수 있는 3D 프린터
여기에는 플러그 앤 플레이로 간주될 수 있는 프린터, 즉 이러한 유형의 프린터에서 일반적으로 자동으로 수행되는 첫 번째 보정 프로세스를 거치는 것 외에 사용자 측에서 설정이 필요하지 않은 프린터가 포함됩니다.
이러한 프린터 중 어느 것도 수정하거나 업그레이드할 수 없다는 점에 유의해야 합니다. 프린터를 개선하기 위해 다른 구성 요소를 교체하고 싶은 사람이라면 다음 섹션에 나열된 프린터에 투자하는 것이 좋습니다.
원래 Prusa MK3S+
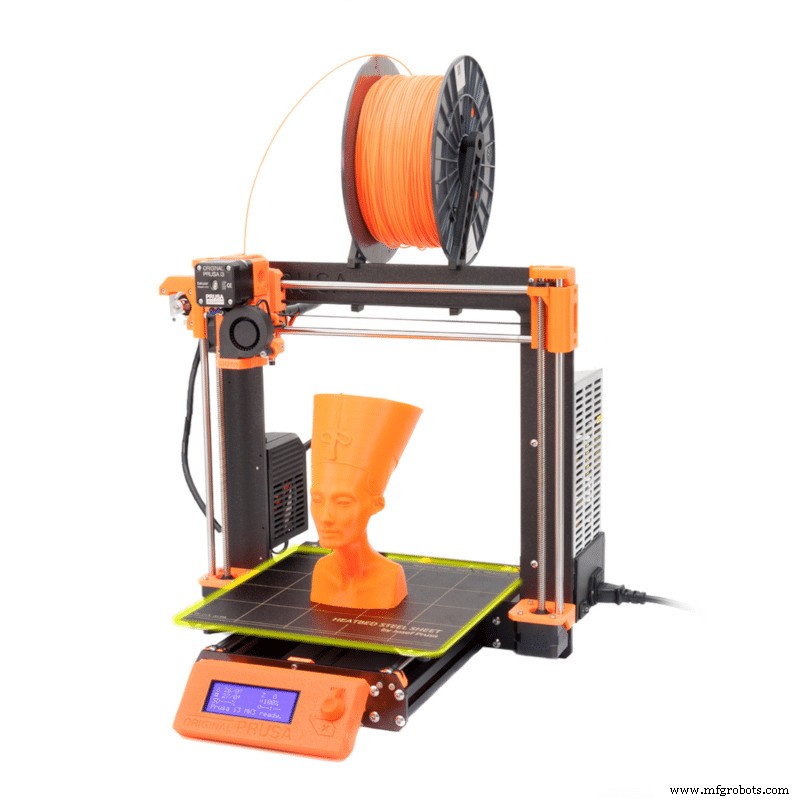
Prusa MK3S+는 현재 시장에서 가장 잘 알려진 3D 프린터 중 하나이며, 인쇄 팜 설정을 검색하면 일반적으로 MK3이 유일한 프린터입니다. 다이렉트 드라이브 압출기를 사용하고(정말 유연하고 마모성 필라멘트로 인쇄할 수 있음), Prusa는 모든 단일 제품에서 테스트된 프로파일과 함께 제공되는 자체 슬라이싱 소프트웨어를 제공하기 때문에 인쇄할 수 있는 수많은 재료 최고의 인쇄 품질을 얻기 위해 프린터 중 하나를 선택합니다.
초기 보정 설정만 하면 완료되기 때문에 특히 사전 제작된 프린터를 구입하는 경우 설정 및 시작이 가장 쉬운 프린터 중 하나입니다.
또한 자동 베드 레벨링과 모델을 빠르게 분리하기 위해 침대에 눕힐 수 있는 탈착식 마그네틱 빌드 플레이트(플라스틱 도트가 인쇄된 표면)가 있습니다.
예산은 걱정하지 않고 제대로 작동하는 고품질 프린터를 원하신다면 MK3S+가 딱입니다.
| 압출기 유형: | 직접 드라이브 |
| 침대 수평 조절 센서 유형: | 귀납적 |
| 필라멘트 런아웃 센서 | 예 |
| 빌드 볼륨 | 250mm X 210mm X 210mm |
| 침대 유형 | PEI 스프링 강판 |
오리지널 Prusa i3 MK3S+를 찾을 수 있습니다. 여기: Prusa 공식 웹사이트.
프루사 미니
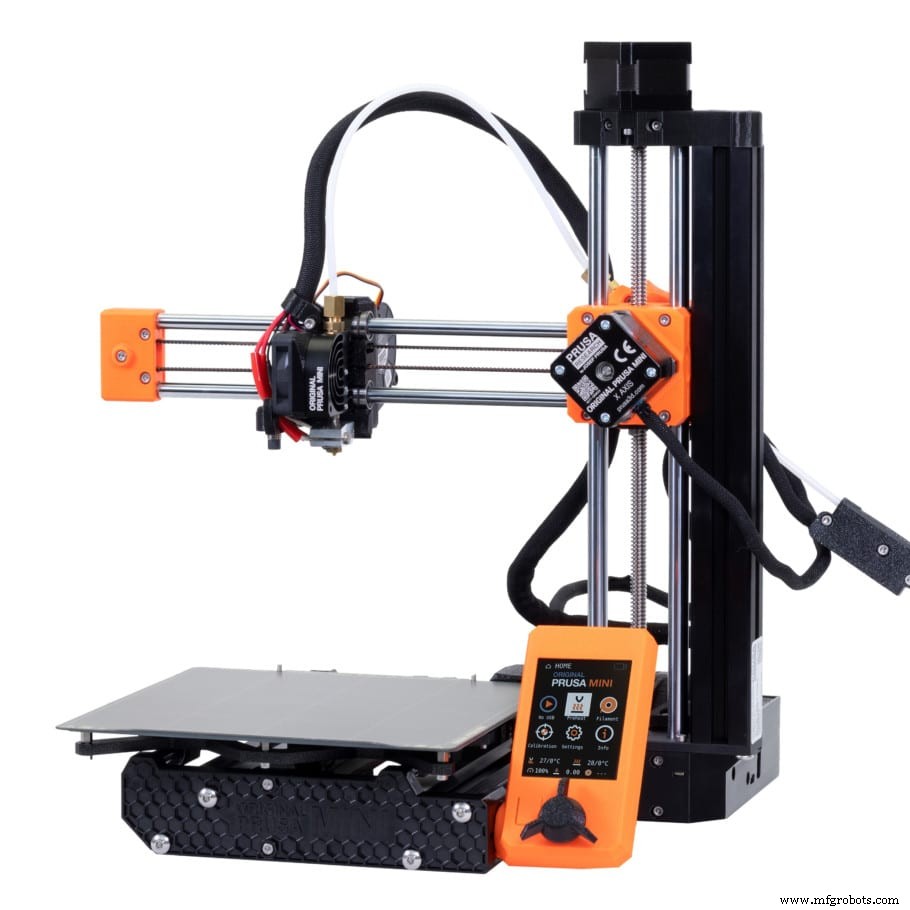
Prusa Mini만큼 사용이 간편하고, 인쇄 품질과 안정성이 뛰어나고, 자동 베드 레벨링 및 마그네틱 빌드 플레이트도 함께 제공되는 다른 프린터는 없을 것입니다.
앞에서 설명한 Prusa MK3S+와 매우 유사합니다. 주요 차이점은 전체 빌드 볼륨에 있고 직접 구동 프린터가 아니라 Bowden 스타일 압출기가 특징이라는 점입니다.
보우덴 압출기는 일반적으로 다이렉트 드라이브 압출기보다 더 빠르고 약간 더 나은 품질로 인쇄할 수 있지만 필라멘트 호환성이라는 단점이 있습니다. 실제로 유연한 필라멘트는 약간의 수정 없이는 인쇄할 수 없고 나일론 및 폴리카보네이트와 같은 필라멘트도 인쇄할 수 없기 때문입니다. 인쇄됩니다.
형인 MK3S+만큼 큰 투자가 아닌 것처럼 보일 수도 있지만 Prusa Mini는 절반 가격에 판매되지만 빌드 볼륨은 약간 작을 뿐입니다.
Prusa Mini의 주요 매력은 Prusa에는 Mini에 대한 특정 사전 설정이 있는 자체 슬라이서와 프린터를 원격으로 제어하는 앱(현재 베타 버전)이 있기 때문에 전체 Prusa 생태계의 일부라는 것입니다.
Mini는 SD 카드용 슬롯이 아니라 USB 드라이브용 슬롯과 함께 제공되며, PrusaSlicer를 사용하여 슬라이스하면 컬러 화면에 인쇄할 파일의 이미지도 표시됩니다. 이것은 당신이 생각하는 것보다 훨씬 더 유용하며 99%의 프린터가 할 수 없는 일입니다.
| 압출기 유형: | 보우든 |
| 침대 수평 조절 센서 유형: | 귀납적 |
| 필라멘트 런아웃 센서 | 아니요(별도 구매) |
| 빌드 볼륨 | 180mm X 180mm X 180mm |
| 침대 유형 | PEI 스프링 강판 |
Prusa Mini를 찾을 수 있습니다. 여기: Prusa 공식 웹사이트.
포병 천재 프로
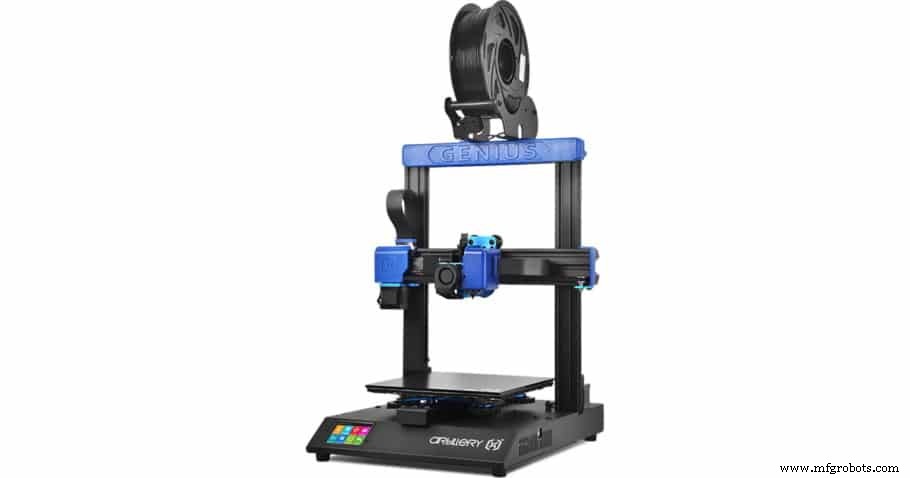
Artillery GeniusPro는 32비트 메인보드, Titan Extruder, 자동 베드 레벨링 등과 같은 몇 가지 업그레이드와 함께 제공되는 Artillery의 Genius 3D 프린터의 업데이트된 버전입니다.
GeniusPro의 뛰어난 기능 중 하나는 침대를 얼마나 빨리 가열할 수 있는지입니다. 대부분의 프린터는 약 100°C의 온도에 도달하는 데 5분이 넘게 걸리는 반면 GeniusPro는 2분 미만이 소요되기 때문입니다.
GeniusPro와 함께 제공되는 베드 레벨링 센서는 기계식 프로브를 사용하여 노즐과 베드 사이의 거리를 측정하는 물리적 홀 효과 센서입니다. 이러한 센서 유형을 사용하는 이점은 모든 표면에서 작동한다는 것입니다. 즉, 빌드 표면을 변경하고 마그네틱 표면 등을 사용하려는 경우 그렇게 할 수 있으며 항상 완벽하게 작동합니다.
특히 Direct Drive 프린터를 사용해 본 적이 없는 경우 언급할 가치가 있는 또 다른 사항은 Bowden 스타일 프린터를 사용할 때보다 훨씬 다양한 필라멘트를 사용할 수 있으며 Direct Drive 시스템은 특히 유연한 프린터로 인쇄하는 데 좋습니다. NinjaFlex와 같은 필라멘트
GeniusPro는 매우 조용한 프린터로 판매될 수 있지만 내 Ender 3 Pro만큼 시끄럽다는 것을 알았습니다. 실제로 그렇게 조용하지는 않지만 확실히 관리할 수 있습니다.
마지막으로, 터치스크린 인터페이스는 정말 환상적이고 멋지게 보일 뿐만 아니라 무언가를 탭해도 몇 초 동안 아무 일도 일어나지 않는 다른 프린터와 달리 정말 직관적이고 빠릅니다.
| 압출기 유형: | 다이렉트 드라이브(타이탄 압출기) |
| 침대 수평 조절 센서 유형: | 물리적 홀 효과 센서(기계적) |
| 필라멘트 런아웃 센서 | 예 |
| 빌드 볼륨 | 220mm X 220mm X 250mm |
| 침대 유형 | 강화 유리 |
여기에서 Artillery GeniusPro를 찾을 수 있습니다. :Amazon, Banggood, 3D 프린터 온라인.
이제 더 저렴한 프린터를 찾고 있다면 이 목록의 다음 프린터가 적합할 것입니다.
트론시 XY-2 프로

이 목록에 추가된 또 다른 제품은 TRONXY XY-2 Pro로 Ender 3 클론으로 보이지만 자동 베드 레벨링 및 필라멘트 런아웃 센서와 같은 몇 가지 추가 기능이 이미 내장되어 있지만 100만원 이상의 비용이 들지 않습니다. 엔더 3.
이것은 보급형 프린터일 수 있지만 실제로 시중에 나와 있는 대부분의 다른 저예산 3D 프린터보다 더 많은 것을 제공하며 모델을 쉽게 제거할 수 있는 유연한 빌드 플레이트와 함께 제공되며 단일 케이블 디자인도 있습니다. 즉, 다른 프린터와 마찬가지로 5~6개의 케이블이 아닌 하나의 케이블만 꽂으면 되고 전원 손실 복구 기능도 함께 제공됩니다(하지만 프린터의 99%가 이 기능도 있음).
TRONXY XY-2 Pro를 Ender 3와 같은 프린터와 차별화하는 또 다른 기능은 바로 작동하는 컬러 터치 스크린이며, Prusa Mini처럼 인쇄할 내용의 미리보기도 보여줍니다.
이제 TRONXY XY-2 Pro의 한 가지 단점으로 넘어가겠습니다. 프린터가 매우 시끄럽습니다. 팬이 움직일 때마다 스테퍼 모터뿐만 아니라 팬도 들을 수 있기 때문에 매우 시끄럽습니다.
마지막으로 이것은 Bowden 방식의 프린터로, Flexible Filament로 인쇄가 가능한 것으로 판매되고 있지만 Ender 3와 매우 유사한 Extruder 시스템을 사용하므로 필라멘트로만 인쇄가 가능합니다. 쇼어 경도는 98a이지만 NinjaFlex(쇼어 경도 85a)와 같은 매우 유연한 재료에서는 그렇지 않습니다.
| 압출기 유형: | 보우든 |
| 침대 수평 조절 센서 유형: | 귀납적 |
| 필라멘트 런아웃 센서 | 예 |
| 빌드 볼륨 | 255mm X 255mm X 260mm |
| 침대 유형 | 유연성 |
여기에서 TRONXY XY-2 Pro를 찾을 수 있습니다. Amazon, Banggood, 3D 프린터 온라인.
Flashforge Adventurer 3 라이트
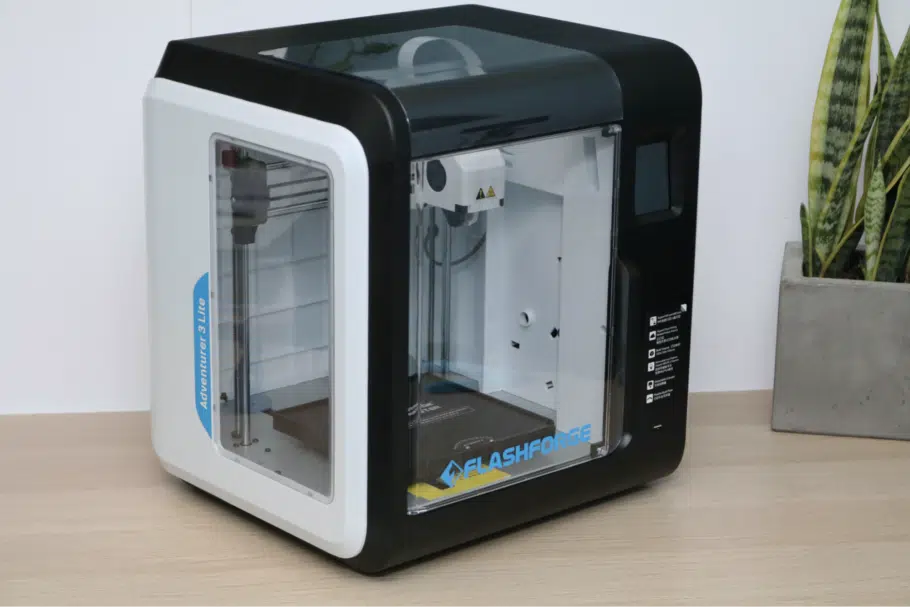
Adventurer 3 Lite는 내장 인클로저와 함께 제공되는 이 목록의 첫 번째 프린터입니다. 즉, ABS와 같은 인쇄 재료는 이 기계가 휘는 것을 방지하기 때문에 이 기계에서 쉽게 사용할 수 있어야 합니다.
하지만 인클로저 때문에 작은 프린터처럼 보이지 않을 수도 있지만 실제로 빌드 볼륨이 155mm x 150mm X 150mm에 불과하기 때문에 생각만큼 크지 않다는 점은 언급할 가치가 있습니다.
Bowden 압출 시스템은 필라멘트 공급 메커니즘으로 사용됩니다. 즉, 통합 모터가 프린트 헤드에서 멀리 장착되고 재료가 PTFE 튜브를 통해 프린트 헤드의 노즐로 구동됩니다. 앞에서 언급했듯이 Bowden 설정을 사용하면 더 빠르게 다이렉트 드라이브 시스템만큼 품질 저하 없이 인쇄 속도를 높일 수 있습니다.
Adventurer 3 Lite의 한 가지 두드러진 기능은 매우 쉽게 제거할 수 있는 탈착식 노즐이며, 유연하고 쉽게 제거할 수 있는 빌드 플레이트와 9포인트 보정 시스템을 사용하는 자동 베드 레벨링이 함께 제공됩니다. 베드 중앙에서 노즐과 베드 사이의 거리만 조절할 수 있게 되었지만, 이제는 더 많은 접점을 사용합니다.
또 다른 흥미로운 기능은 버튼 하나만 누르면 필라멘트를 쉽게 교체할 수 있는 자동 필라멘트 로딩 및 언로딩 기능입니다.
마지막으로, 자동 베드 레벨링은 제공되지 않지만 펌웨어를 통해 제어되는 9포인트 레벨링 시스템이 특징이며, 베드가 수평이 되면 거의 다시 할 필요가 없습니다.
| 압출기 유형: | 보우든 |
| 침대 수평 조절 센서 유형: | 없음 |
| 필라멘트 런아웃 센서 | 예 |
| 빌드 볼륨 | 150mm X 150mm X 150mm |
| 침대 유형 | 자기 |
Flashforge Adventurer 3 Lite는 여기에서 찾을 수 있습니다. Amazon, Banggood, 3D 프린터 온라인.
3D 프린팅에 대해 알려주는 3D 프린터(사용하기 어려움)
"3D 인쇄에 대해 가르쳐 줄 프린터"가 의미하는 바는 프린터를 올바르게 설정하고, 침대를 수평으로 맞추고, 문제 해결 방법을 배워야 한다는 것입니다. 그러면 3D에 대한 더 많은 지식을 얻을 수 있습니다. 사용 및 설정이 매우 쉬운 프린터를 구입하는 것보다 시간이 지남에 따라 인쇄하는 것이 좋습니다.
운 좋게도 이러한 프린터는 모두 제가 방금 나열한 프린터보다 일반적으로 더 저렴합니다.
Ender 3(Pro 및 V2)
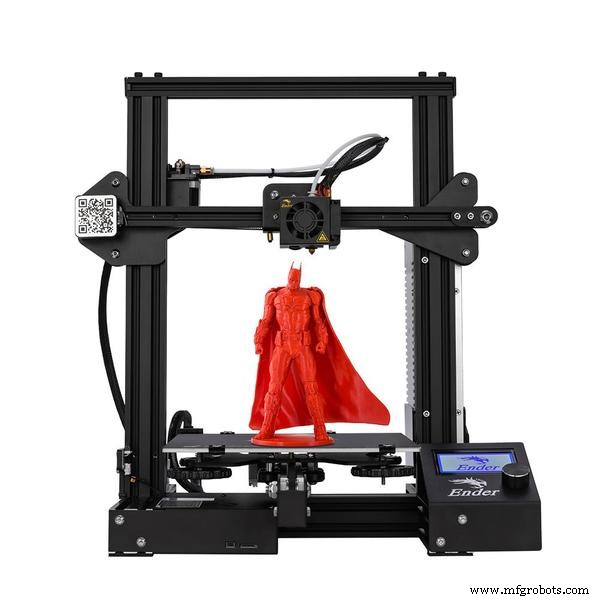
Ender 3는 가격이 저렴하고 업그레이드가 가능하고 인쇄 품질이 우수하고 이를 둘러싼 전체 커뮤니티도 환상적이기 때문에 지금까지 가장 잘 알려진 프린터입니다!
확실히 단점이 있지만 3D 프린팅이 작동하는 방식, 첫 번째 레이어를 올바르게 만들기 위해 침대를 수평으로 맞추는 방법, 특정 문제를 해결하는 방법 등을 배우도록 강요하기 때문에 초보자를 위한 환상적인 프린터입니다. , you can learn to do by following my extensive list of articles about the Ender 3 here, and more.
Since it doesn’t feature automatic bed leveling, you’ll have to learn how to level the bed using either a sheet of paper or feeler gauges. However, you could certainly install an automatic bed leveling sensor, such as the BLTouch, to enable this functionality on the printer.
It features a Bowden extruder, making printing with extremely flexible filaments a challenge, although with a simple printable upgrade or by upgrading the extruder you should be able to print with NinjaFlex, one of the most flexible TPU’s.
Even though I believe that the Ender 3 is an amazing printer, be it the stock Ender 3, Pro, or V2, it does suffer from one issue which is quality control. Creality doesn’t seem to put as much effort into controlling the quality of their products as they should, at least not as far as the heated bed goes, since there are a lot of reports of people getting a printer with a warped bed, and sadly for me, mine came with a warped bed as well.
If that’s the case with your heated bed, there’s a simple easy fix for it which is installing a glass build plate (not ideal since you won’t be able to use the magnetic one, but better than having a warped bed).
Recommendation :If at all possible, go with the Ender 3 V2 or the Ender 3X, which is essentially an upgraded version of the Ender 3 Pro, since these come with the new 32-bit mainboard with the silent drivers, which drastically lower the noise the printer makes while the print head moves around.
Lastly, even though the Ender 3 can be quite noisy, especially if you don’t get the models with the silent drivers, you could certainly make it quieter by swapping out the cooling fans. Add and an automatic bed leveling sensor, and you got yourself a hell of a printer.
| Extruder Type: | Bowden |
| Bed Leveling Sensor Type: | None |
| Filament Runout sensor | No |
| Build Volume | 220mm X 220mm X 250mm |
| Bed Type | Flexible, Glass |
You can find the Ender 3 here: Amazon, Banggood, 3D Printers Online.
TEVO Tarantula
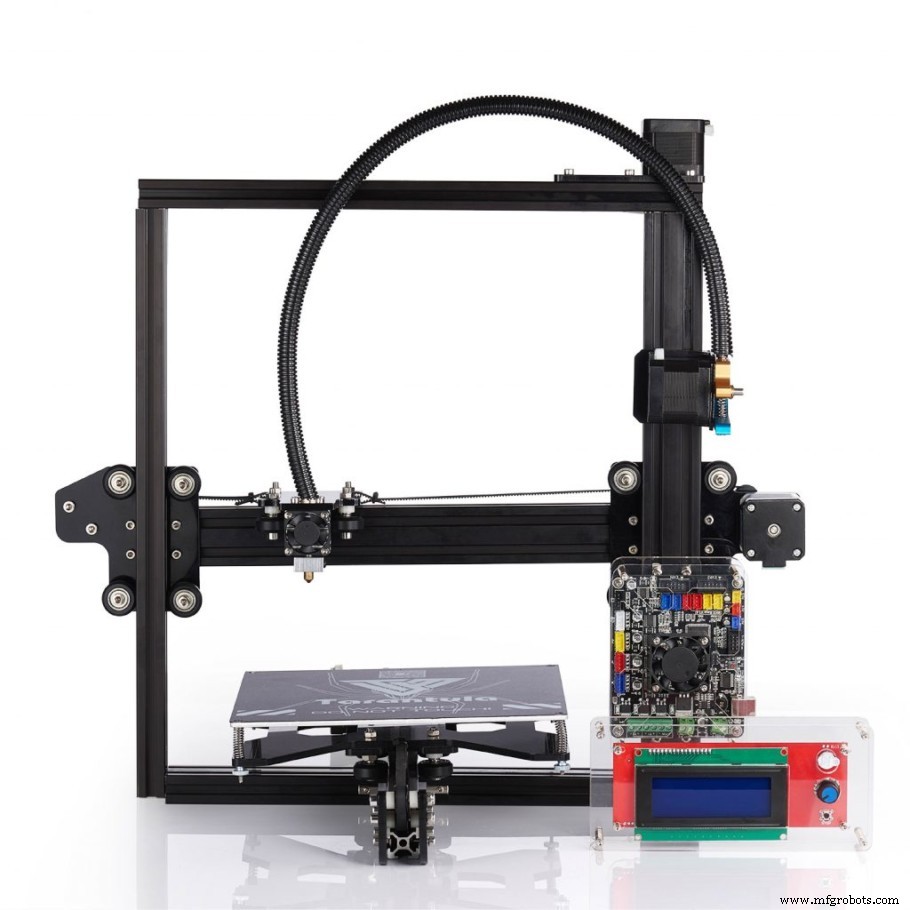
The Tevo Tarantula is based on the Reprap I3 3D printer, which is a proven design that a lot of printers are also based on, and even though it’s already been released a couple years ago it’s still a great little printer that sells for well under $200. Of course, you could also get the pro.
The reason that I included the Tarantula in this list is because it comes as a kit that you need to completely assemble by yourself, and while this may take you a couple hours, you will learn how everything on the printer works, what each component is for, and you will have a much easier time troubleshooting specific issues down the line compared to if you went with a completely assembled printer.
This also means that upgrading and swapping out components will be a breeze for you as well.
In addition to this, it doesn’t feature auto-bed leveling which is actually quite a hard process to learn in the beginning, but it’s an essential skill to learn since it will allow you to use any other 3D printer properly and set the initial layer height without issues in the future.
The Tarantula is a Bowden-style printer, meaning that you will be mainly limited to printing with PLA, ABS, PETG and some forms of TPU, and at temperatures not higher than 245°C since this may cause the PTFE tube to burn slightly and get damaged, plus the fumes that it releases can be harmful to you.
If you’re someone who is technically skilled and who likes to take their time putting a machine like this together, then the Tevo Tarantula is a great buy.
| Extruder Type: | Bowden |
| Bed Leveling Sensor Type: | None |
| Filament Runout sensor | No |
| Build Volume | 200mm X 200mm X 200mm |
| Bed Type | Buildtak |
You can find the TEVO Tarantula here: Amazon, Banggood, 3D Printers Online.
FLSUN Q5 (Delta Printer)
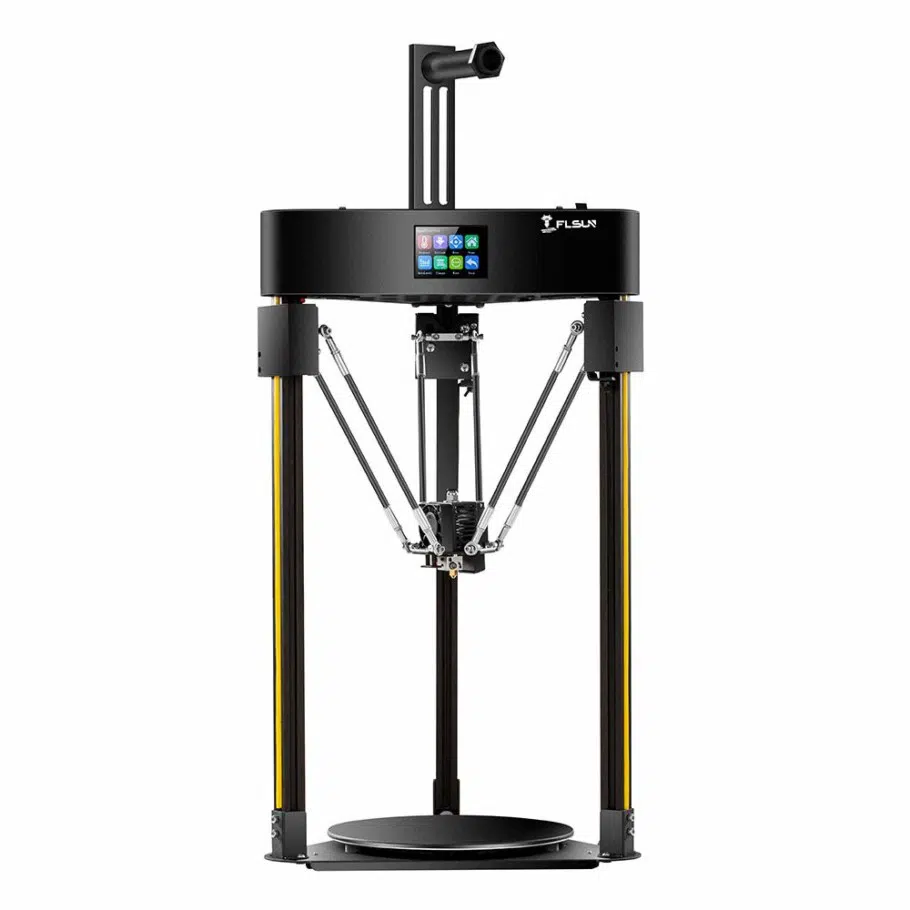
The FLSUN Q5 is a Delta printer, which means that it uses three arms to support the extruder instead of having X, Y, and Z Axis, and each arm can only move up and down, but by moving each arm independently the extruder is able to move in all directions.
Delta printers are known for their high print speeds, and the FLSUN Q5 Delta is no different, plus they are more fun to watch when printing.
The FLSUN Q5 feature a 27-point auto bed leveling system, a 32-bit mainboard, power loss recovery (resumes print without having to start over), and it is a Bowden-style printer, which means that you’ll be a bit more limited on the materials you can use (PLA, PETG, ABS, some TPUs).
The cooling fan is a bit loud and it’s the first part I’d recommend you upgrade once you get the printer, but the stepper motors are very quiet thanks to the mainboard drivers.
Delta printers are known for printing fast, and on paper this machine can print really fast, however, the lack of linear advance results in over- and under-extrusion artifacts at fast speeds, and if you’re not printing huge parts, then the maximum stock acceleration of 1000mm/s² will hinder you quite a bit.
One additional issue is that the screen is handled directly by the mainboard and not by a separate controller, which means that when you update a setting the printer moves may stutter and cause artifacts.
Other than that, the FLSUN Q5 is an amazing printer considering the low price of about $250.
| Extruder Type: | Bowden |
| Bed Leveling Sensor Type: | None |
| Filament Runout sensor | Yes |
| Build Volume | 200mm(diameter)*200m |
| Bed Type | Glass with ceramic goating |
You can find the FLSUN Q5 Delta here: Amazon, Banggood, 3D Printers Online.
Artillery Genius (not Pro)

The Artillery Genius already comes semi pre-assembled and not as a complete DIY kit, meaning that you should have it un and running in about 30 minutes without any hassle, since the instructions are really clear.
It’s fairly more expensive than the previous printers on this section of the list, but it could also be considered a better printer overall since it features a direct drive extruder, which can print with more materials and generally at higher temperatures than a printer with a Bowden extruder, it also comes 2x Z-axis for more stable printing, a filament runout sensor, and more features not included in printers such as the Ender 3, Tevo Tarantula, etc.
The reason I included it in this list is because, even though it costs a little more, you won’t need to upgrade it down the line since it already comes with a direct drive extruder system, and it’s also a bit quieter than the stock Ender 3, for example, making it a great investment for anyone who just wants something that works well.
Lastly, it features a touch screen that makes operating the printer a little easier than having to scroll through the settings using the knob.
| Extruder Type: | Direct Drive (Titan Extruder) |
| Bed Leveling Sensor Type: | None |
| Filament Runout sensor | Yes |
| Build Volume | 220mm X 220mm X 250mm |
| Bed Type | Tempered Glass |
You can find the Artillery Genius here :Amazon, Banggood, 3D Printers Online.
Creality CR-10 Series
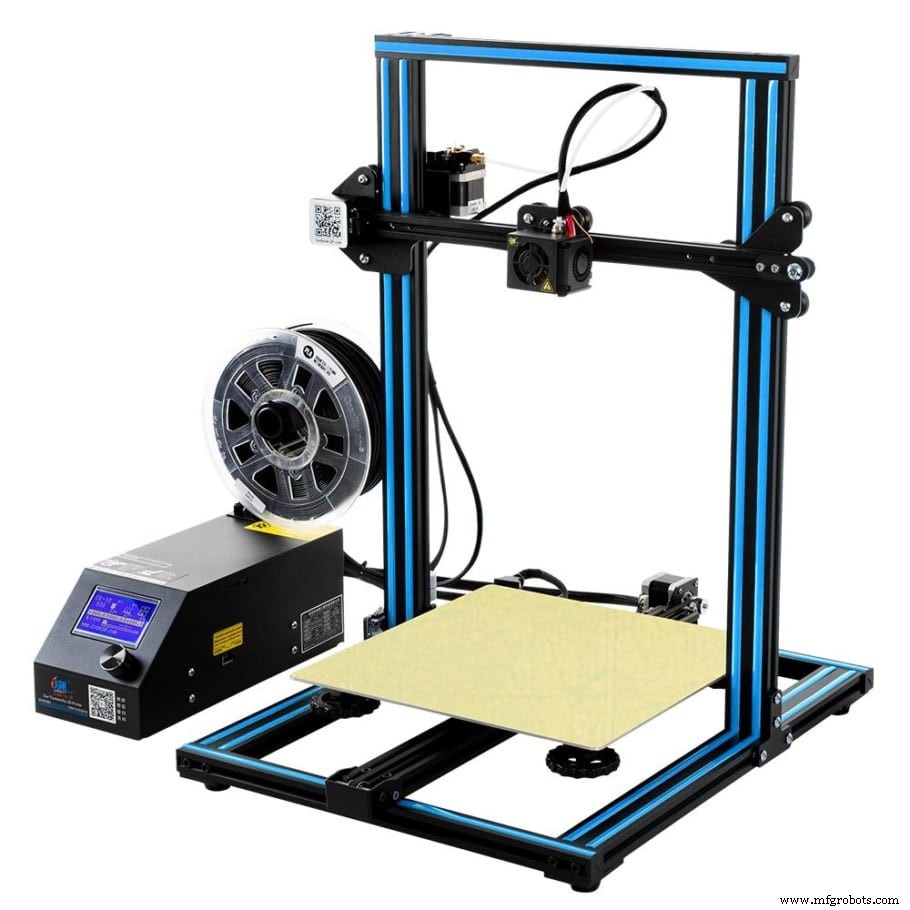
The Creality CR-10 has been one of the best budget printers to ever have been released, and now it’s gone through a couple iterations, each of which comes with some additional built-in features.
The Stock CR-10 is a very barebones machine that comes with just the essentials and it’s very similar to the Ender 3 in almost every regard, with the main difference being print volume, since the CR-10 is much bigger than the Ender 3.
The Original CR-10 features a Bowden extruder, a build volume of 300×300×400mm, and it’s a 12V printer, which makes replacing the cooling fans a lot easier since on printers such as the Ender 3 you need to use buck converters to down-step the voltage from 24V to 12V. However, it doesn’t feature a filament runout sensor, it comes with the 8-bit mainboard that doesn’t feature the silent drivers, and it also doesn’t have auto-bed leveling built-in (can be added later on).
The good news is that it sells for roughly $250, just slightly more than the stock Ender 3, and it’s a much larger printer that has the exact same print quality.
Of course, you could get the “Smart” version of the printer that sells for about $480 and which comes with Auto-Bed leveling already built-in as well as WIFI, is much more silent, comes with a filament runout sensor, and also has a touchscreen instead of the traditional knob.
If you need an affordable printer with a large build volume to get started with, the original CR-10 is definitely the way to go.
| Extruder Type: | Bowden |
| Bed Leveling Sensor Type: | None |
| Filament Runout sensor | Yes |
| Build Volume | 300mm X 300mm X 400mm |
| Bed Type | Tempered Glass |
You can find the Artillery Genius here :Amazon, Banggood, 3D Printers Online.
My Top Recommendation
All of the printers on this list are absolute beasts, and while clearly the best choice would be to go with the Original Prusa I3 M3S+ because of how great of a printer it is, the support you get from Prusa, etc., it’s also a very expensive printer (about $1000). If you have the money and want the best printer you can get below $1000, then that’s the one.
However, for everyone else I’d recommend going with the Ender 3-X, which is essentially the Ender 3 Pro that comes with both the glass and magnetic beds and the 32-bit silent mainboard, and it generally sells for less than the stock Ender 3.
The reason I would go with the Ender 3-x is because of how great the whole Ender 3 community is and you can also download a whole bunch of printable upgrades for free to make the printer better, upgrading components is easy and affordable, installing silent Noctua fans is also pretty straight forward, etc., and all of this for less than $200, usually… I purchased mine for $180 but I’ve also seen it being sold for $300.
I hope this information was useful!
좋은 하루 되세요!
Check out our recommended products section
We created a recommended products section that will allow you to remove the guesswork and reduce the time spent researching what printer, filament, or upgrades to get, since we know that this can be a very daunting task and which generally leads to a lot of confusion.
We have selected just a handful of 3D printers that we consider to be good for beginners as well as intermediates, and even experts, making the decision easier, and the filaments, as well as the upgrades listed, were all tested by us and carefully selected, so you know that whichever one you choose will work as intended.


