이 프로젝트 정보
진정한 스마트 박스 플랫폼은 정말 유용한 박스(tm)를 재고 모니터링을 위한 지능형 인터넷 연결 보관 박스로 바꿉니다. Sigfox Arduino MKR FOX 1200을 기반으로 온도 및 습도와 함께 상자에 저장된 물건의 무게를 감지하고 저전력 Sigfox 라디오를 사용하여 이 정보를 전달합니다.
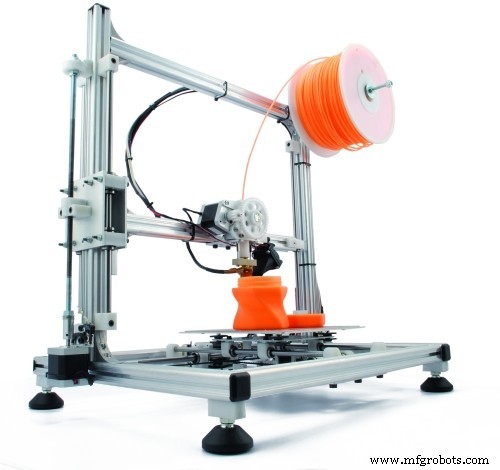
사용 사례 - 3D 프린터 필라멘트 보관:
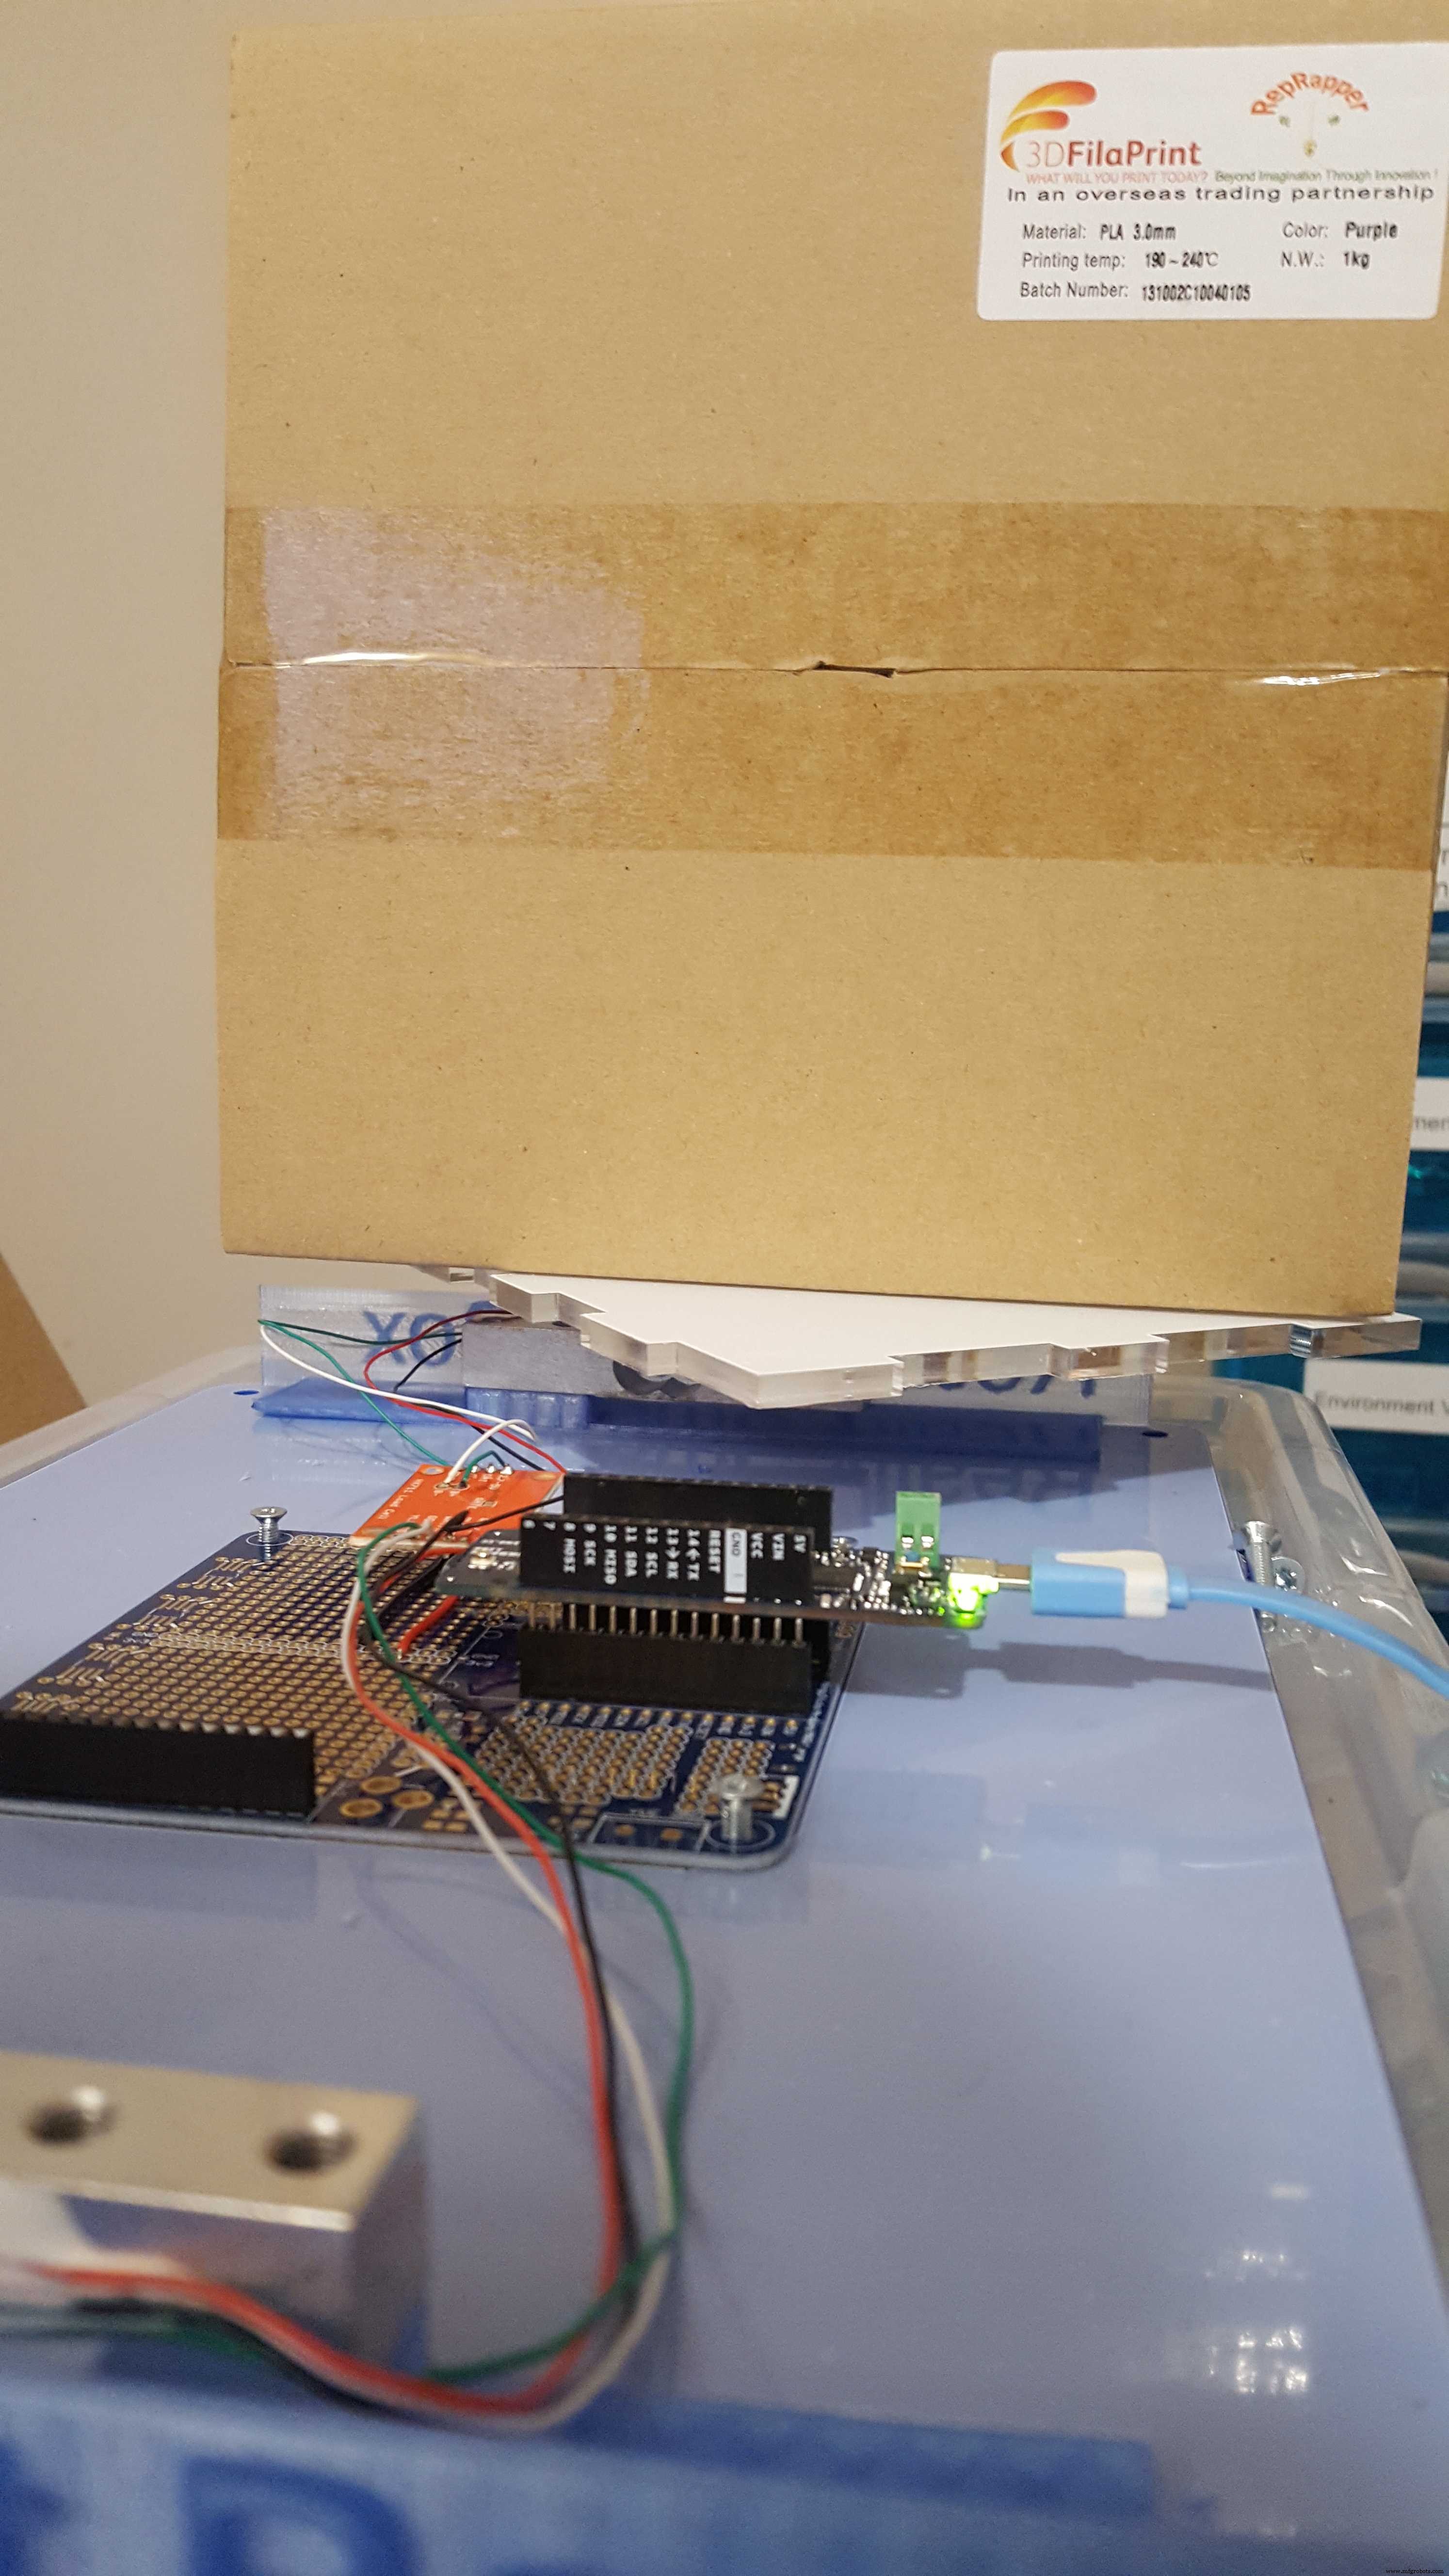
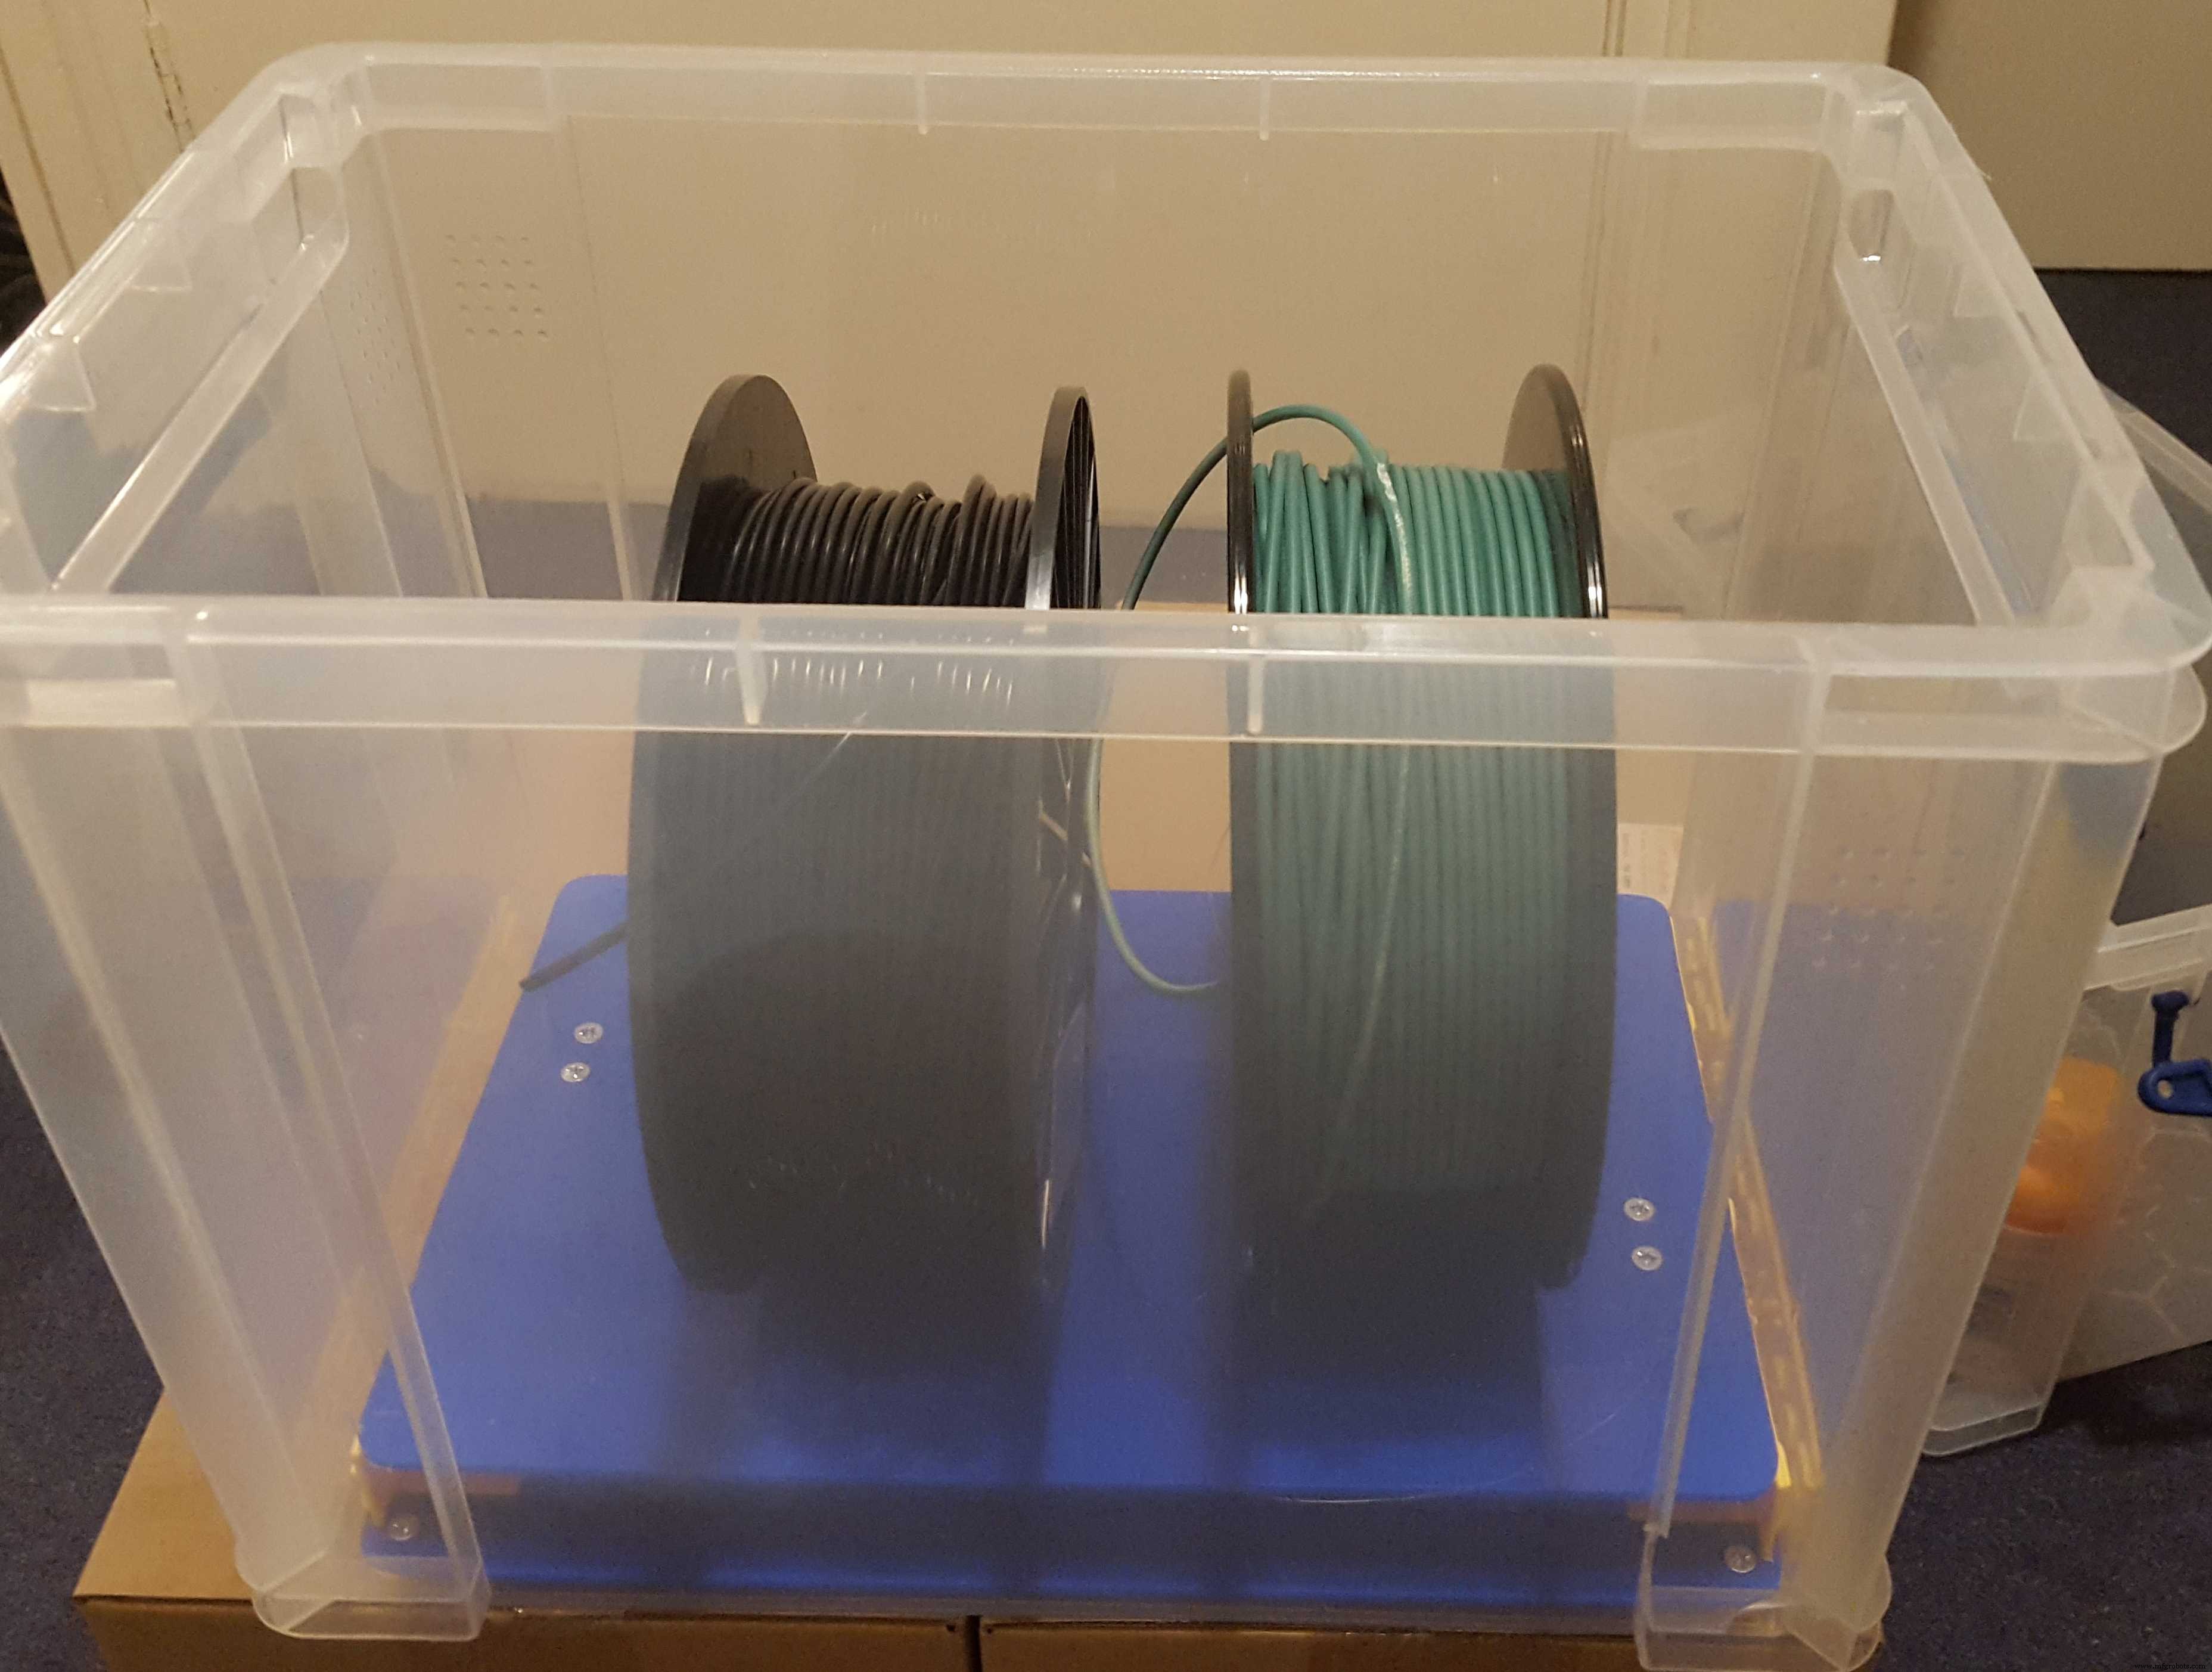
3D 프린터를 소유하고 있다면 필라멘트를 보관하는 방법에 대해 가장 걱정할 것입니다. 이는 프린터 필라멘트뿐만 아니라 허용 가능한 온도 및 습도 범위 내에서 보관해야 하는 다른 많은 것들이 해당됩니다(예:영하의 온도까지).
지역 메이커 공간에서 3D 프린터를 유지 관리하는 책임자 중 한 사람으로서 저는 필라멘트 재고가 충분하고 건조한 상태로 유지되도록 해야 합니다.
정말 스마트한 상자를 사용하면 필라멘트의 무게를 모니터링할 수 있으므로 실리카겔을 교체해야 하는지 여부를 알려주기 위해 상자의 습도 수준을 모니터링하는 것과 함께 필라멘트가 낮아지는지 알 수 있습니다.

사용 사례 - 소모품 재고 관리:
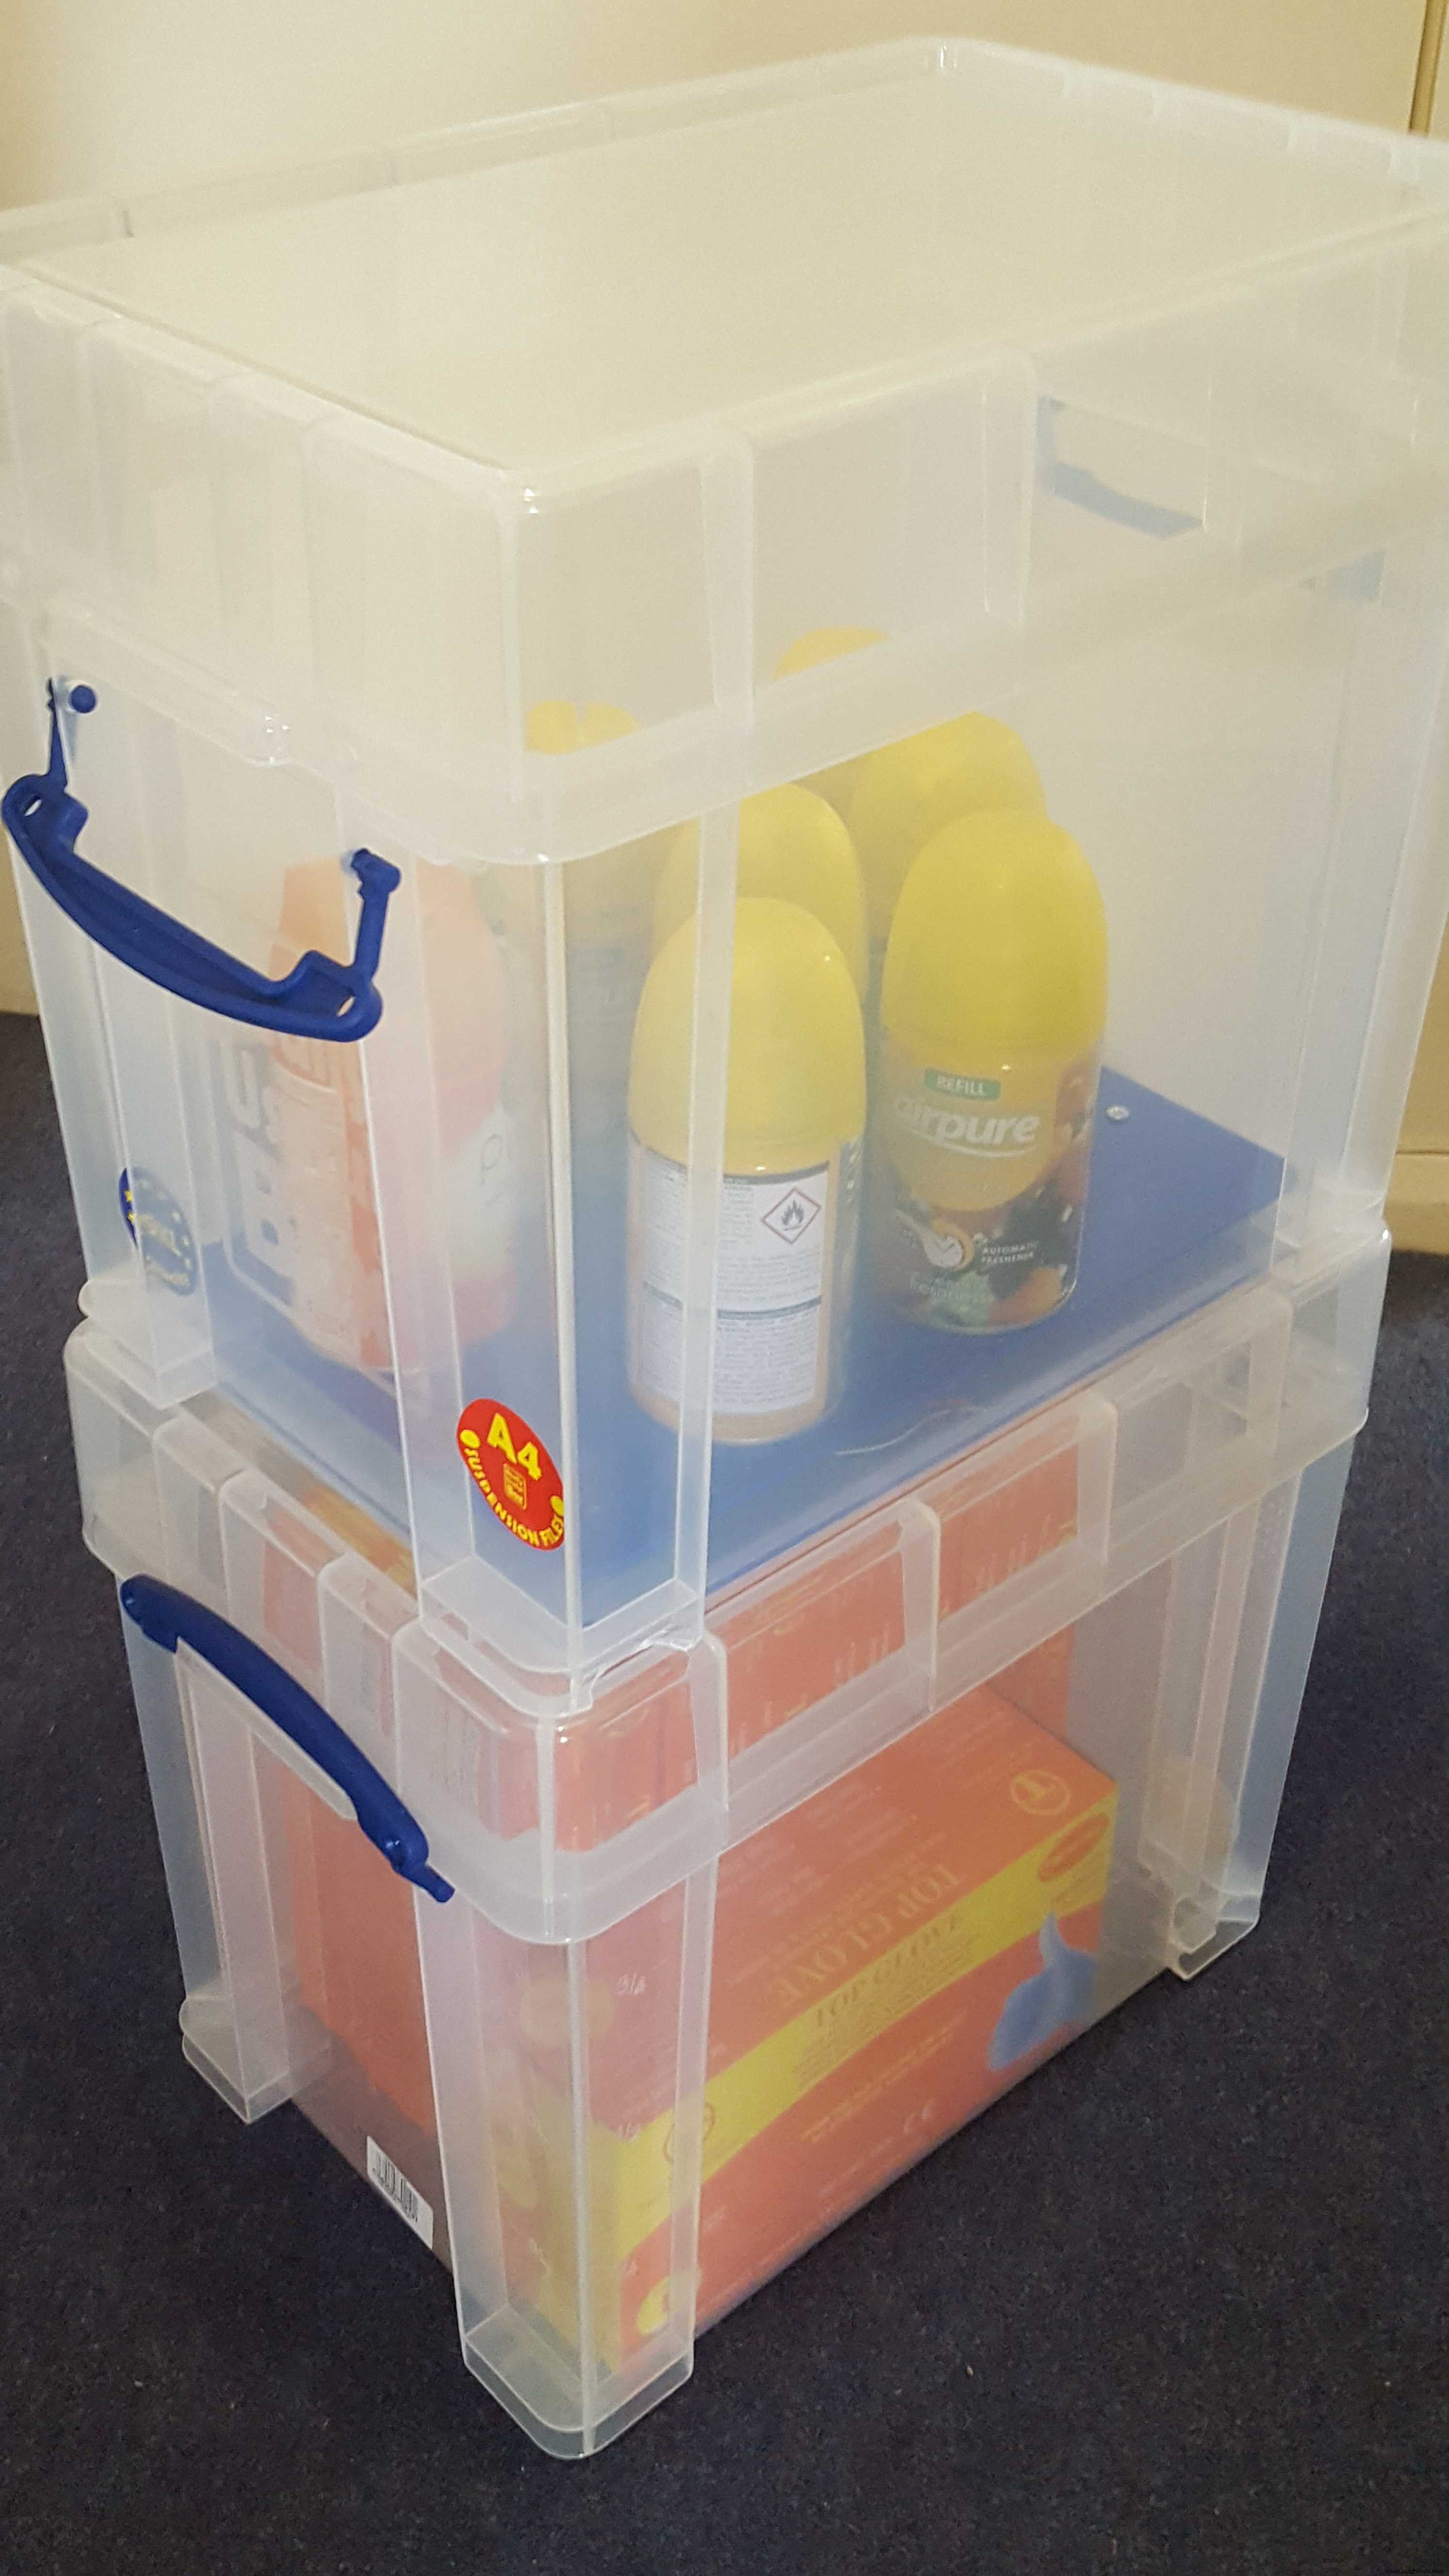
청소 계약자는 공기 청정제, 손 비누 또는 기타 소모품을 고객 사이트에 보관하기를 원할 수 있습니다. 클라이언트는 계약자가 없을 때 계약자 WiFi 액세스를 허용하거나 이와 같은 장치에 전원을 공급하는 것을 허용하지 않을 수 있지만 계약 회사는 다음을 수행해야 합니다. 새로운 재고를 언제 보내야 하는지 알고, 청소 시간과 아무도 좋아하지 않는 추가 서류 작업에 간접비를 추가합니다.
Real Smart Box 플랫폼은 Sigfox를 사용하기 때문에 클라이언트 네트워크에 연결할 필요가 없고 저전력이므로 한 세트의 배터리로 실행되기 때문에 단순히 스토리지 상자에 떨어집니다. 상자의 내용물이 매우 드물게 변경되기 때문에 Arduino는 배터리 수명을 연장하는 데 도움이 되는 대부분의 시간 동안 저전력 상태로 유지될 수 있습니다.
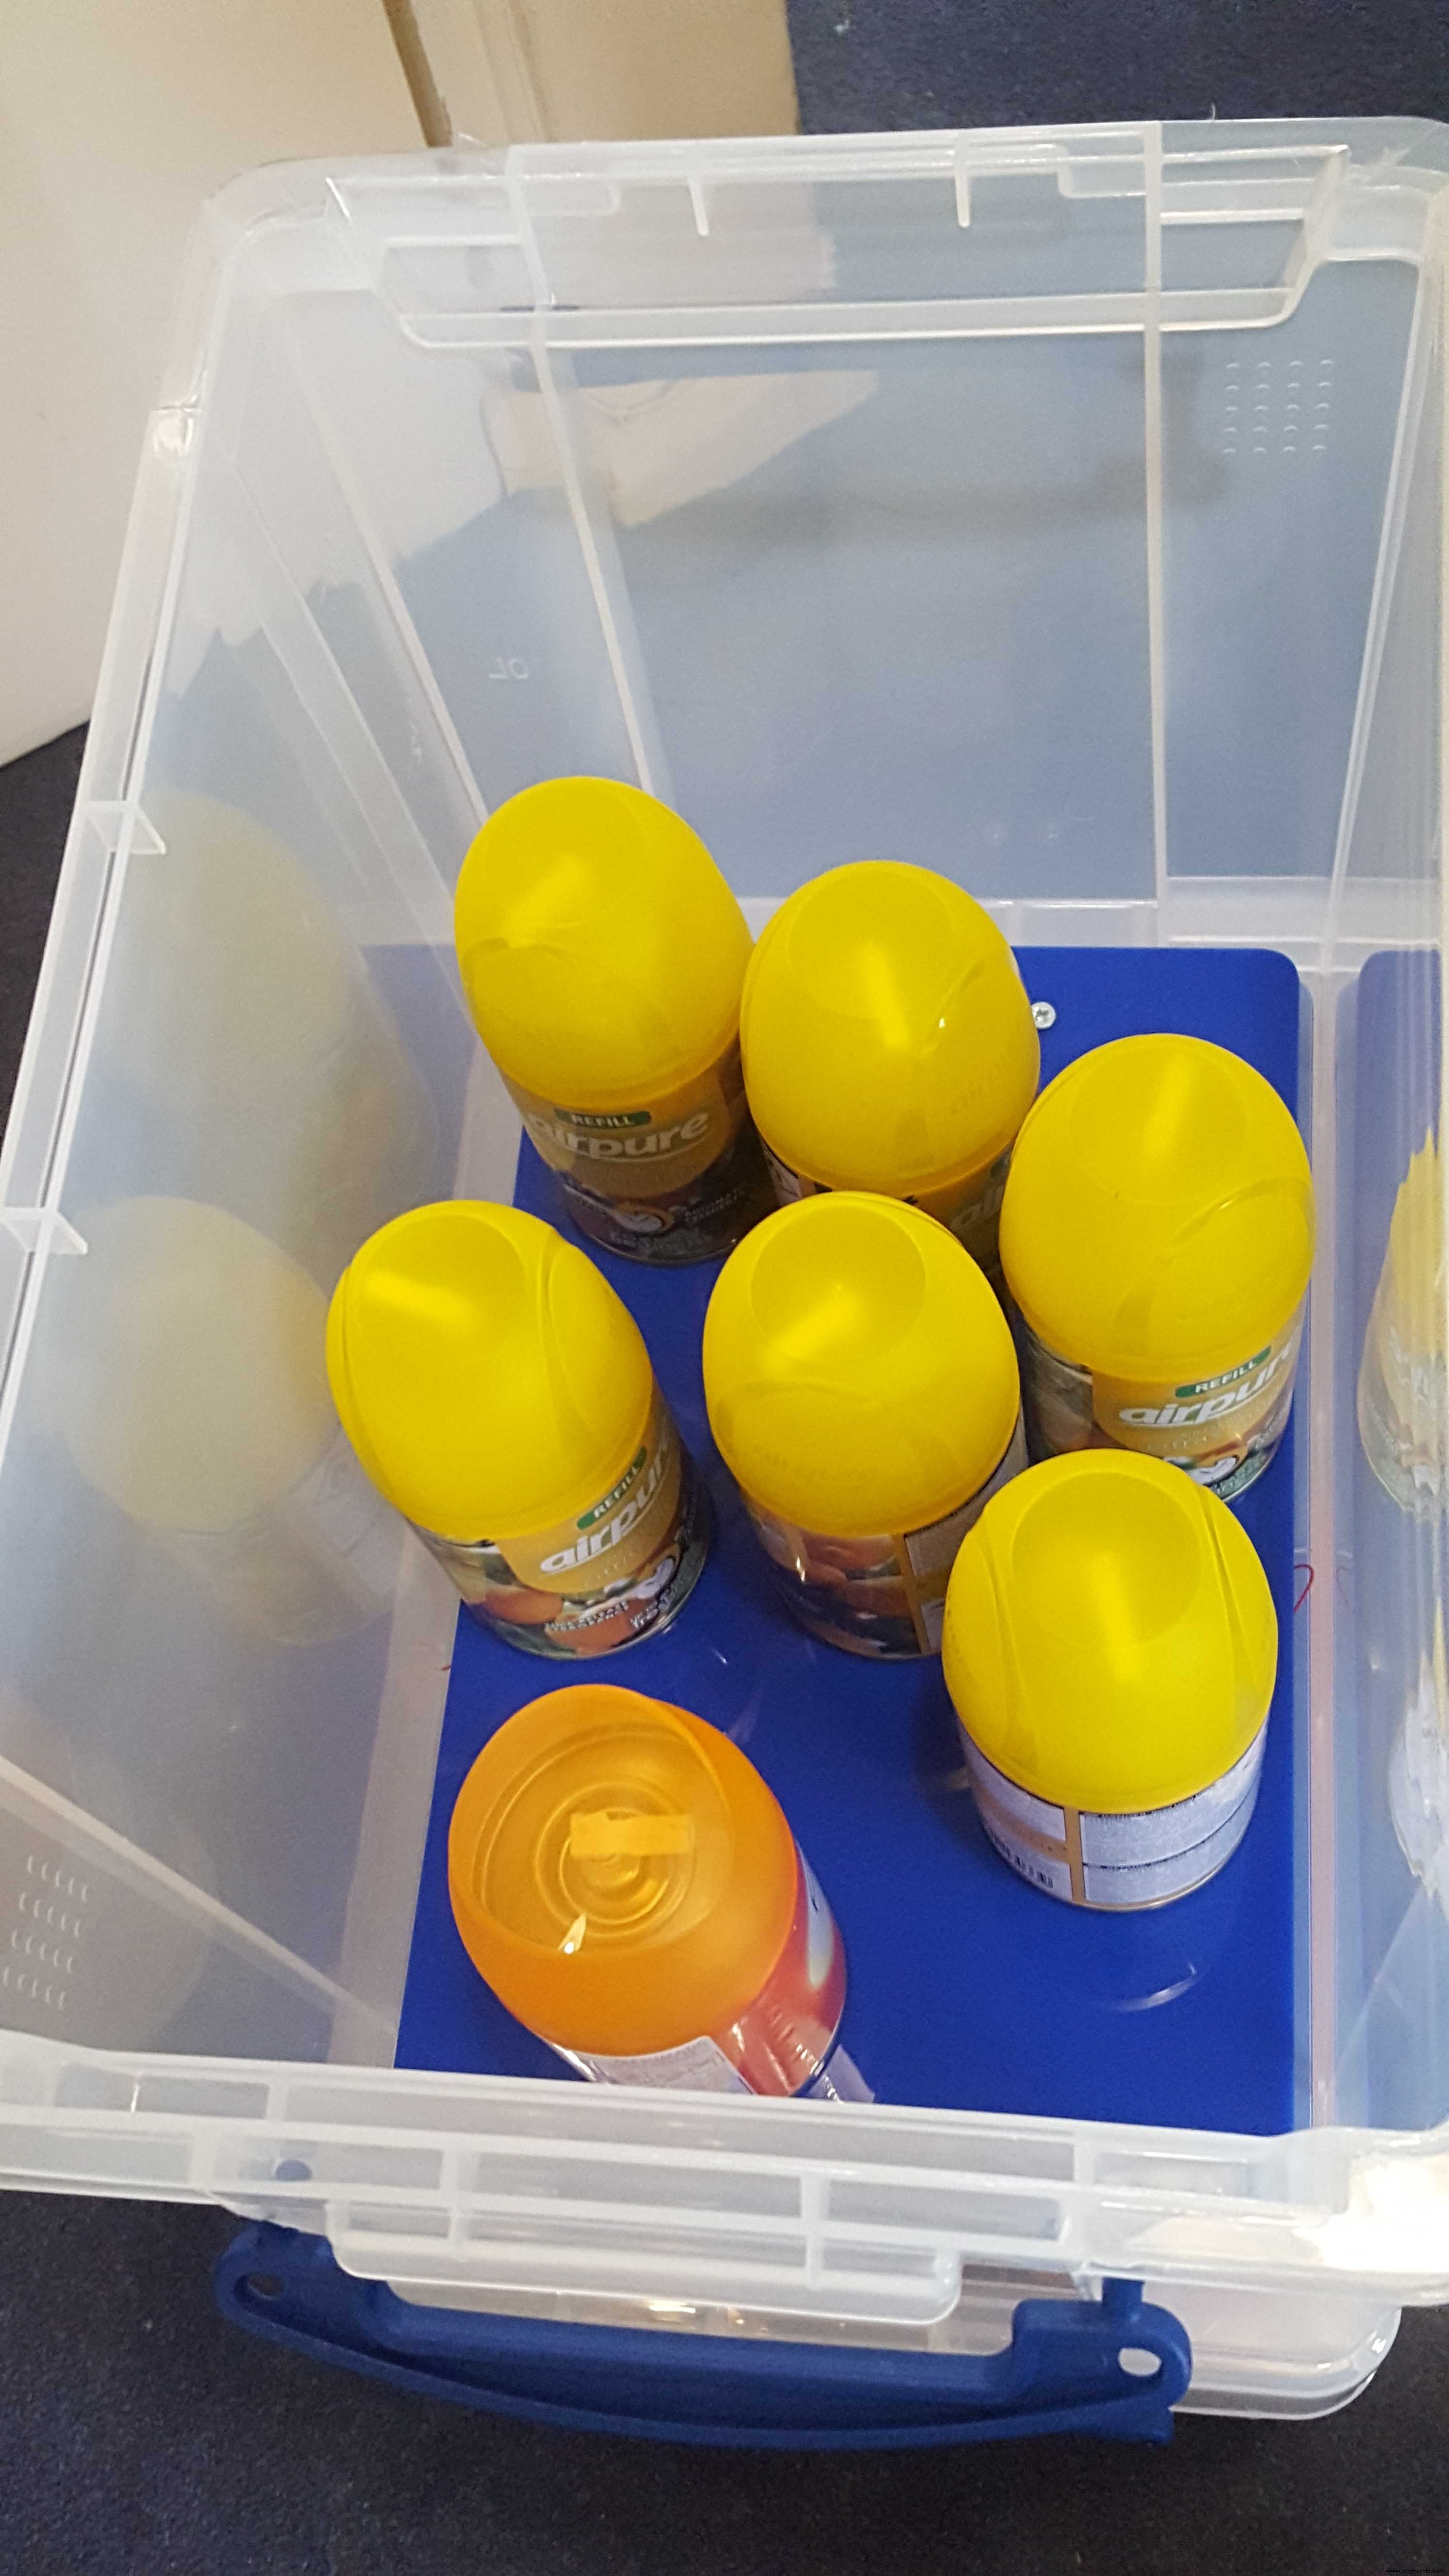
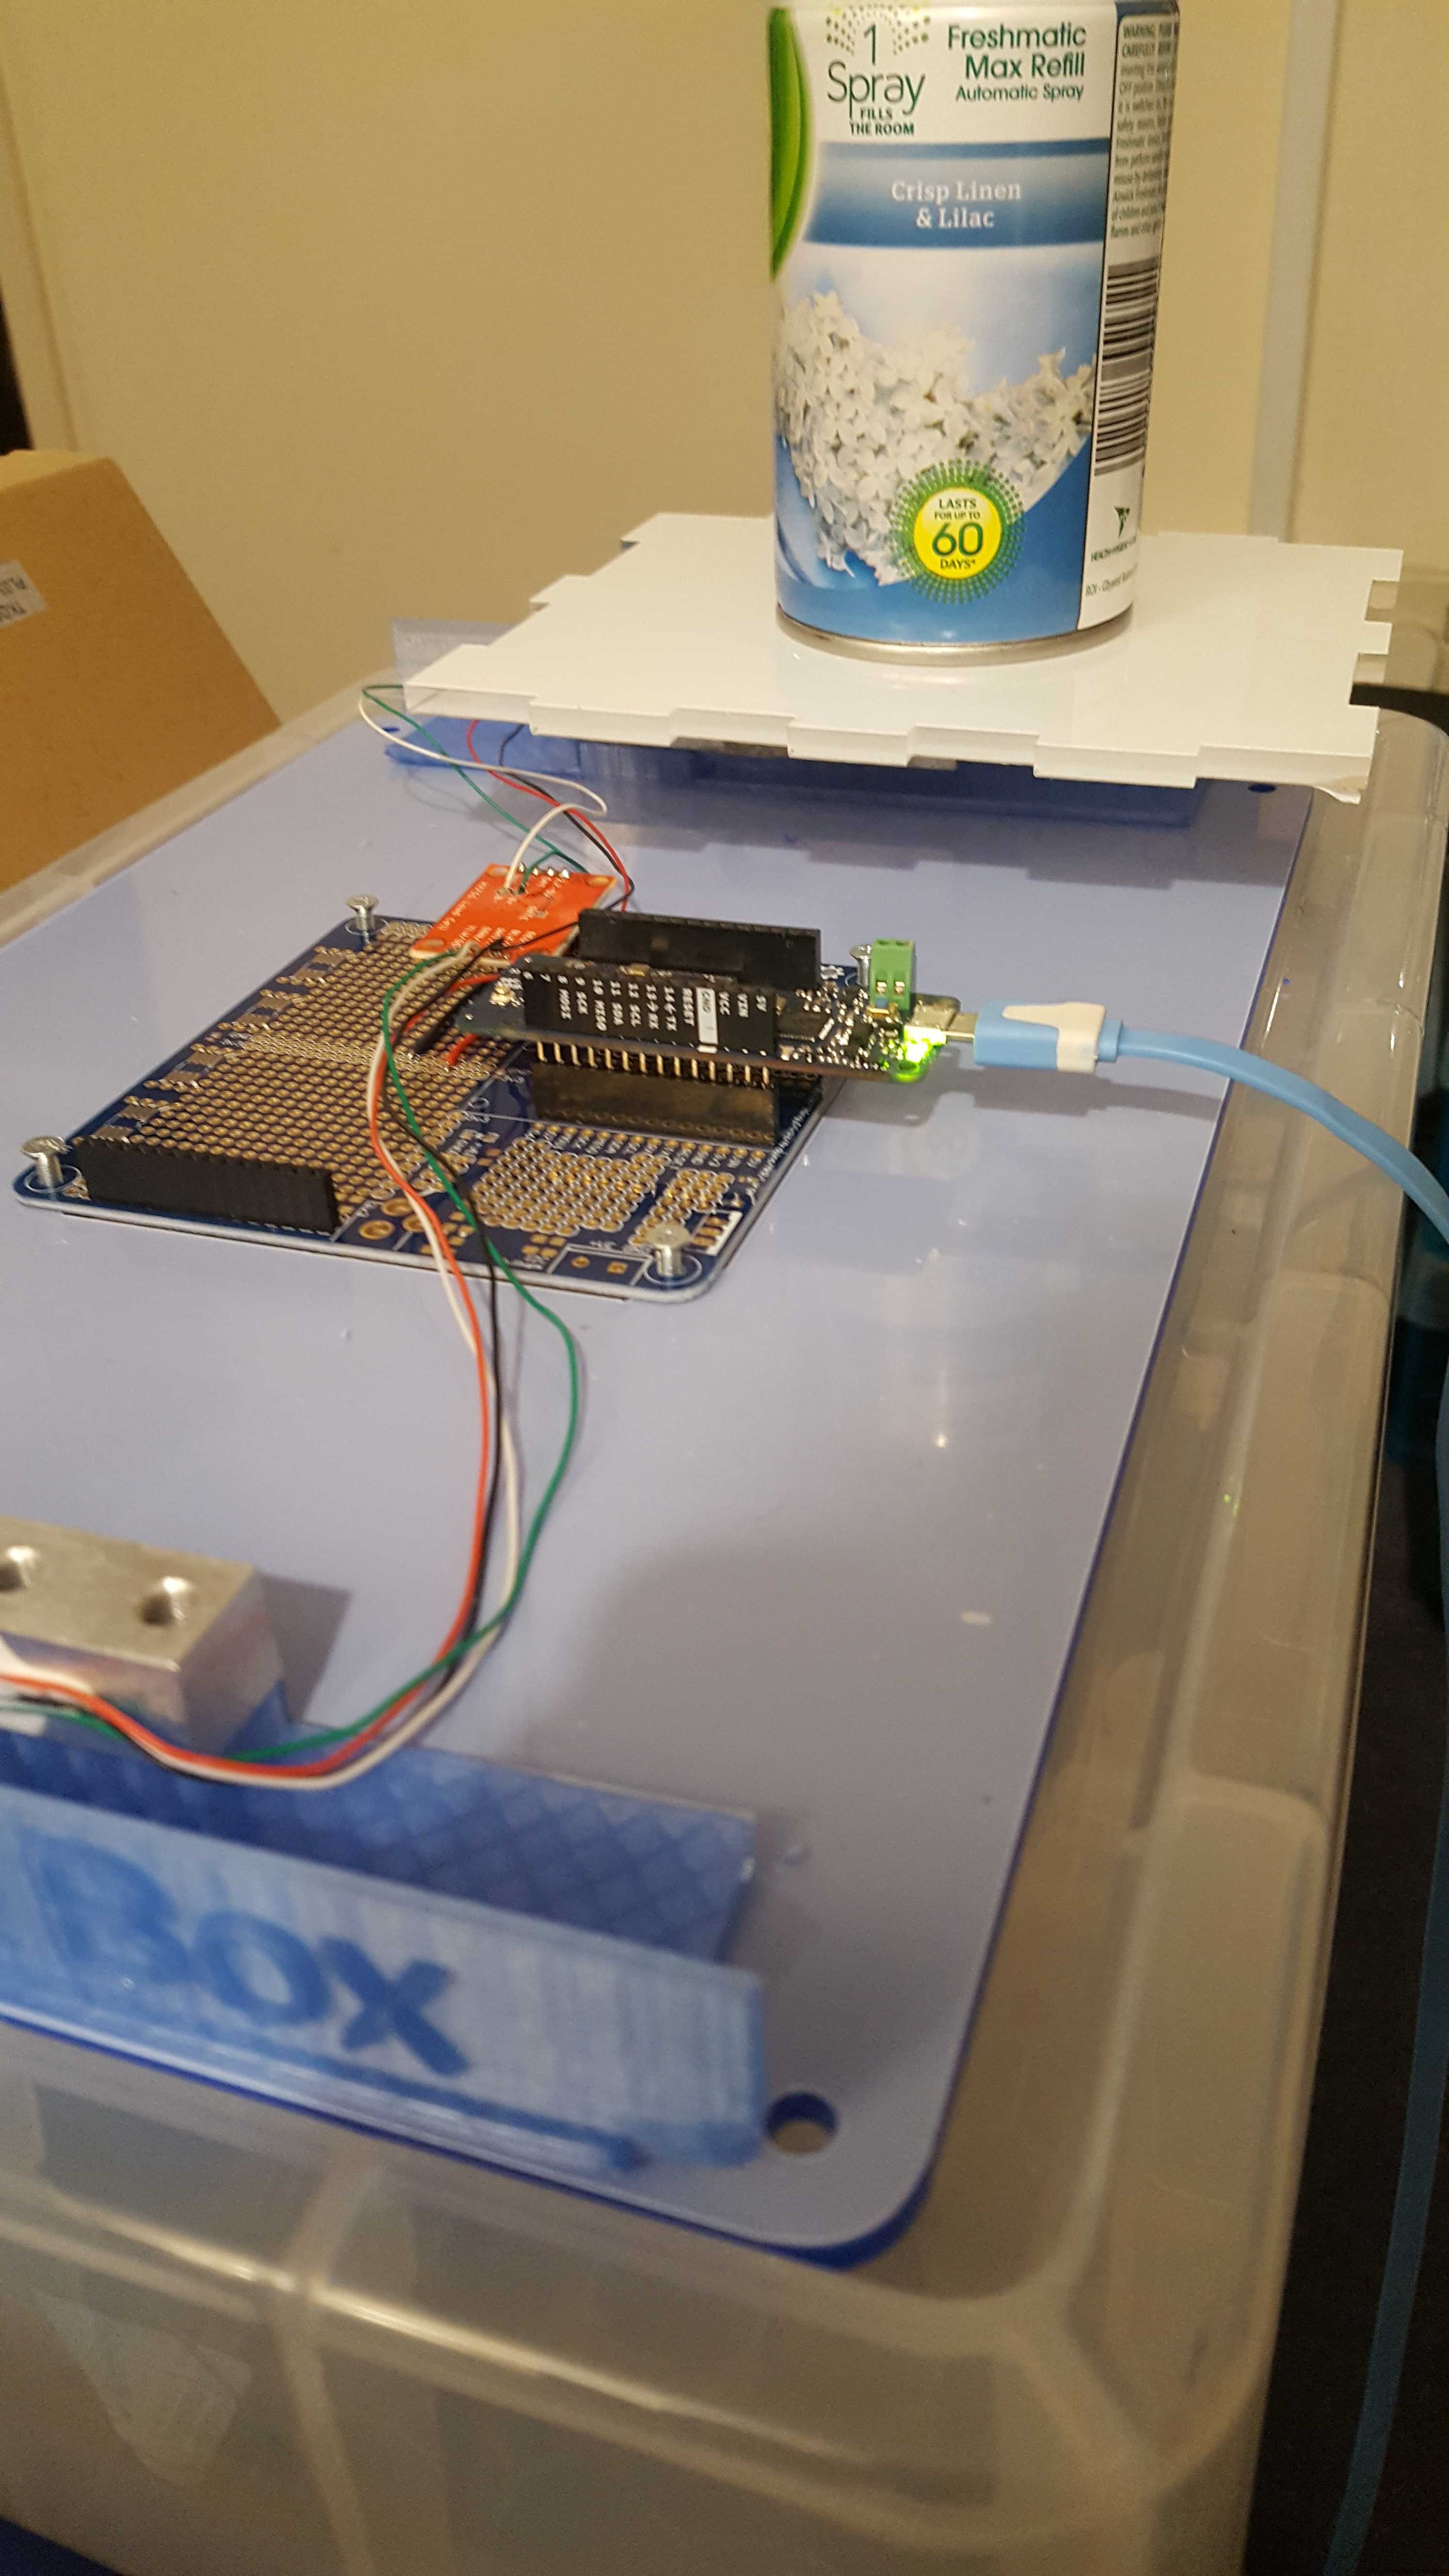
플랫폼은 상자에 보관된 품목 유형(즉, 방향제)의 무게를 알 수 있으므로 상자에 얼마나 들어 있는지 계산할 수 있습니다. 그런 다음 이 정보를 청소 계약자 회사로 보내어 고객 사이트에 더 많은 양의 연료를 공급해야 할 때 이를 알릴 수 있습니다.
플랫폼 만들기:
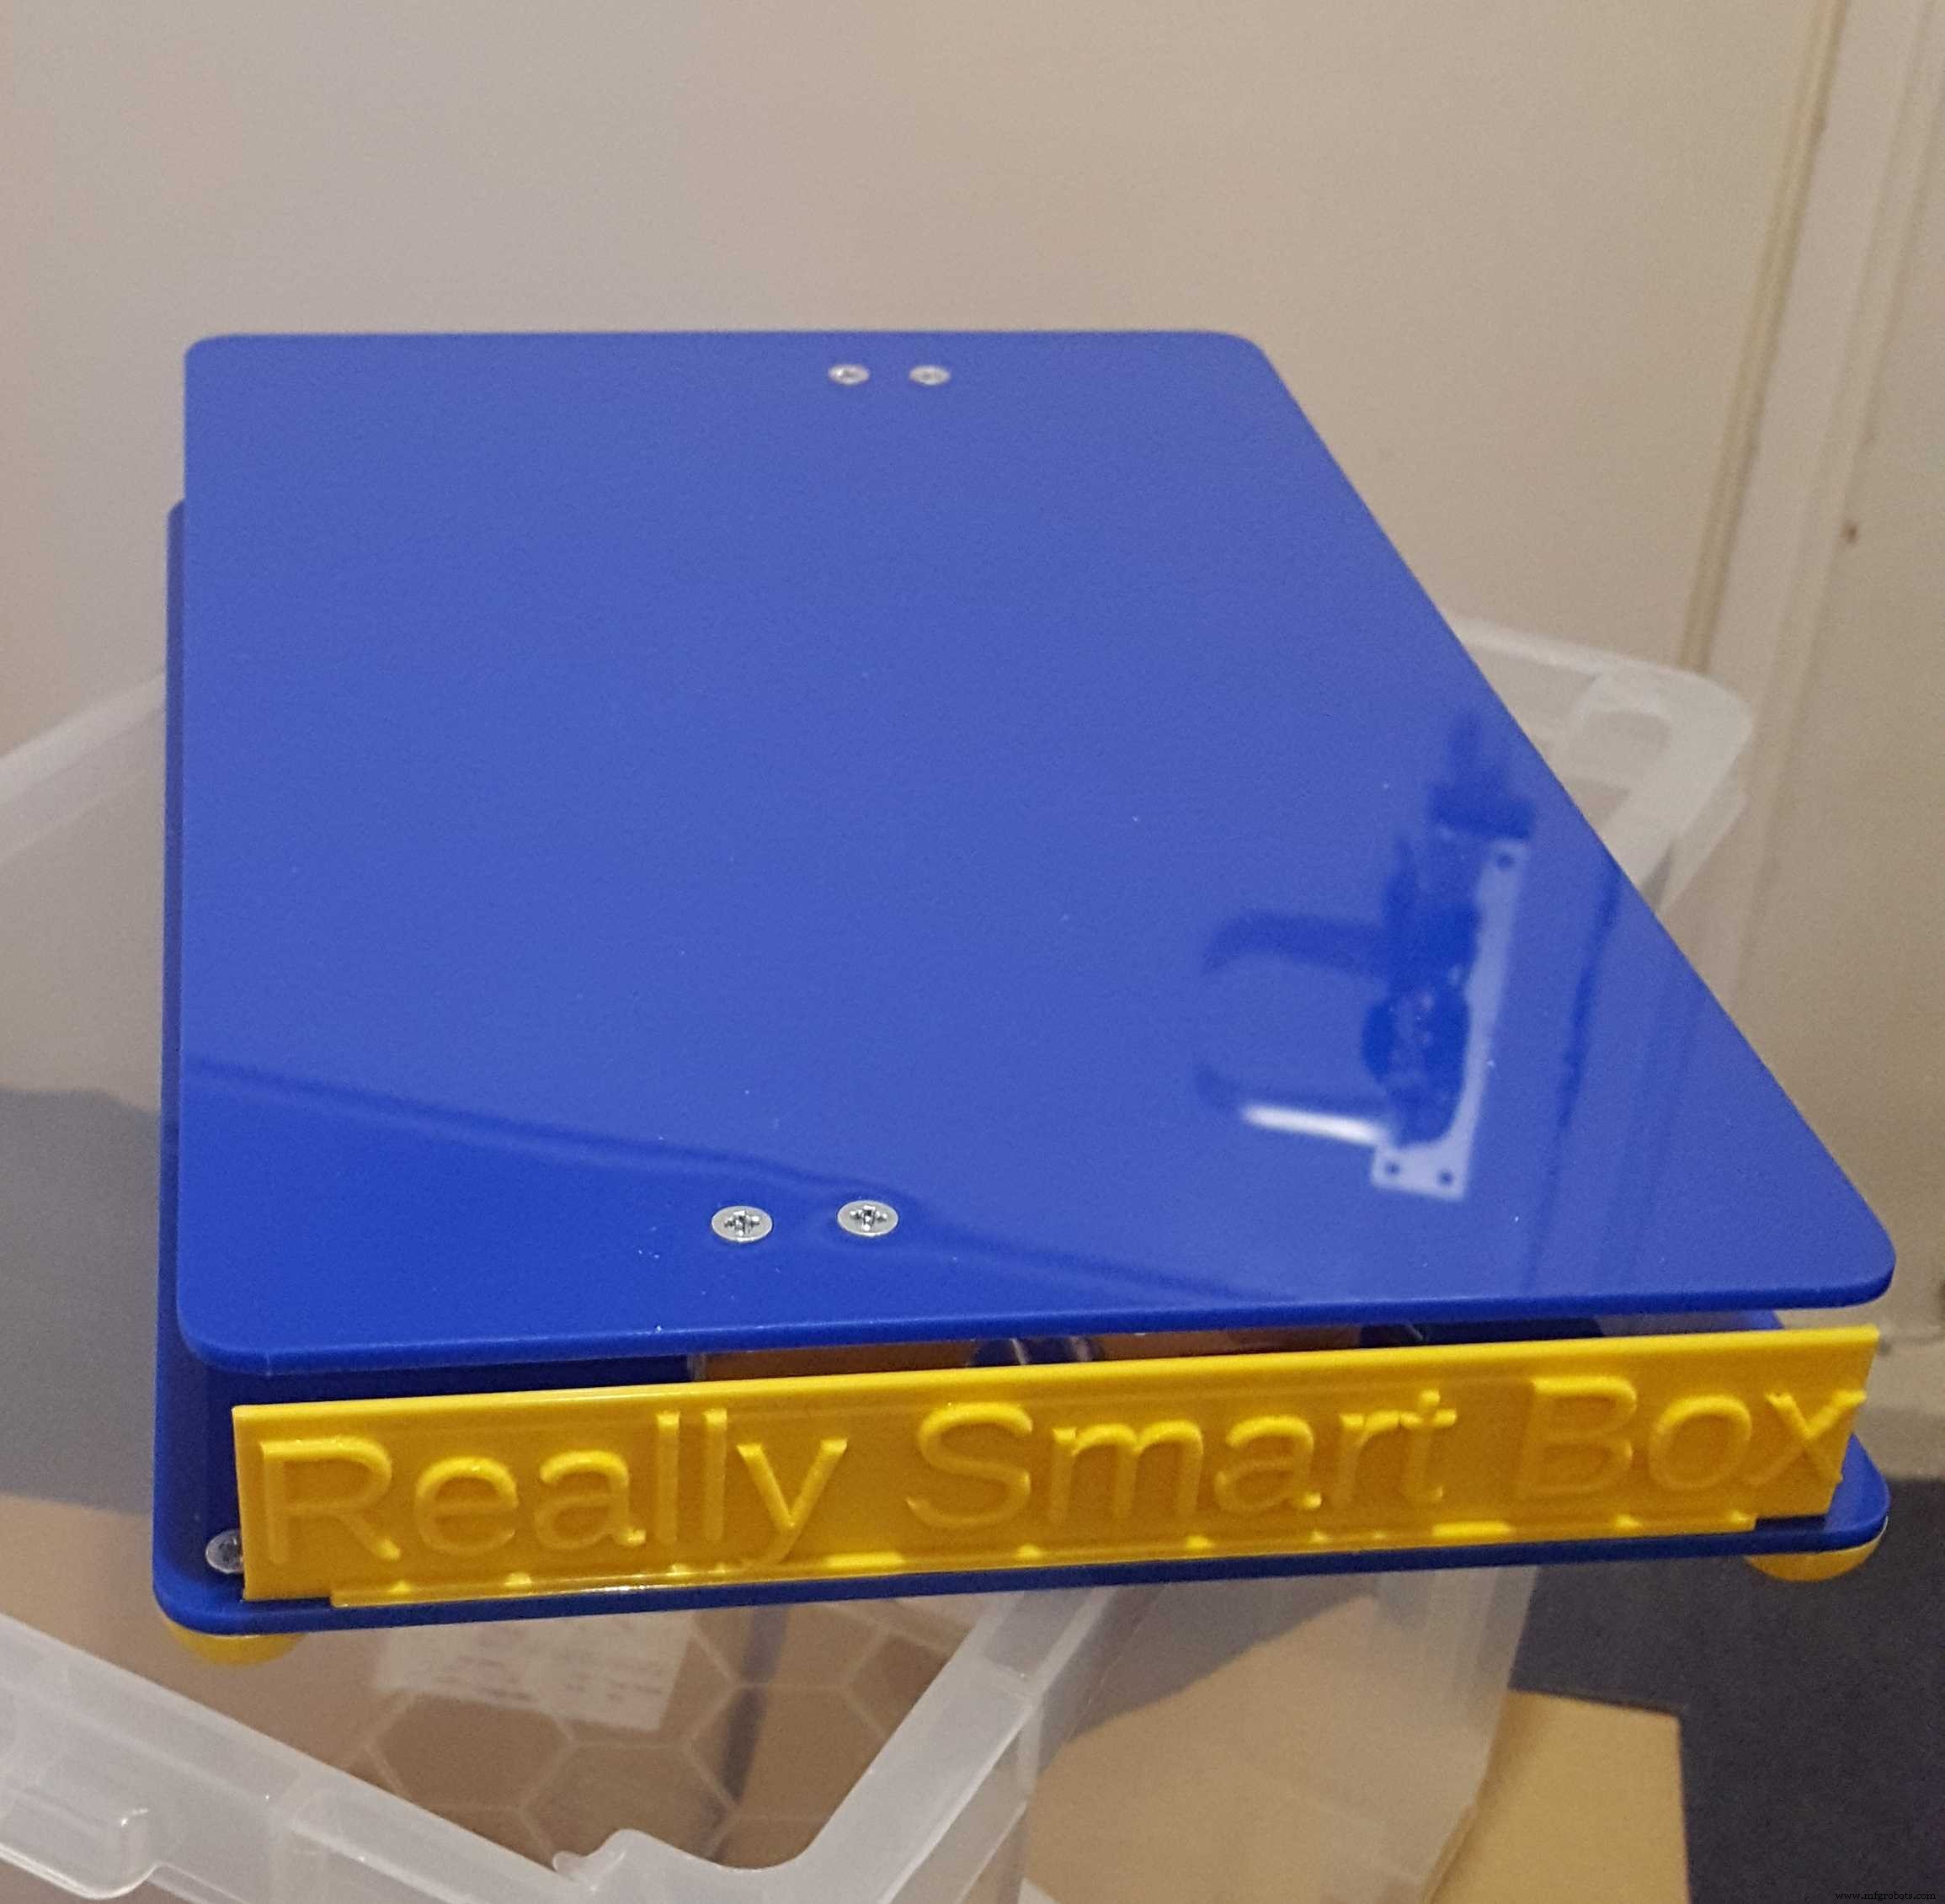
플랫폼은 간단한 구조로 되어 있으며 본체는 두 장의 레이저 컷 아크릴(저는 3mm를 사용했습니다. 프린터 필라멘트와 같은 무거운 품목의 경우 더 두꺼운 것이 좋습니다)과 그 사이에 한 쌍의 로드 셀로 구성되어 있습니다.
더 좋은 마무리를 제공하기 위해 로드 셀의 나사 구멍을 수동으로 카운터 싱크했습니다. 카운터 싱크를 수행하는 레이저 커터를 아직 찾지 못했습니다!
아크릴은 원하는 상자에 맞게 원하는 크기로자를 수 있지만 로드 셀의 위치와 와이어 길이가 상당히 짧기 때문에 주의하십시오. 상단 아크릴 시트는 상자 측면에 걸리지 않도록 하단보다 약간 작습니다.
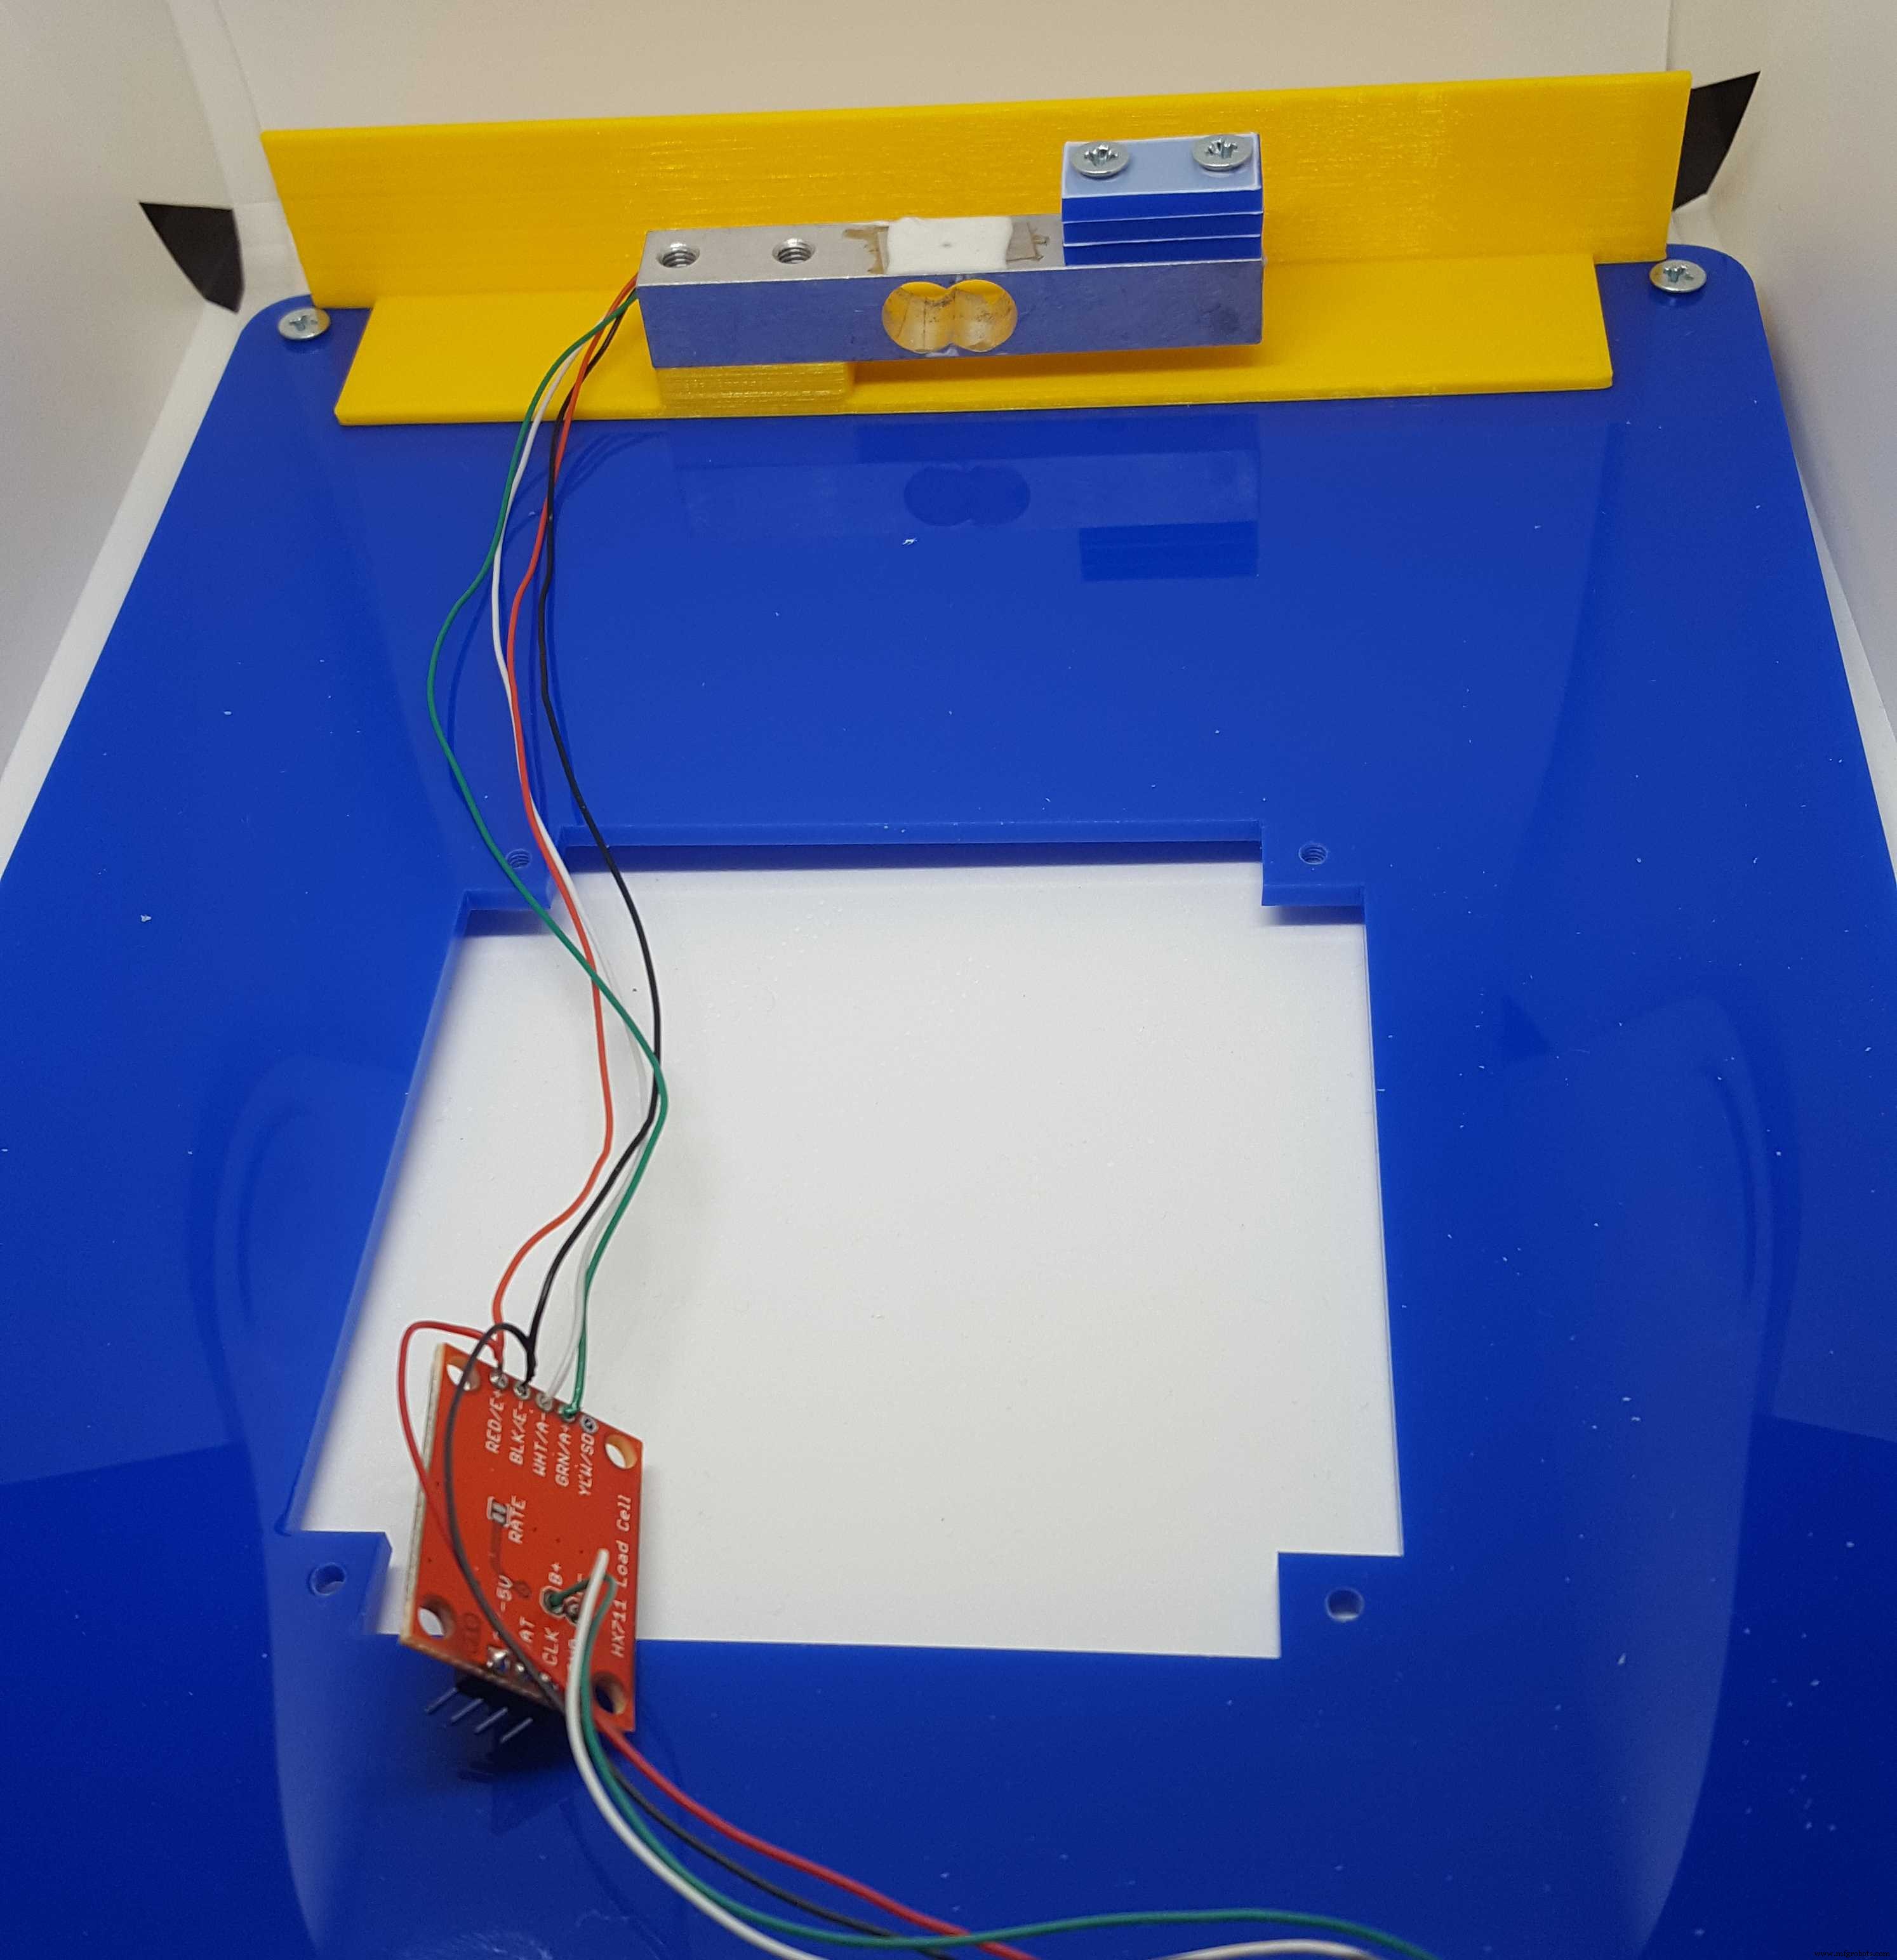
하단 시트에는 전자 장치가 스페이서 없이 아크릴에 장착되고 납땜된 장치 다리가 관통하도록 하는 컷아웃이 있습니다. 컷아웃의 모서리 부분에 M3 탭을 사용하여 PCB에 직접 볼트로 고정했습니다. 아크릴과 같은 높이가 아닌 로드 셀의 나사가 저울에 영향을 미치지 않도록 3D 인쇄된 발도 모서리에 맞춰졌습니다.

무게는 2개의 5Kg 로드셀을 사용하여 감지됩니다. 4개 세트는 일반적으로 욕실 저울에 사용되며 이것이 더 나을 수도 있지만 아크릴에 고정하고 전자 제품에 필요한 간격을 제공하는 좋은 방법을 찾지 못했습니다.
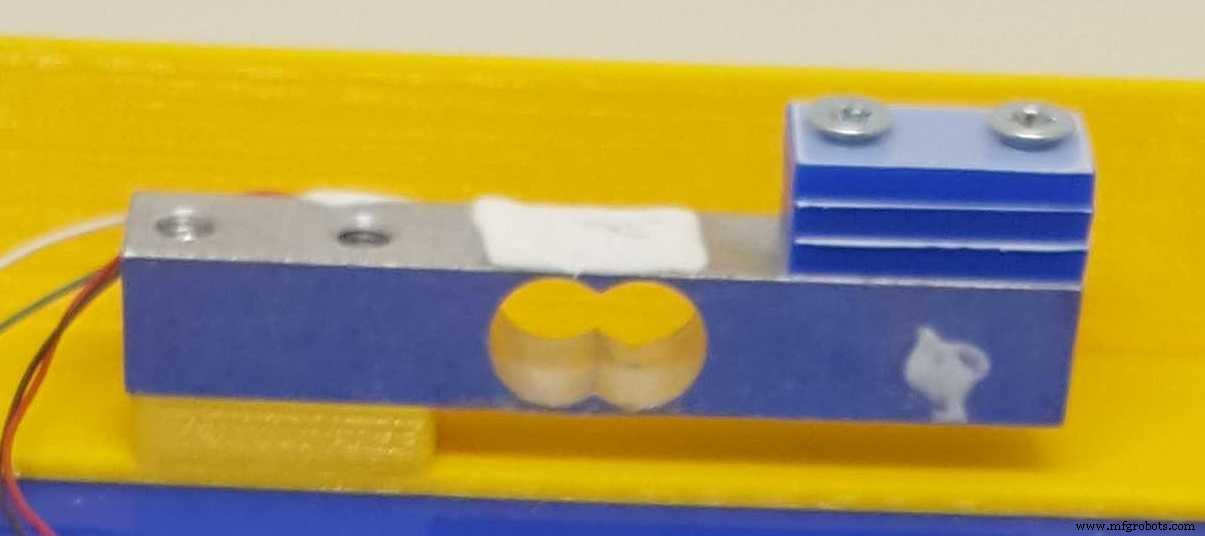
로드 셀은 약간의 굴곡을 허용하기 위해 상단과 하단에 약간의 패딩이 필요하며 로드 셀의 실제 스트레인 게이지 센서(사진의 흰색 부분)는 장착 블록보다 뚱뚱합니다. 이것은 로드 셀을 위로 올릴 수 있는 작은 블록이 있는 두 개의 "Really Smart Box" 3D 인쇄 엔드 플레이트를 사용하여 로드 셀 아래에서 달성되며 로드 셀 상단에는 일부 레이저 절단 아크릴 패딩 블록이 있습니다.
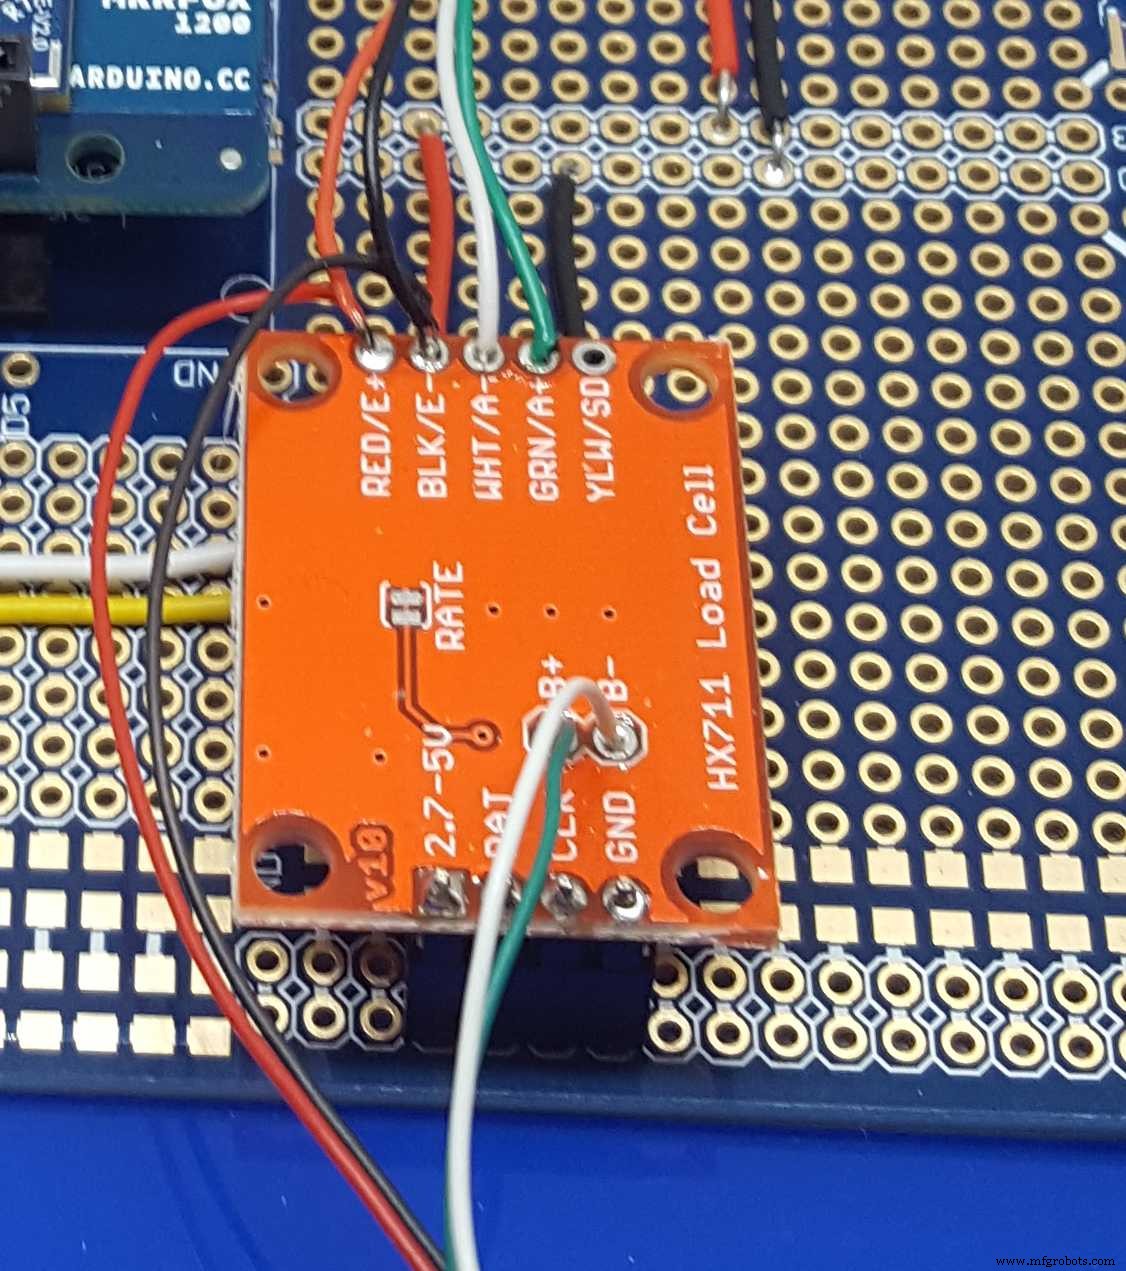
로드셀은 HX711 로드셀 증폭기에 연결됩니다. 이 용도에 적합한 두 개의 채널(A 및 B)을 선택할 수 있습니다.
각 로드 셀은 Wheatstone 브리지 구성의 스트레인 게이지로 구성되며, 이는 로드 셀이 부하 상태에 놓이면 스트레인 게이지의 저항이 변경되어 두 전위 디바이더 사이의 차이가 생성되는 불균형한 쌍의 전위 분배기를 생성합니다. , 이것은 우리를 위해 아날로그에서 디지털로 변환을 수행하는 HX711에 의해 증폭되고 측정됩니다.
저는 이 프로젝트를 위해 2개의 5kg 로드셀을 사용했으며, 정확히 동일하지만 다른 감도로 작동하는 다른 등급(예:1kg 및 10kg)을 얻을 수 있습니다.
로드 셀을 배치할 때 셀 끝에 있는 화살표가 아래를 가리키는지 확인하십시오(하중 방향). 셀의 한쪽 끝(일반적으로 고정 끝)에 M5 탭 구멍이 있고 다른 쪽 끝(하중을 놓는 쪽)에는 M4 탭이 있습니다.
빨간색/검은색 와이어는 전원이며, 이는 전위 분배기의 상단과 하단에 공급되며 두 로드 셀 간에 공유됩니다. 녹색과 흰색은 전위 분배기 중간의 감지 와이어로, HX711의 채널 A와 B에 연결됩니다.
HX711은 3가지 게인 팩터를 지원하지만 채널 선택에도 사용됩니다. 128 및 64의 게인은 A 채널에서 사용할 수 있으며 32의 게인을 선택하면 B 채널이 선택됩니다. 이것은 우리의 두 번째 채널이 메인 채널만큼 민감하지 않다는 것을 의미합니다. 이것은 이 애플리케이션에 적합합니다.
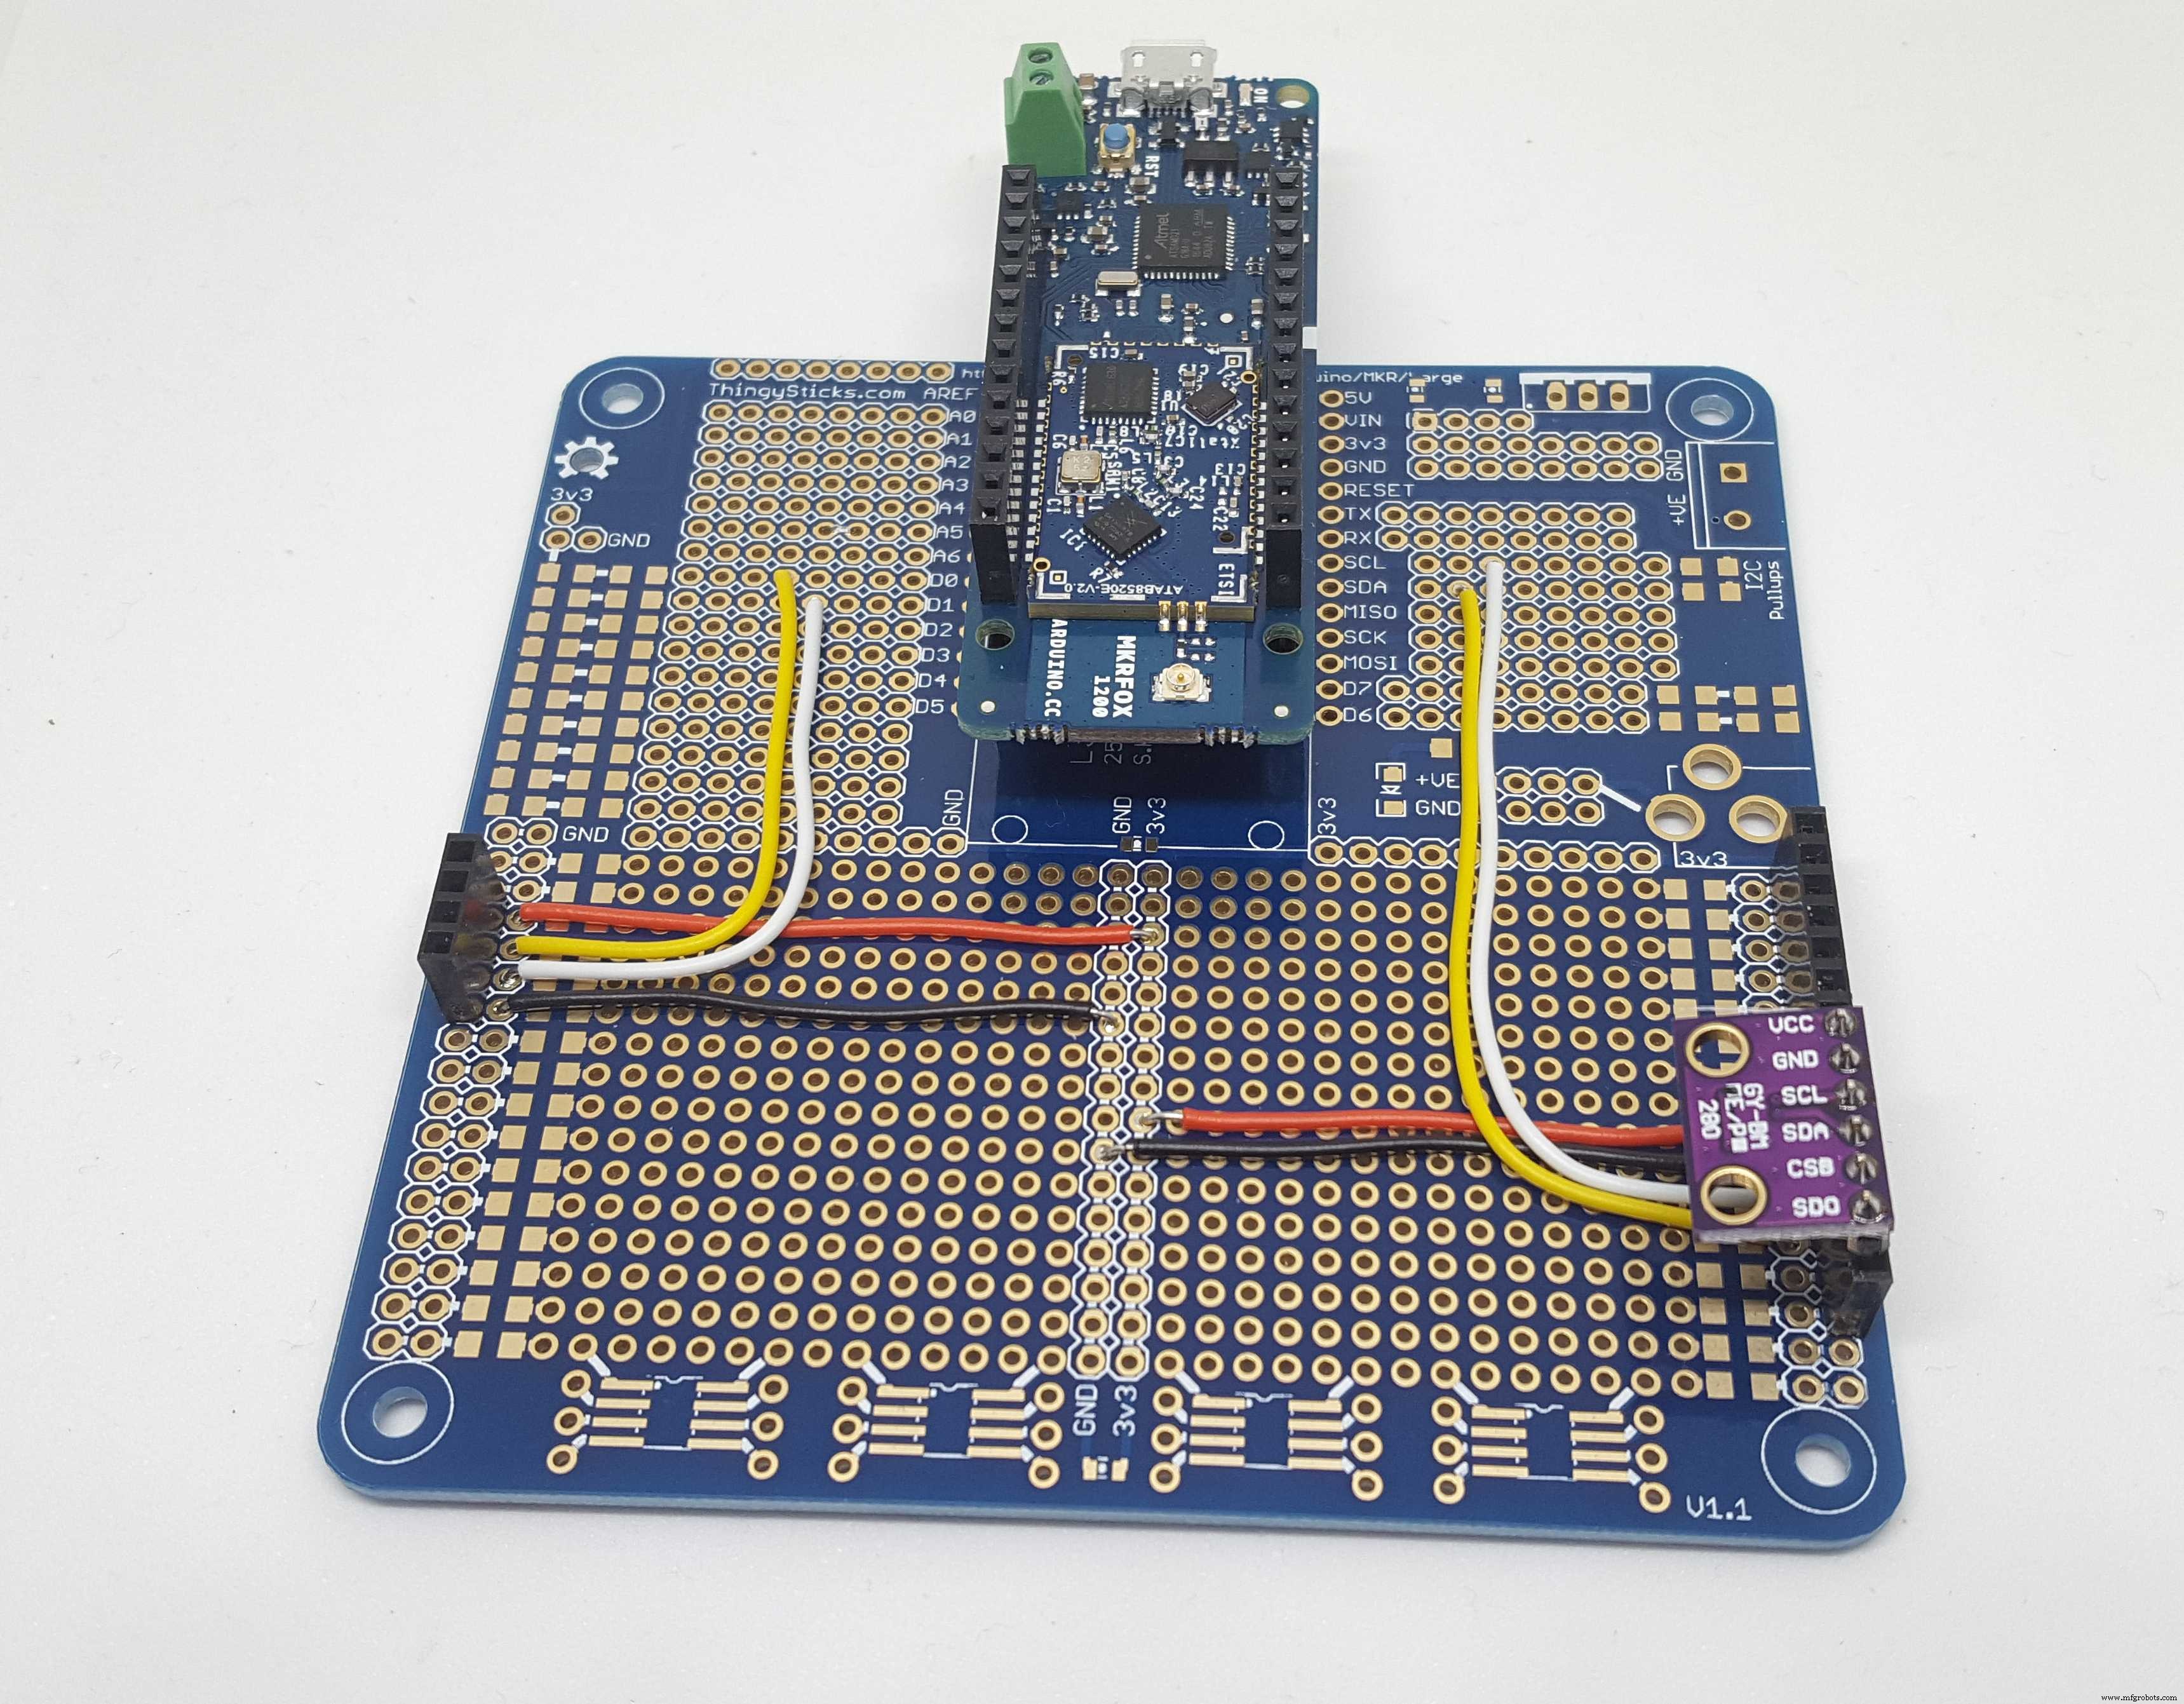
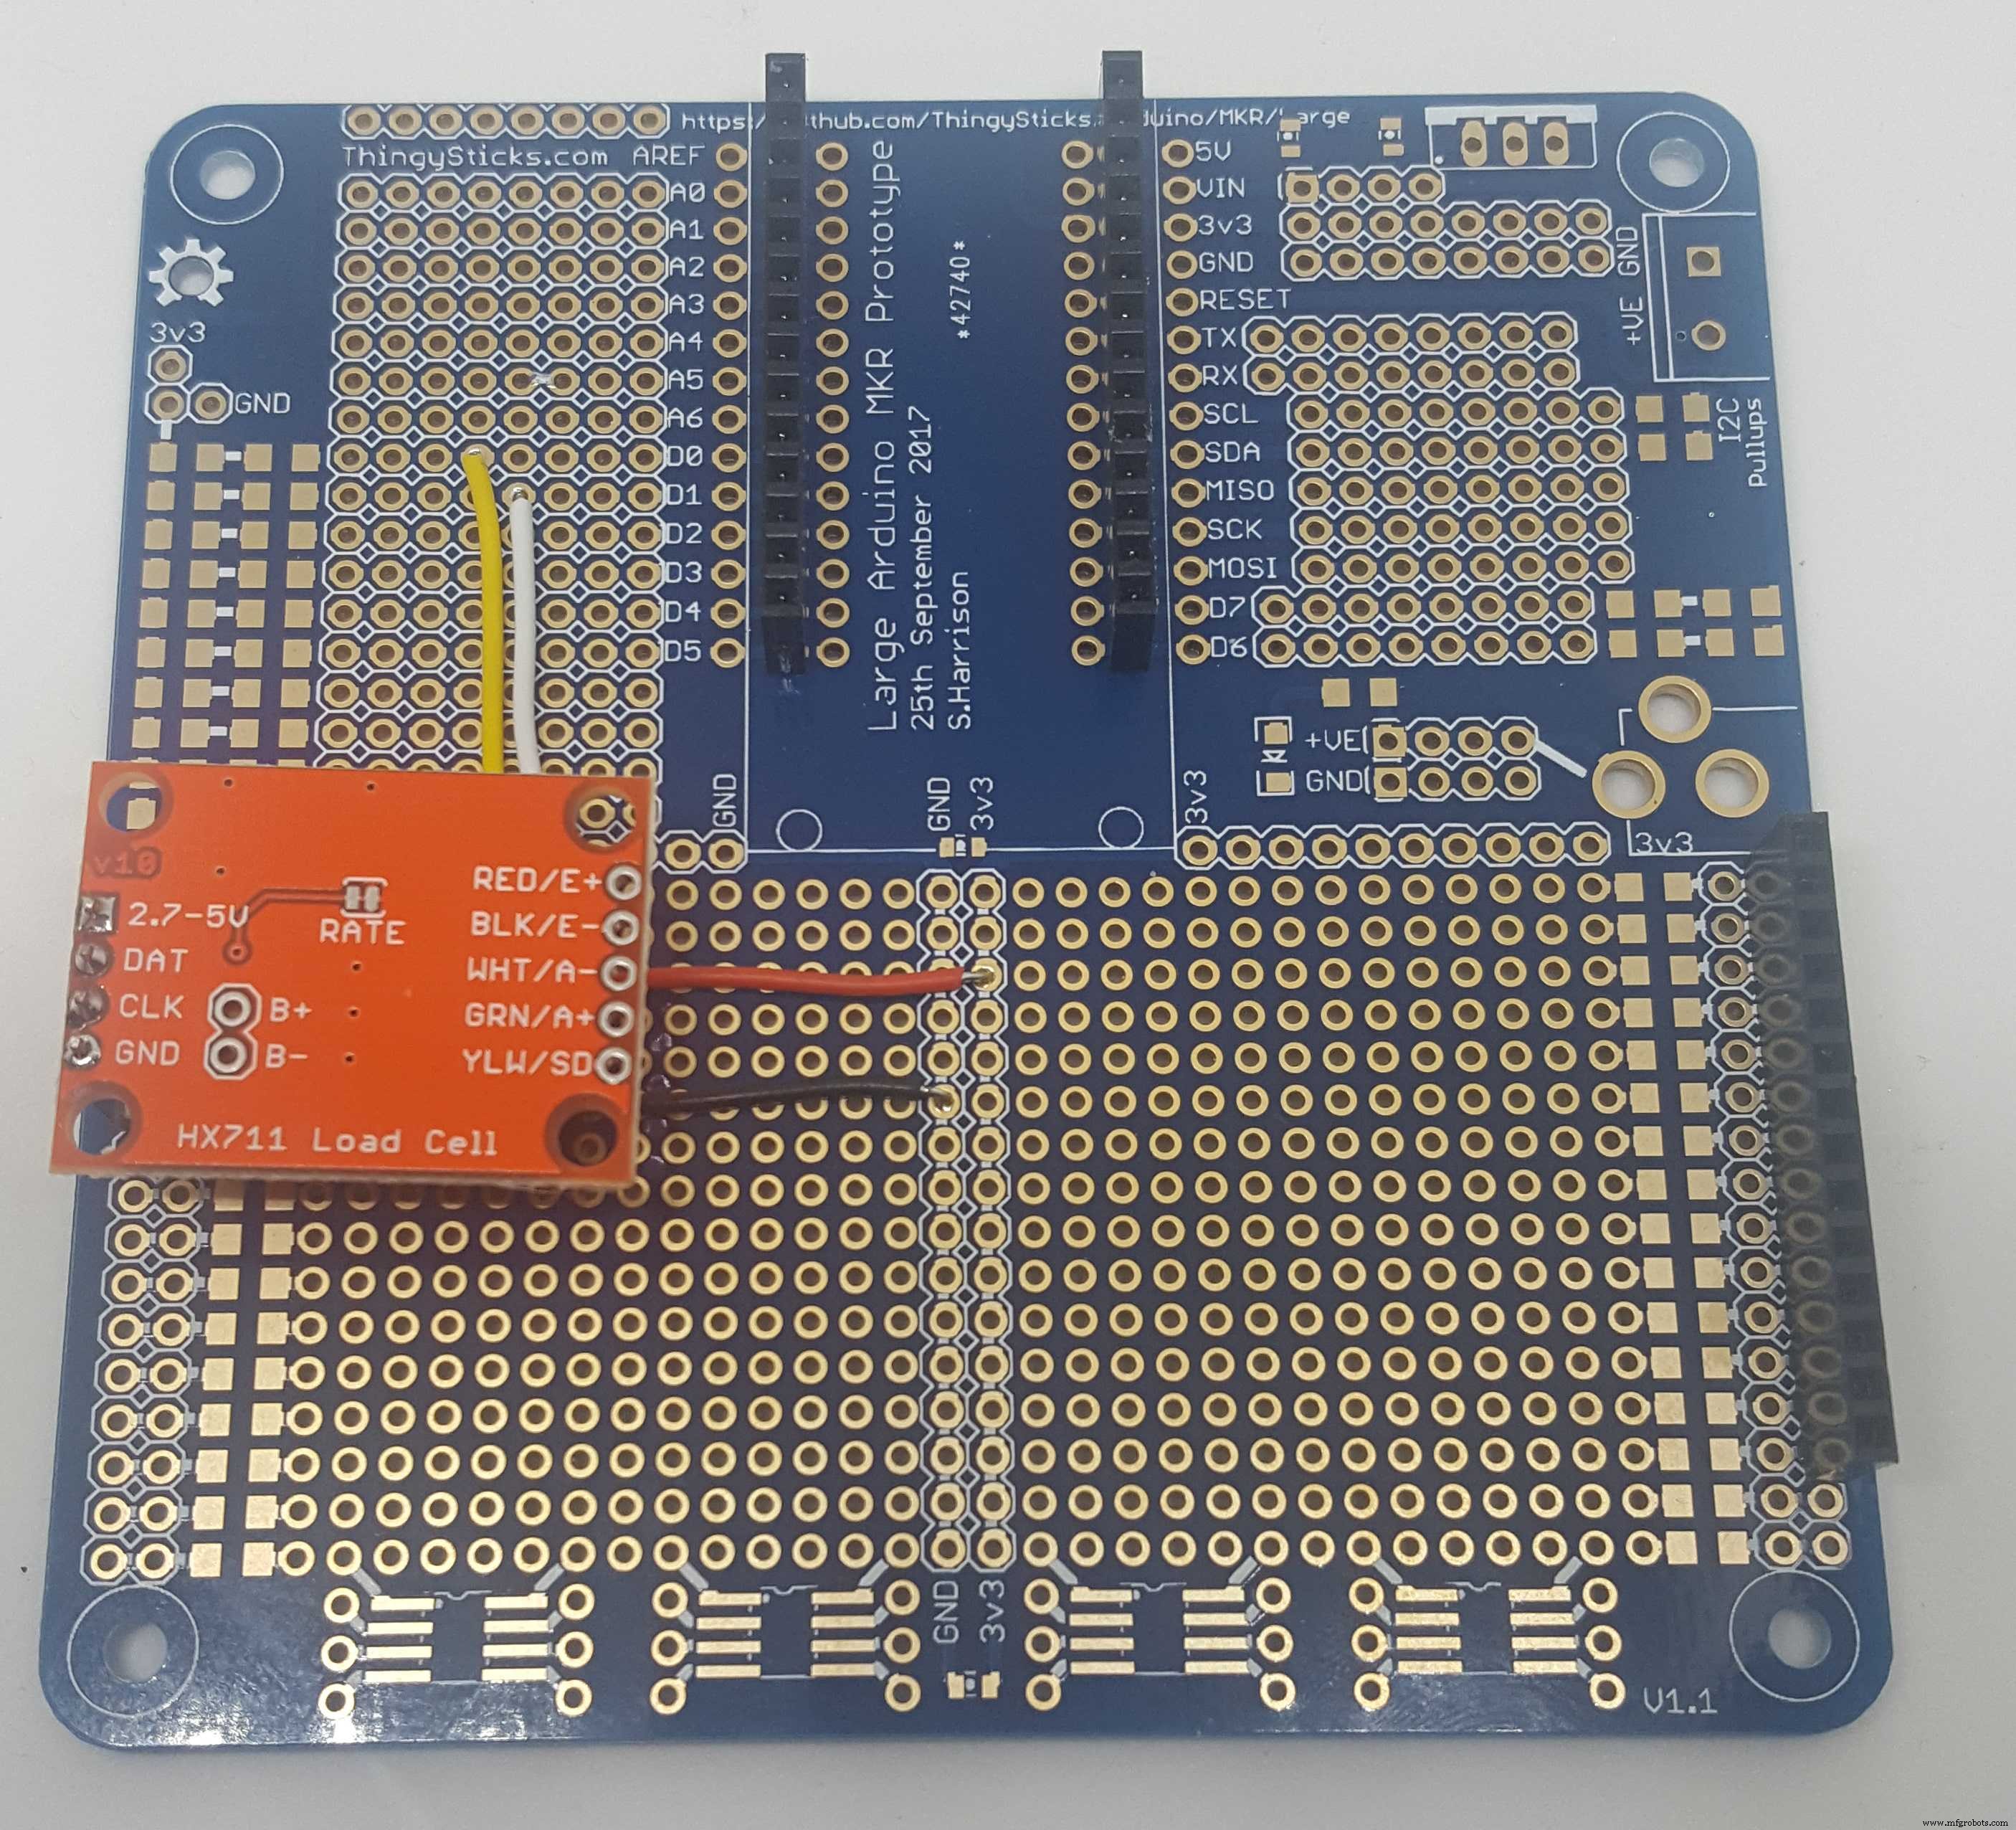
HX711은 Arduino의 모든 디지털 핀에 연결할 수 있습니다. 저는 D0(데이터) 및 D1(시계)을 사용했으며 증폭기는 Arduino의 3v3 전원에 연결하기만 하면 됩니다.

SparkFuns의 우수한 로드셀 튜토리얼에서 로드셀과 HX711에 대해 자세히 알아볼 수 있습니다.
마지막으로 BME280은 I2C 버스에 연결되어 상자 내부의 온도와 습도를 감지하는 데 사용됩니다. 이것은 압력을 감지하는 데에도 사용할 수 있지만 이는 별로 관심이 없을 것이며 12바이트의 sigfox 데이터만 가지고 놀 수 있습니다. 보고되지 않았습니다.
전자 제품은 ThingySticks Arduino Prototype 보드에 장착되었으며 배터리 홀더(하단 아크릴 시트에 핫멜트 접착)를 추가하고 플랫폼에 완벽하게 작동하는 멋진 평면 디자인의 안테나를 연결했습니다.

로드셀 보정:
플랫폼을 사용하기 전에 로드 셀을 보정해야 합니다. 각 로드 셀은 고유합니다. 금속 블록에 스트레인 게이지를 부착하고 부러지지 않고 감지할 수 있는 충분한 굴곡을 제공하기 위해 구멍을 뚫어 만듭니다. 이 때문에 무게에 대한 반응에 대해 각 로드 셀을 보정해야 합니다. .
일단 보정되면 y=mx+c 방정식을 측정된 ADC 값(x)에 적용하여 실제 무게(y)를 얻습니다. 따라서 로드 셀에 대한 c(오프셋)와 m(기울기)을 찾아야 합니다.
메인 플랫폼 상단을 제거하고 각 로드셀에 작은 아크릴 사각형을 차례로 부착하고 측정된 값을 모니터링했습니다(이를 수행하기 위한 펌웨어의 라우팅은 직렬 포트에 "c"를 전송하여 시작할 수 있습니다.
처음에는 빈 플랫폼에 대한 판독값이 측정되었으며 이는 오프셋(c) 값을 제공한 다음 셀에 알려진 무게의 하중을 가하고 판독값의 차이가 기울기를 제공합니다.
기울기 =(측정 - 오프셋) / 무게(g).
작은 방향제 캔(약 230g)과 프린터 필라멘트 스풀(약 1.5kg)을 사용하여 값을 확인했는데 둘 다 거의 같은 기울기를 보여 안심했습니다.
당연히 작은 아크릴 패드로 측정한 오프셋은 전체 상판에서 경험한 오프셋과 다르며 마찬가지로 두 로드 셀을 모두 사용할 때 기울기 차이가 작으므로 2차 보정이 필요합니다. 현재는 1점 영점 오프셋(용기)이 사용되며 이는 펌웨어에서 설정되지만 USB 직렬 연결을 사용하거나 배포된 후 Sigfox 다운링크 메시지를 통해 설정할 수도 있습니다.
Sigfox 연결:
Really Smart Box 배선을 통해 처음에는 USB 직렬 포트를 사용하여 시스템을 디버그하고 조정하는 데 도움이 되도록 출력을 모니터링했습니다. 이렇게 하면 개별 로드 셀, 변경 사항 및 소음을 볼 수 있습니다. 그러나 이것은 완전히 무선이어야 하므로 배포된 상자에서는 작동하지 않습니다.
Sigfox를 사용하면 하루에 최대 140번까지 12바이트의 데이터를 온라인 서비스에 보낼 수 있습니다. 아두이노에서 사용하는 자료구조는 12바이트를 어떻게 사용하는지 설명하고 있습니다.
typedef struct __attribute__ ((포장)) sigfox_message { uint8_t 상태; // 상태 플래그 int8_t 습도; // 습도::int:8 - 일부 센서(HTU21D) 읽기 -ve 습도) int8_t 온도; // 온도::int:8(소수점 없음). int16_t zeroWeight; // zeroWeight::int:16:little-endian int16_t weight; // weight::int:16:little-endian int16_t itemCount; // itemCount::int:16:little-endian(2.01을 허용하는 100x 실제 항목 수(무게가 정확히 일치하지 않음) int8_t driftCorrection; // 체중계에 적용된 0무게 변경에 대한 드리프트 수정 int8_t filler; // 여기에 볼 것이 없습니다. 계속 이동합니다.... int8_t lastStatus; // 마지막 sigfox 상태 } SigfoxMessage;
첫 번째 바이트(상태)는 표시된 문제에 대한 비트 플래그로 분할됩니다.
// status::uint:8 -> 8비트로 분할 // B7 - 첫 번째 실행// B6 - HX711 오류 // B5 - BME280 오류// B4 - 온도 알람// B3 - 습도 알람 // B2 - 중량 알람// B1 - 재고 부족// B0 - 예비
이 구조는 12바이트로 압축되지만 Tinamous에 푸시하려면 Sigfox 끝에서 압축을 풀어야 합니다. 이를 위해 Custom Payload Configuration을 사용하며 데이터 구조가 정의될 때 이를 해결하는 것이 가장 좋습니다. 우리는:
firstRun::bool:7 hx711Fault::bool:6 bmeFault::bool:5 temperatureAlarm::bool:4 습도Alarm::bool:3 weightAlarm::bool:2 lowStock::bool:1 b0::bool:0 status::int:8 습도::int:8 온도::int:8 zeroWeight::int:16:little-endian weight::int:16:little-endian itemCount::int:16:little -엔디안
사용자 정의 페이로드는 구문 분석될 때 12바이트를 분할합니다.
Sigfox는 기본적으로 빅 엔디안을 사용하고 Arduino는 리틀 엔디안을 사용하므로 1바이트보다 큰 모든 것의 리틀 엔디안 특성을 지정해야 합니다(즉, 최하위 바이트가 멀티 바이트 단어에서 첫 번째).
또한 첫 번째 바이트에서 부울 플래그를 분리해도 다른 모든 읽기와 마찬가지로 바이트 마커가 진행되지 않으므로 모든 플래그를 보유하고 있는 상태 바이트도 첫 번째 바이트를 건너뛰기 위해 읽힙니다.
플래그에는 온도, 습도 및 중량 범위 경보 플래그가 포함되며, 온라인 서비스(예:Tinamous)를 사용하여 범위를 벗어난 온도, 습도 및 중량을 모니터링할 수 있지만 수명이 짧을 수 있으며(몇 시간) 상자 드물게(하루에 한 번 또는 두 번) 전송될 수 있으므로 손상을 줄 수 있는 환경 조건을 쉽게 놓칠 수 있으므로 장치에 플래그가 지정되고 전송됩니다(전송 성공 후 재설정).
항목 수는 실제로 실제 항목 수의 100배로 설정됩니다. 나는 반올림을 강요하지 않고 2.2 항목(중량 오류 또는 상자의 다른 항목으로 인해)과 같은 값을 허용하고 싶었습니다. 마찬가지로 2.95는 조심하지 않고 상자와 작은 오류. 또한 더 많은 공간이 필요한 부동 소수점을 사용하고 싶지 않았기 때문에 16비트 단어를 사용하고 쉬운 변환을 허용하는 요소를 적용했습니다(또한 0 오류를 허용하도록 서명되어 재고 수준이 -1 또는 -2 등).
Sigfox 통신을 활성화하기 위해 수행해야 하는 작업은 거의 없습니다. Arduino 내에서 Sigfox 라이브러리가 추가되고 Sigfox 라이브러리에 대한 Arduino 예제에 따라 데이터를 내보내도록 적절한 기능이 호출되지만 Sigfox에 장치를 등록해야 합니다.
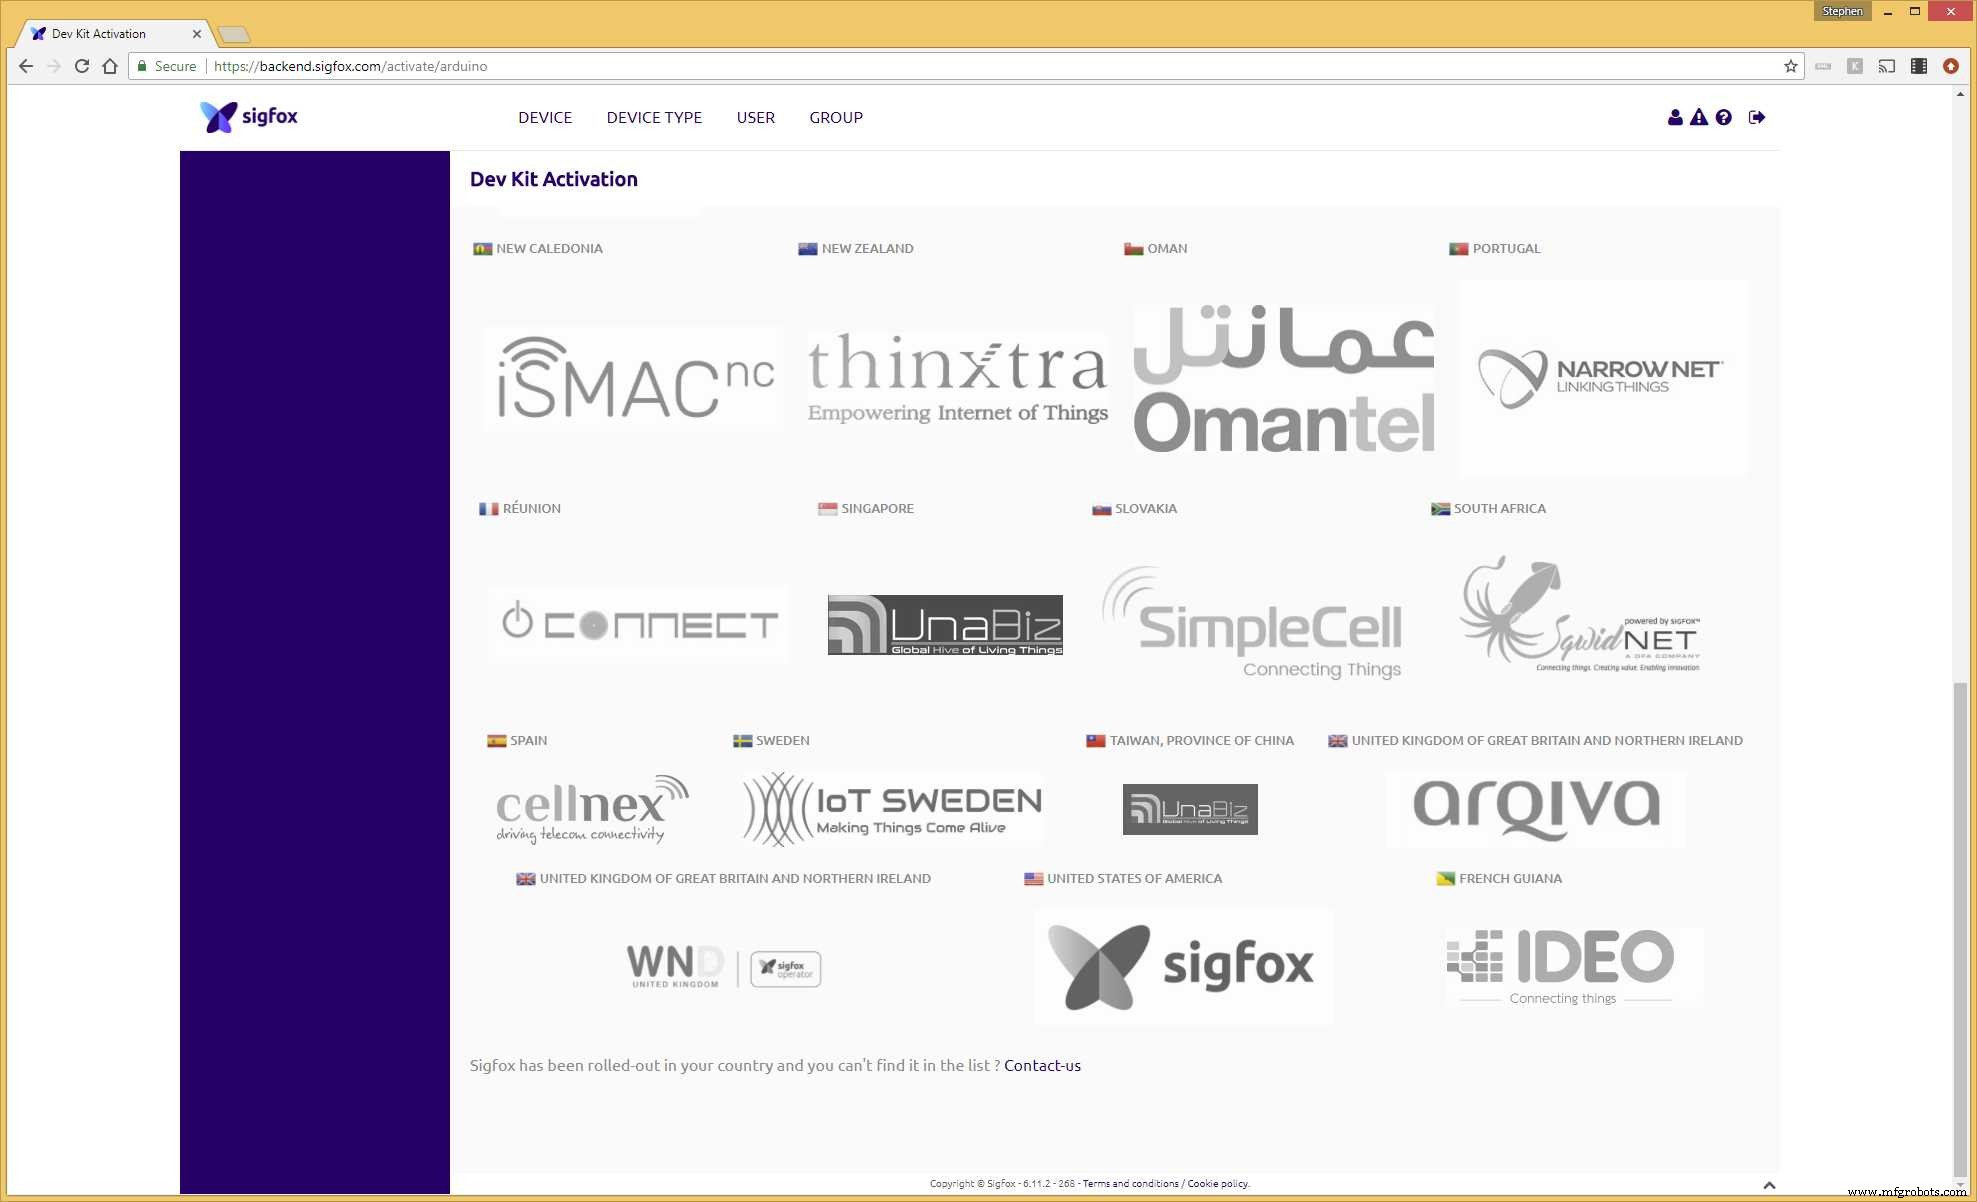
Really Smart Box의 직렬 포트에 "s"를 보내면 Sigfox ID와 PAC 코드가 인쇄되며, 이들은 Sigfox 백엔드에서 장치를 활성화하는 데 사용됩니다. 그런 다음 Sigfox 백엔드 활성화 서비스로 이동하여 마법사를 따라 먼저 장치를 선택한 다음 국가/제공업체를 선택한 다음 몇 가지 세부 정보를 선택합니다.

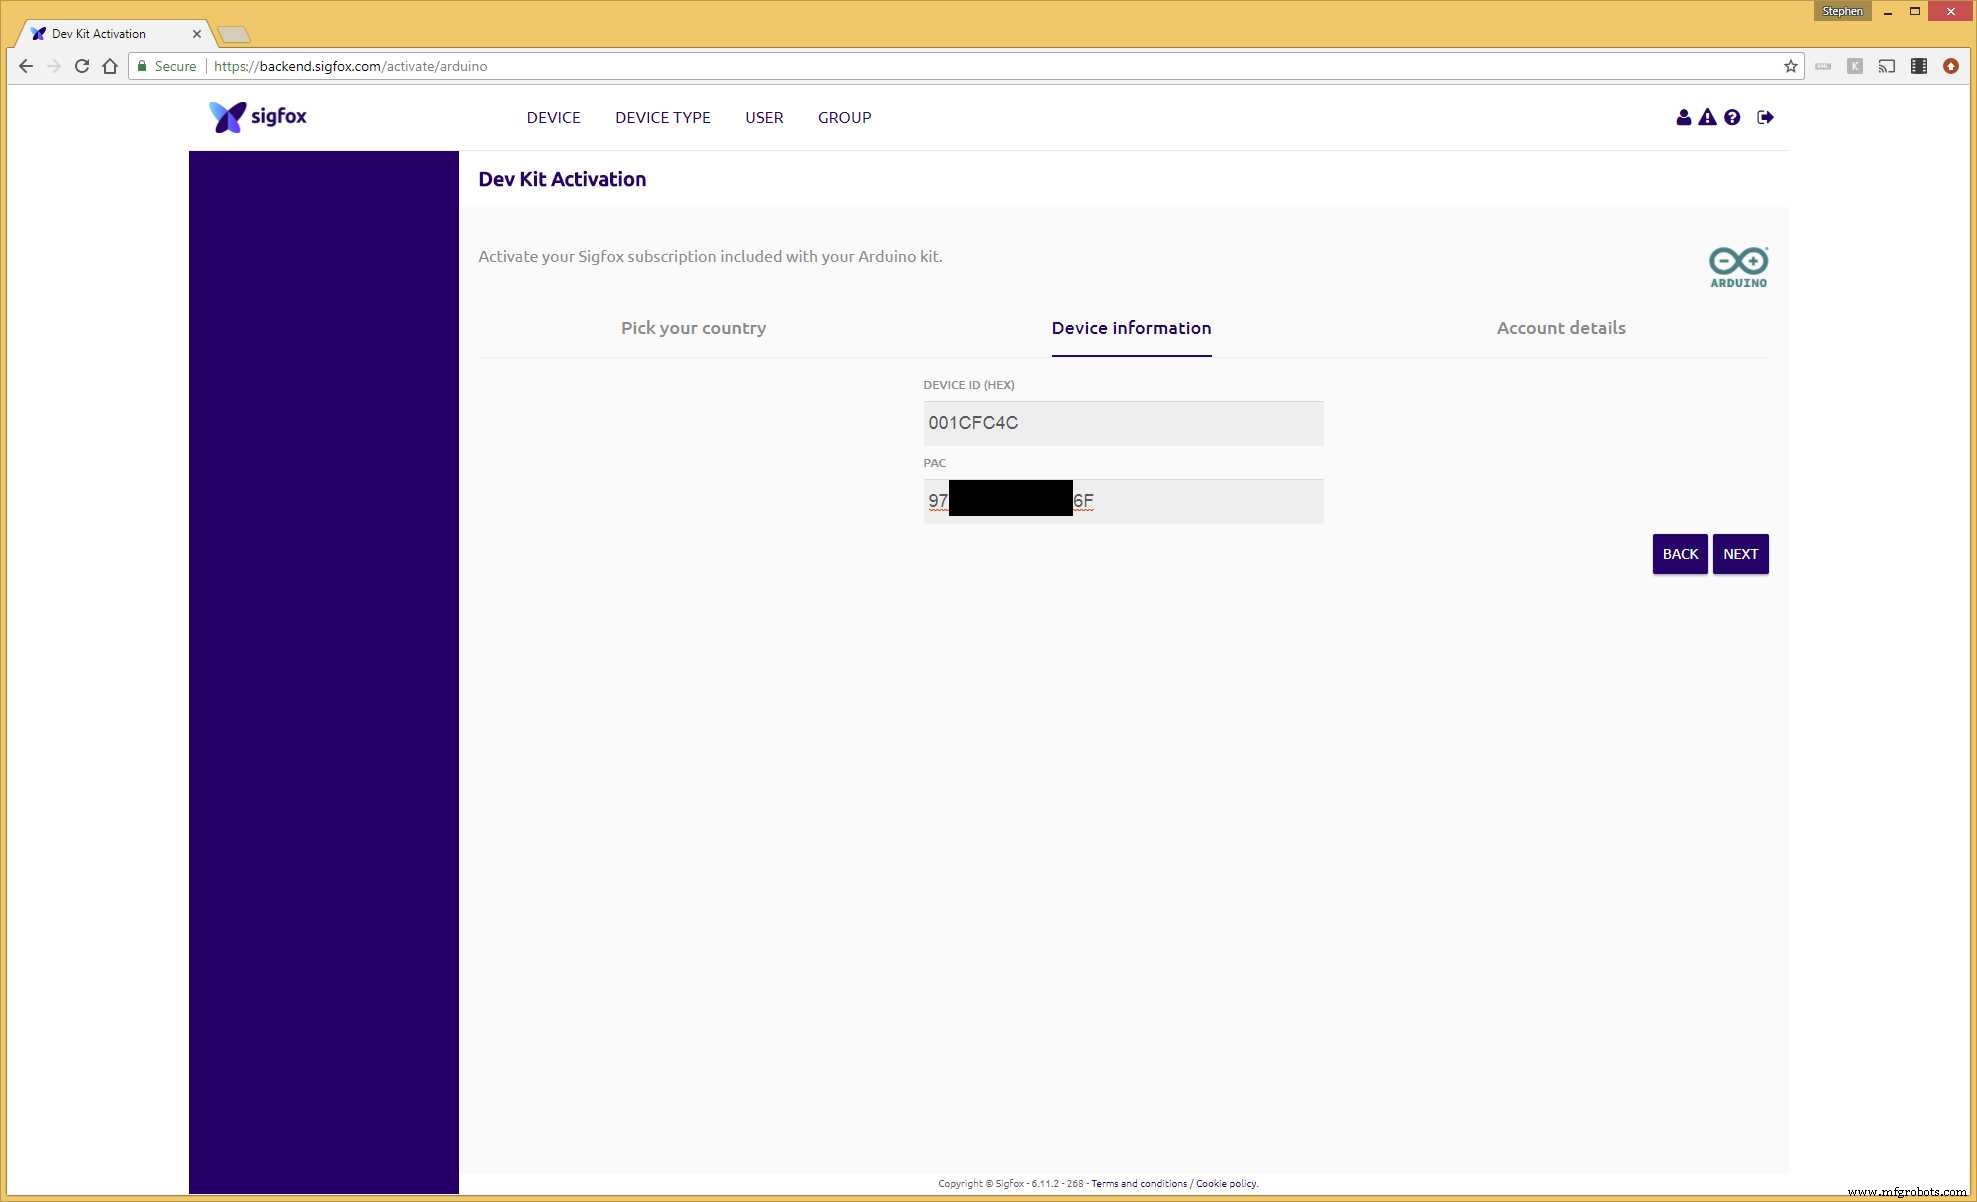
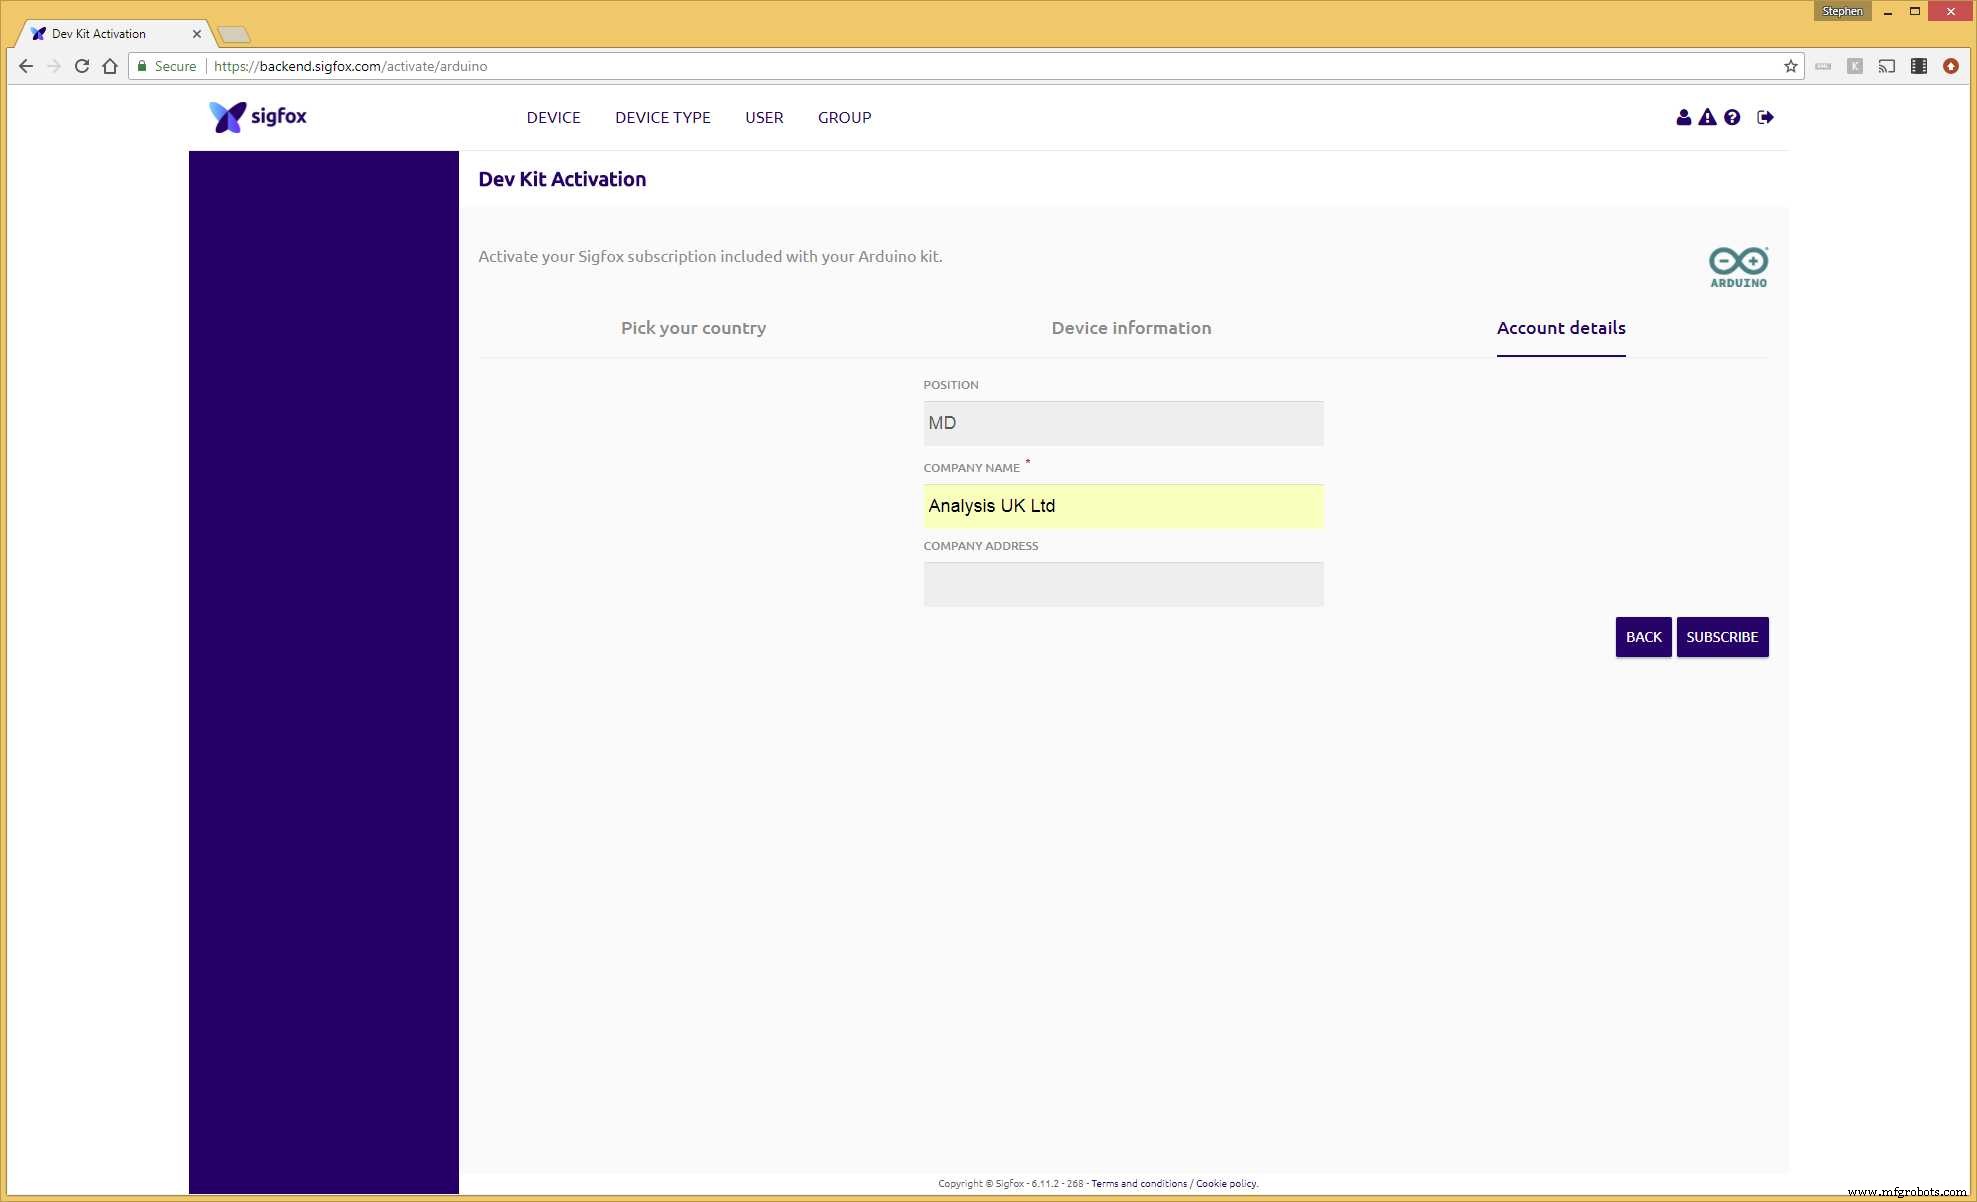
마지막으로 장치가 활성화되고 나열됩니다.
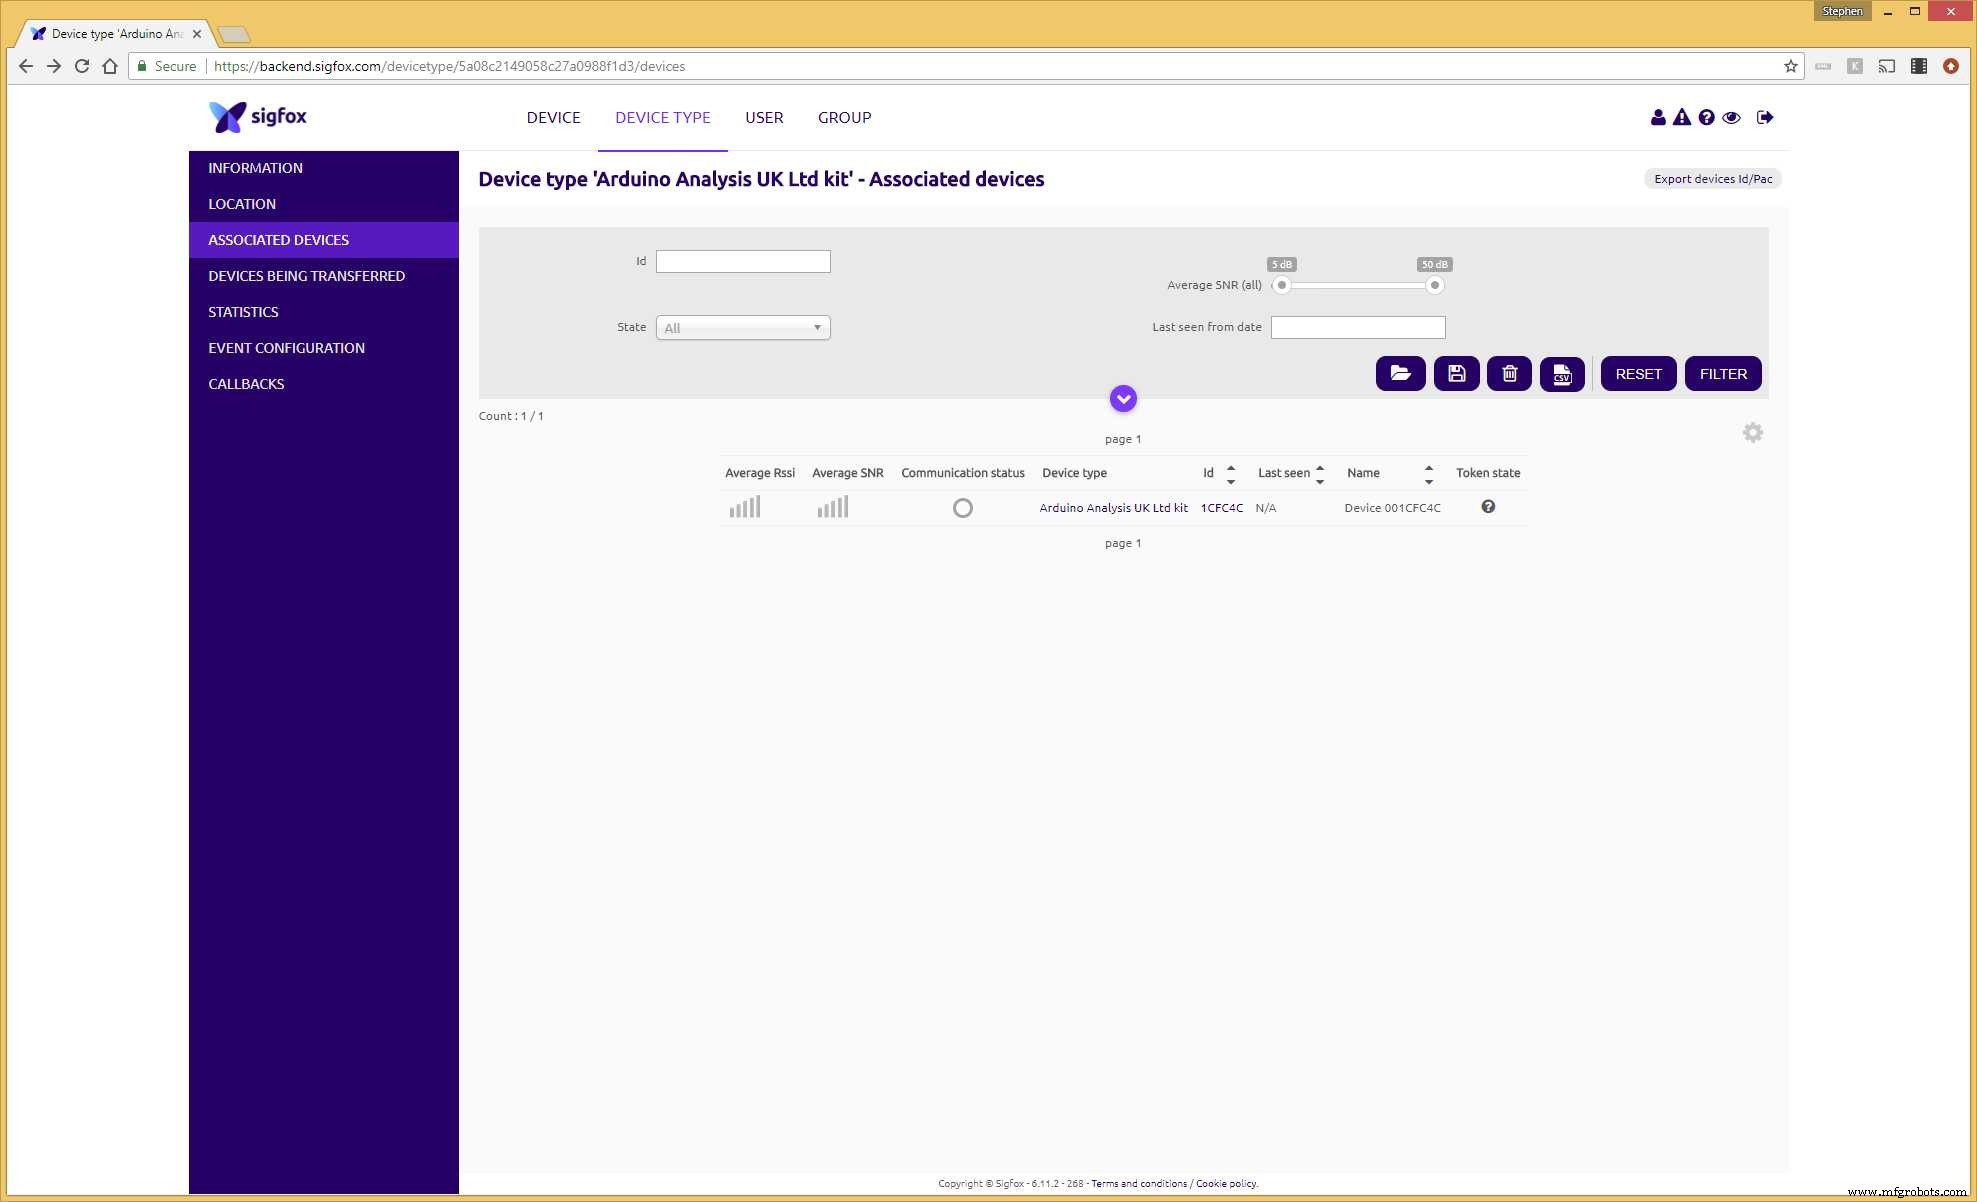
Sigfox는 일반적으로 그룹으로 작동하려는 동일한 장치 유형의 많은(수백, 수천 등)이 있을 수 있으므로 합리적인 장치 유형 그룹화에 장치를 할당합니다. 장치 유형을 정의하면 수신한 데이터를 온라인 서비스로 푸시하도록 사용자 정의 콜백을 구성할 수 있습니다. 저는 이를 위해 Tinamous를 사용하고 있습니다(힌트:내 프로필 이름 참조 - 선택에 편견이 있을 수 있음).
정말 똑똑한 상자 사용:
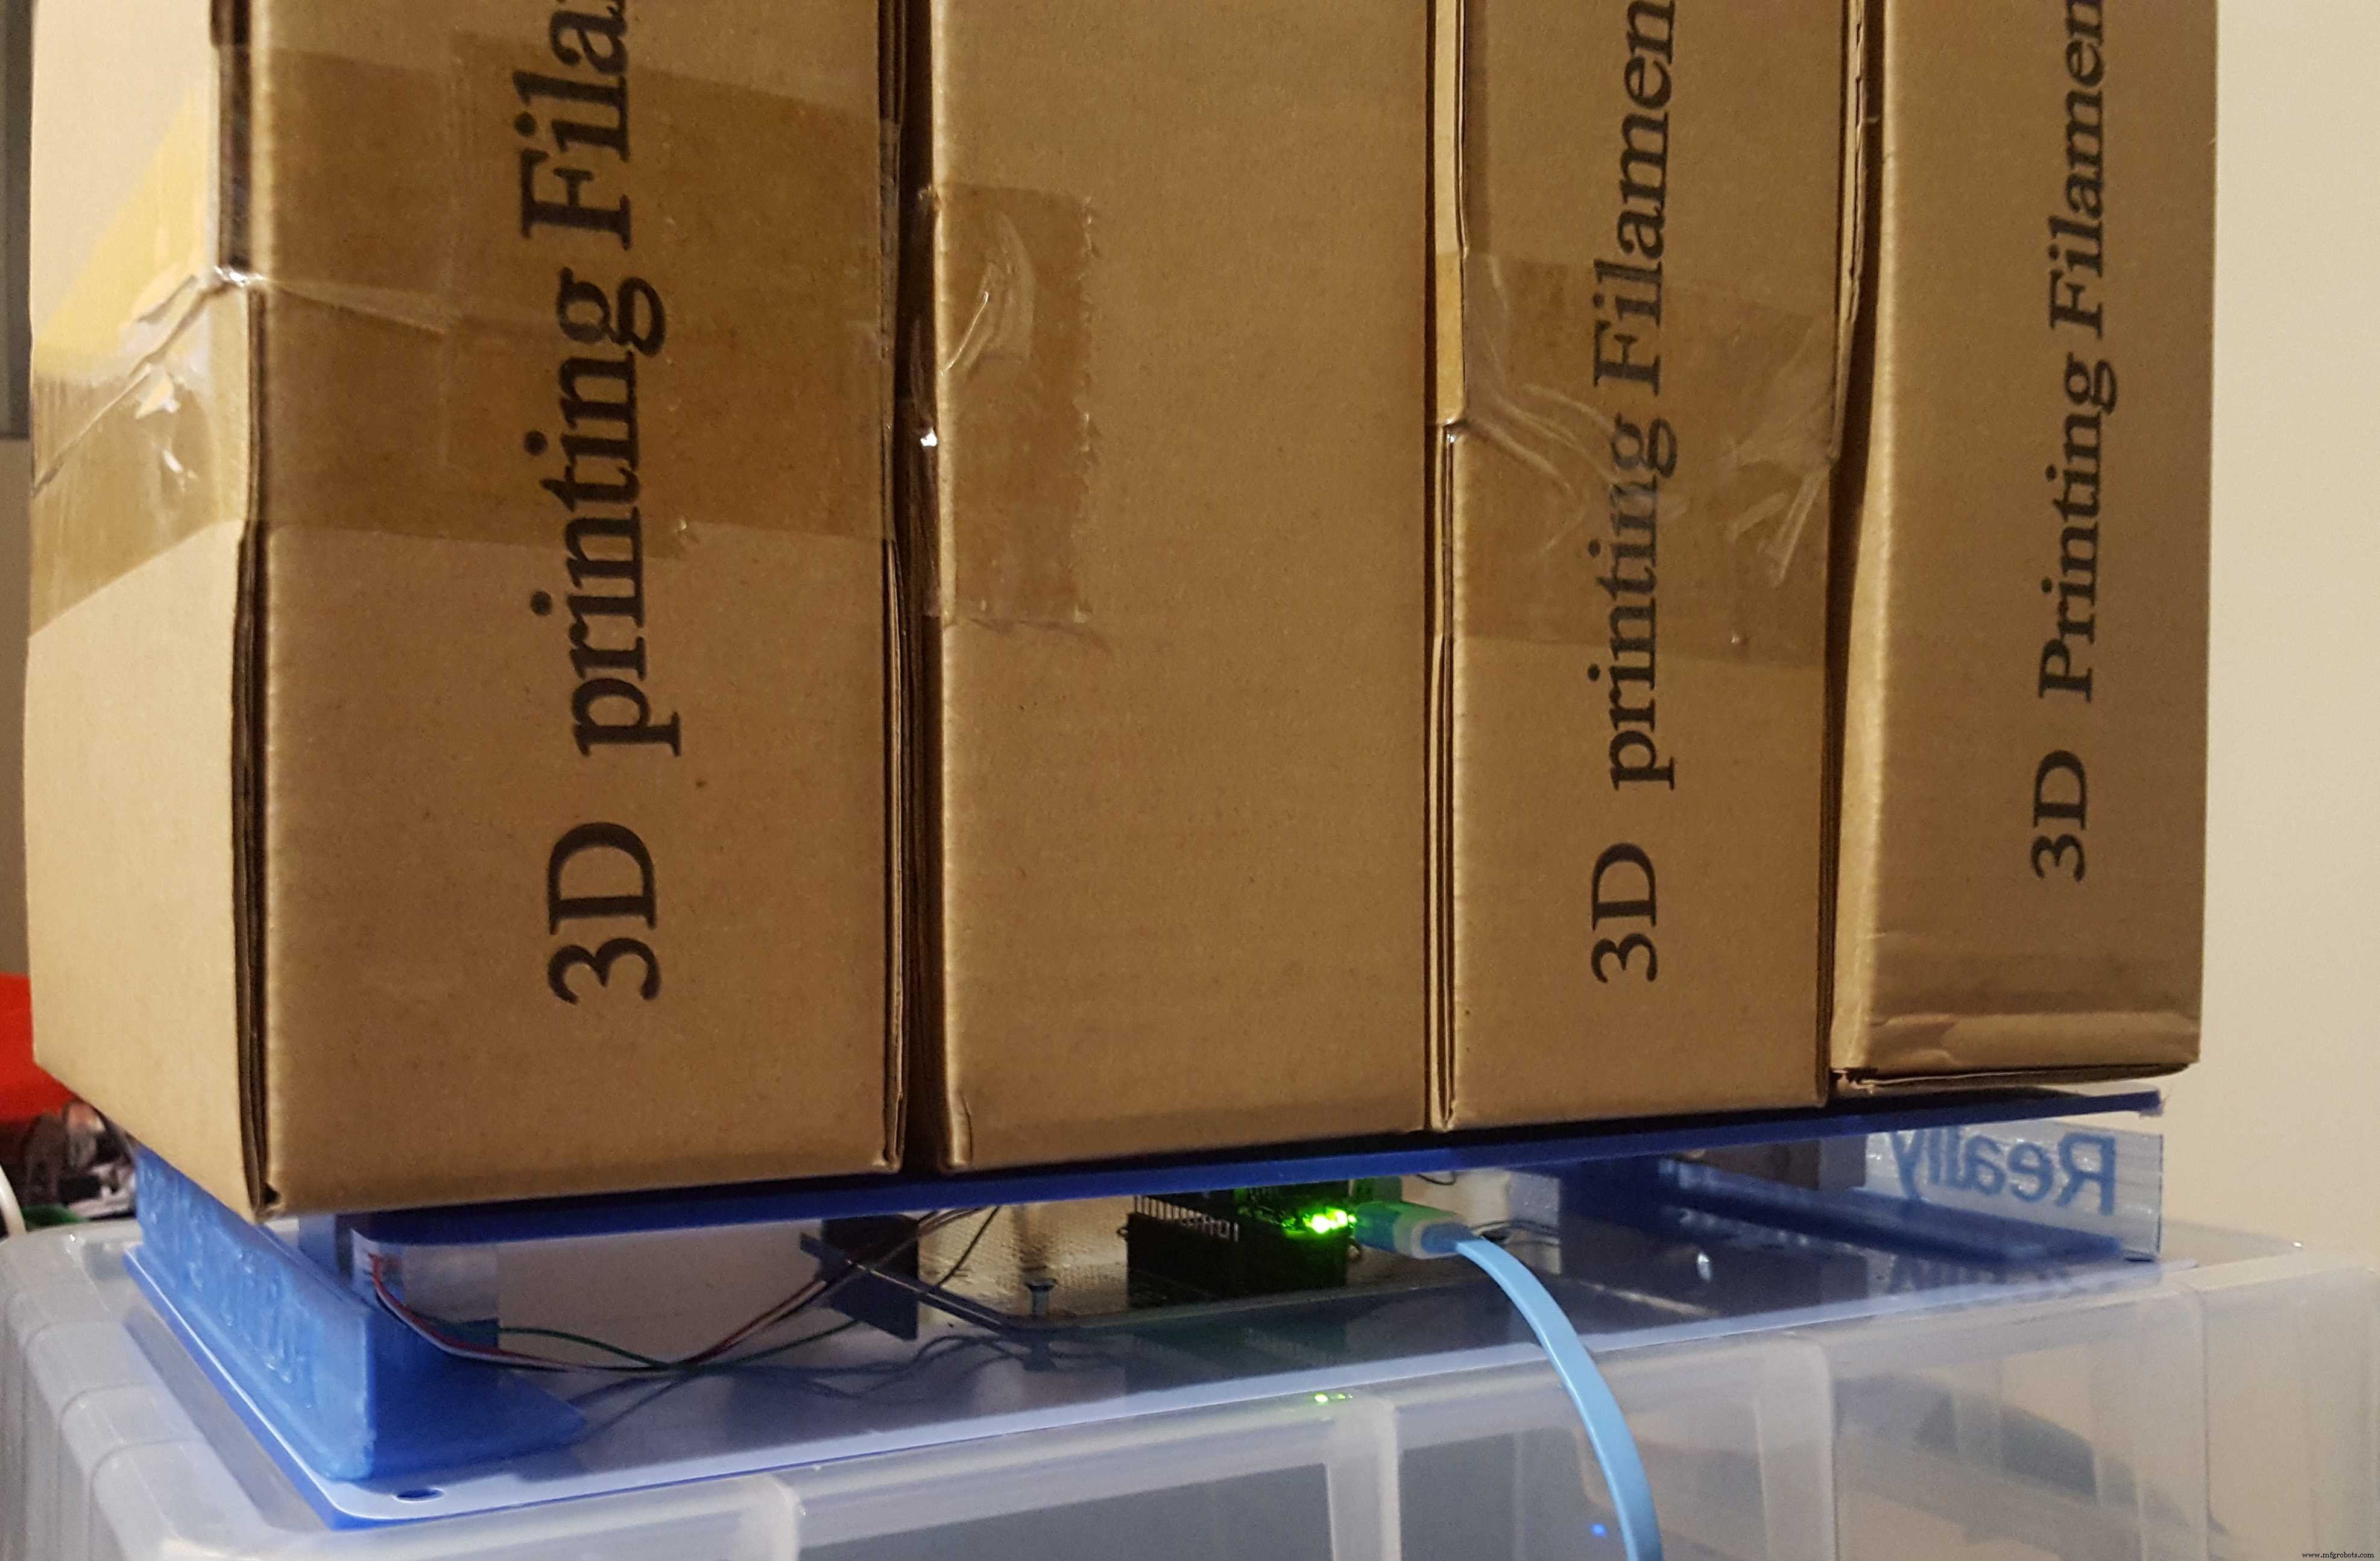
일단 배선하고 볼트로 조이면 펌웨어가 깜박이고 플랫폼에 장착된 배터리를 정말 유용한 상자(tm)에 넣기만 하면 바로 사용할 수 있습니다.
장치의 전원이 켜지면 가능한 한 늦게 전원을 공급해야 합니다. 장치는 2분 후에 첫 번째 Sigfox 메시지를 보내고 함께 다운링크 데이터를 요청합니다. 이 데이터에는 플랫폼 무게를 0으로 만들기 위한 "Zero" 명령이 포함될 수 있습니다. 실패하면 USB 직렬 연결이 필요하거나 다음 다운링크 요청을 기다려야 합니다. 이러한 요청은 12시간마다 이루어집니다.
플랫폼을 실행하고 실행하면 무게, 품목 수, 온도, 습도 및 경보 상태를 보내기 위해 15분마다 Sigfox 메시지를 게시합니다. 온도, 습도 및 무게가 1분마다 측정되어 범위를 벗어나지 않았는지 확인하고 다음 전송에 대한 경보가 발생하면 플래그가 지정됩니다.
Tinamous로 모니터링:
Tinamous는 "Sigfox 봇"을 계정에 추가하여 Sigfox 사용자 정의 콜백을 지원합니다. 이를 수행하는 방법에 대한 지침은 제 "Sigfox 켜기" Hackster.io 자습서를 참조하십시오.
Tinamous 계정에 Sigfox Bot을 추가할 때 API 설정을 포함하면 Sigfox Bot이 장치를 조회하여 Tinamous 계정에 추가하지만 데이터가 생성될 때 장치가 자동으로 추가되므로 이 작업을 수행할 필요가 없습니다. 게시됩니다.
봇을 추가하면 Sigfox 콜백 설정에 도움이 되는 콜백 구성 화면이 표시됩니다.
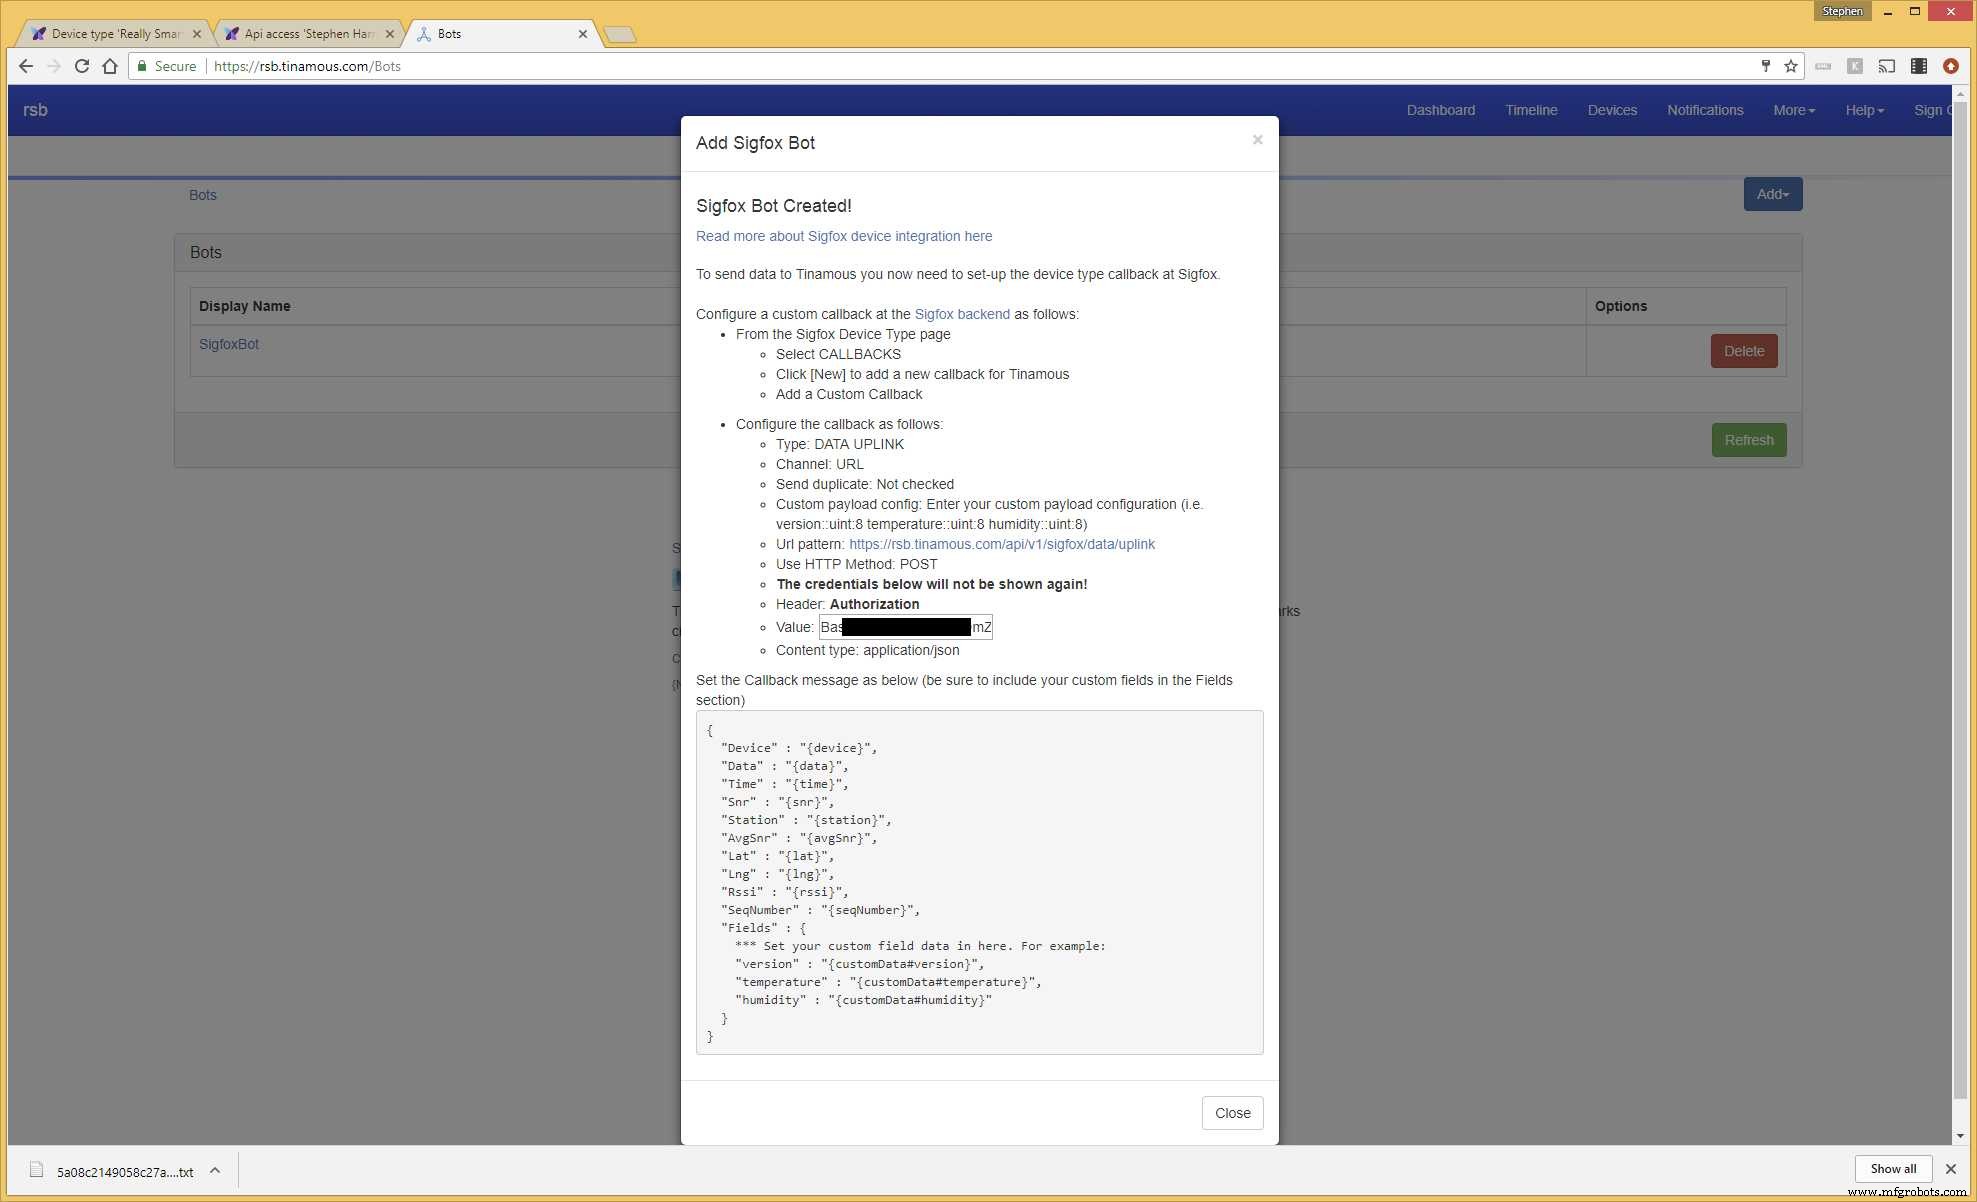
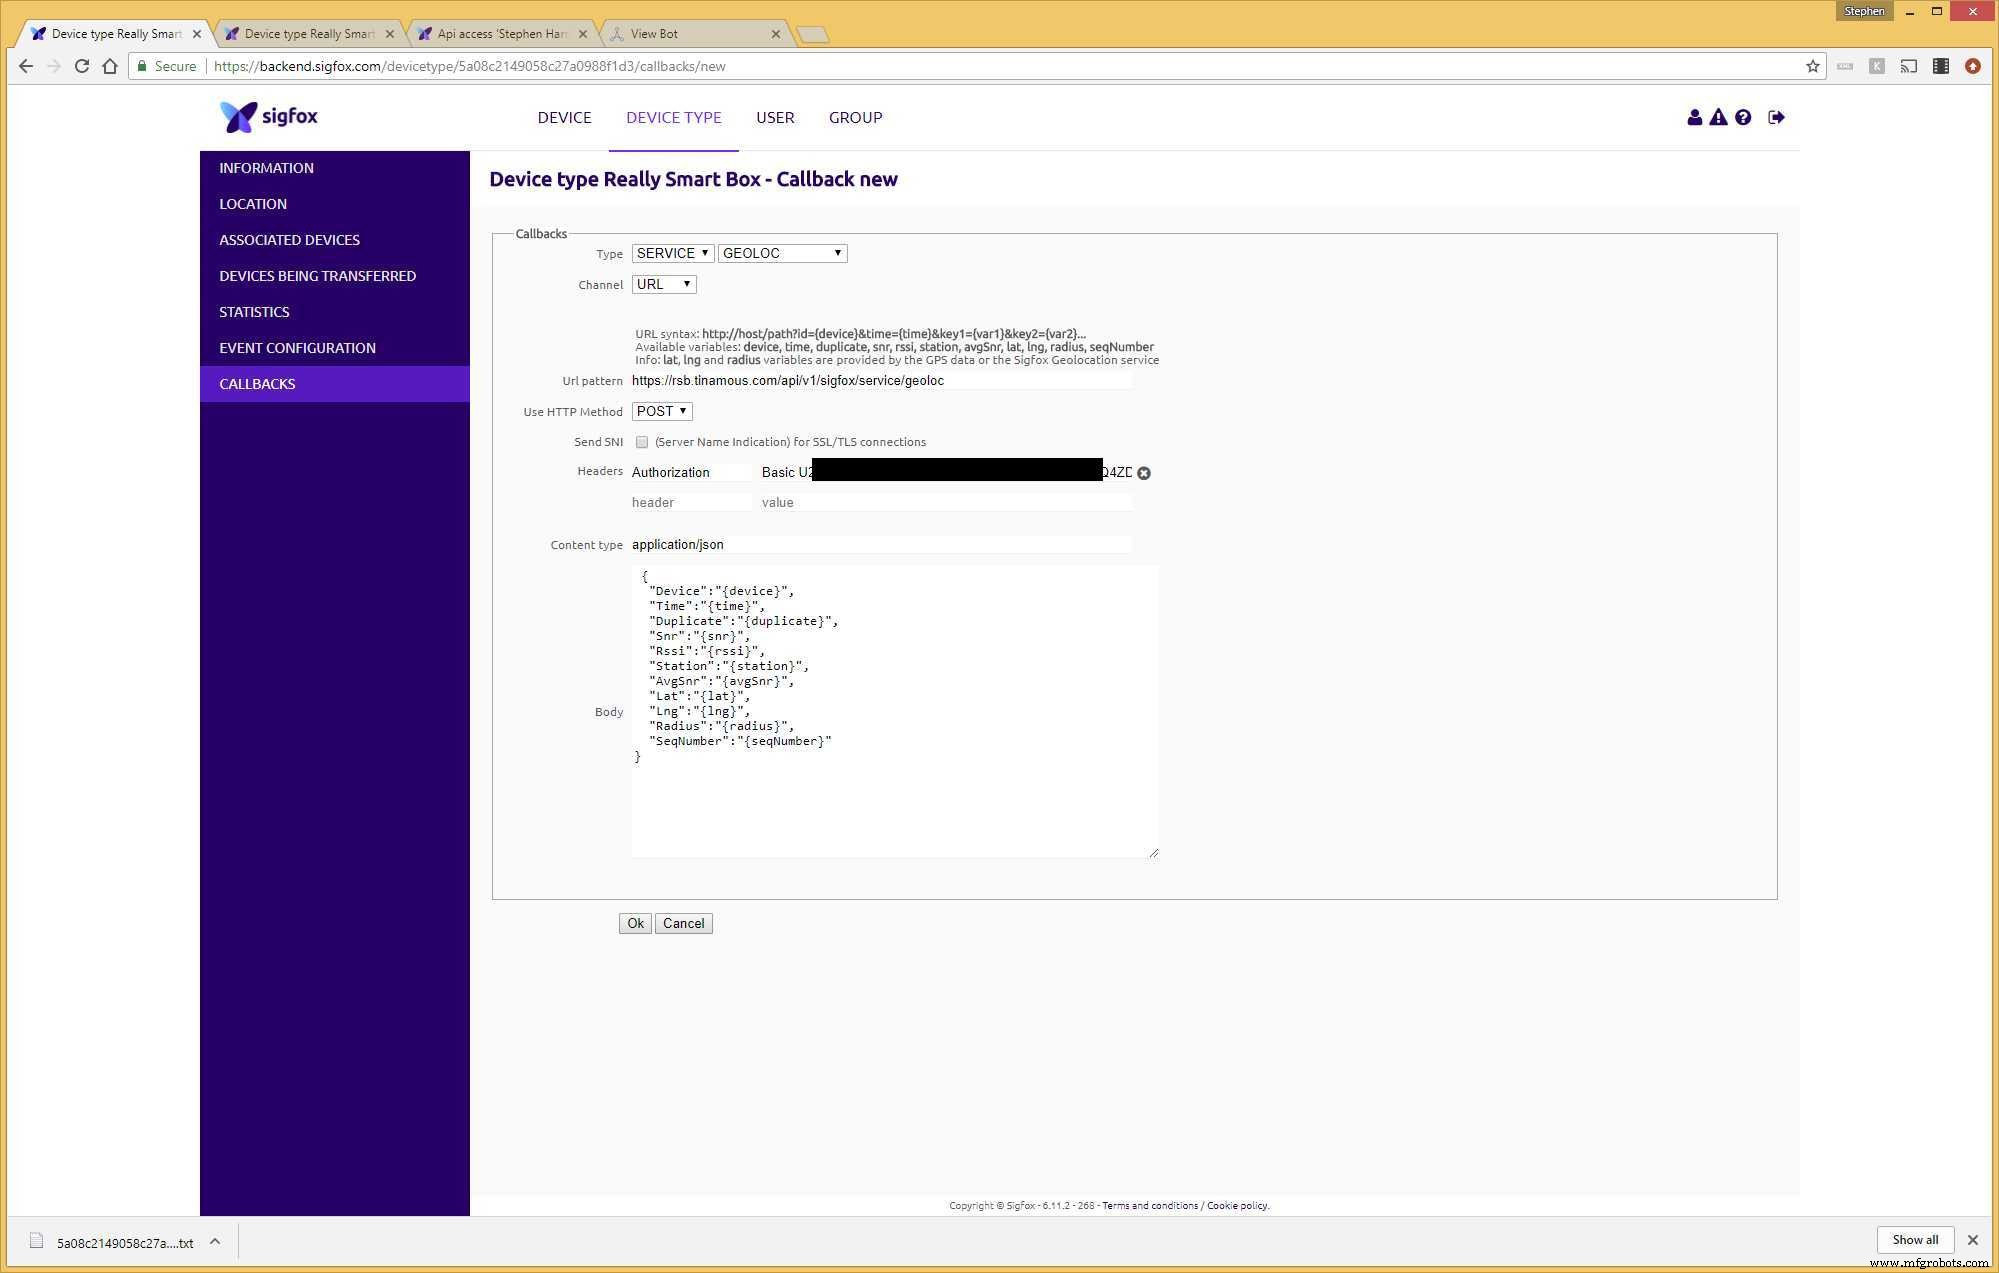
그런 다음 Sigfox에서 사용자 정의 콜백을 만들 수 있습니다. really Smart Box는 일반 UPLINK 콜백과 BIDIR(업 및 다운링크) 콜백을 처리하는 DATA -> BIDIR 콜백을 사용합니다.
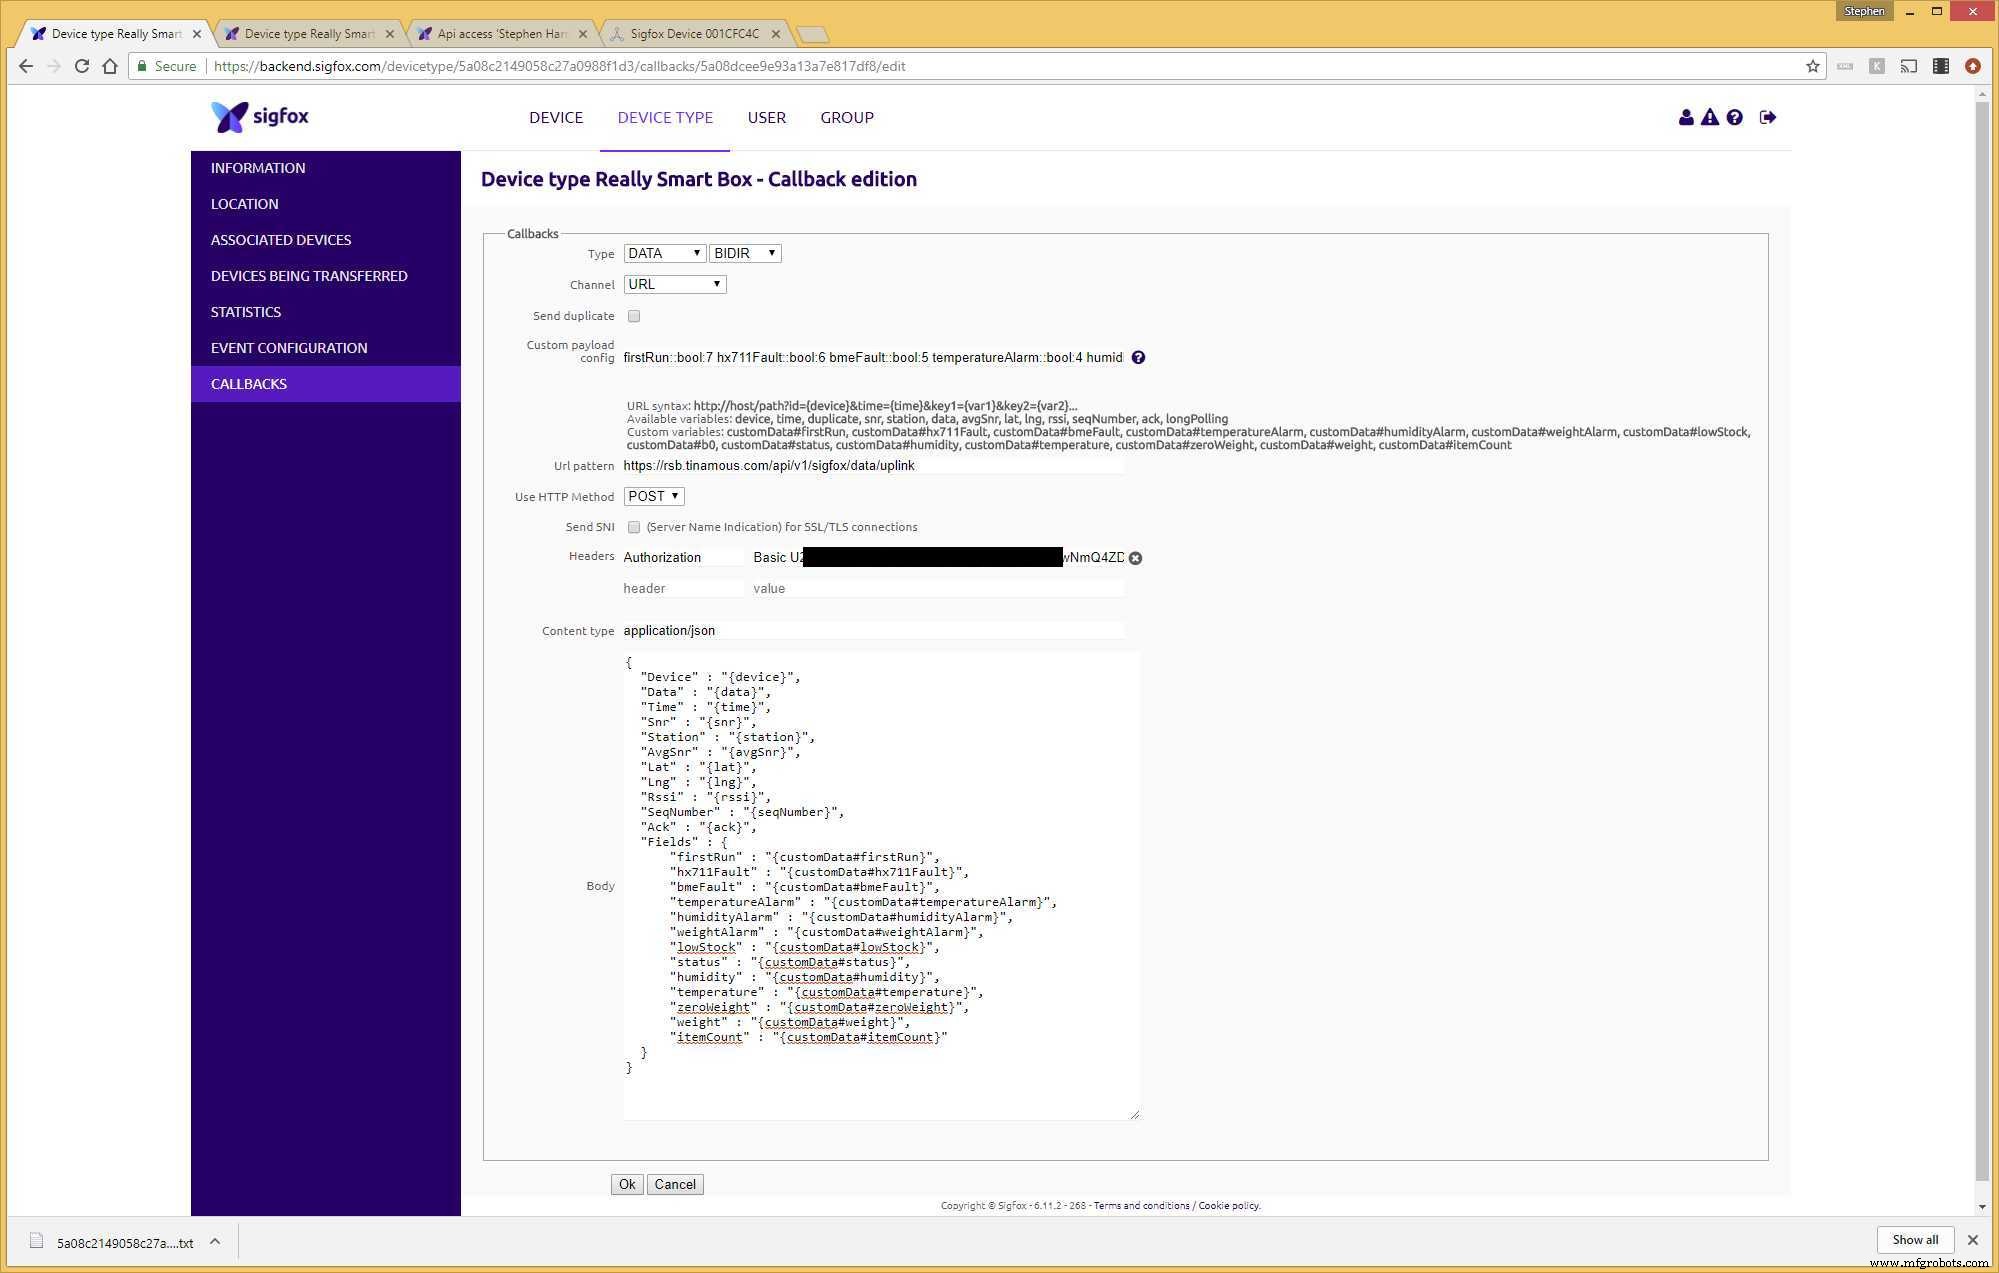
여기에서 이전의 사용자 정의 페이로드가 유용합니다. 소스 코드에서 이를 사용자 정의 페이로드에 붙여넣고 이를 반영하도록 필드 섹션을 업데이트하십시오.
위도와 경도는 대략적인 위치를 제공하는 이 콜백에 지정되지만 Arduino의 Sigfox는 향상된 위치 설정을 지원하지만 두 번째 콜백이 필요합니다. 지리적 위치 기능을 사용하는 경우 이 메시지에 위도/경도를 지정하지 마십시오. 정말 스마트한 상자가 위치 간에 움직이는 것처럼 보일 것입니다.
이것이 구성되면 다운링크에 대해서도 활성화해야 하며, BIDIR이 설정되어 있어도 기본적으로 비활성화되어 있습니다.
다운링크 옵션 아래의 스크린샷은 "선택됨"이며, 이는 수동으로 수행해야 하며, 다운링크 데이터(장치 유형 -> 편집 -> 다운링크 데이터)에 대해 장치 유형이 "콜백"으로 설정되지 않은 경우 사용하지 못할 수 있습니다. .
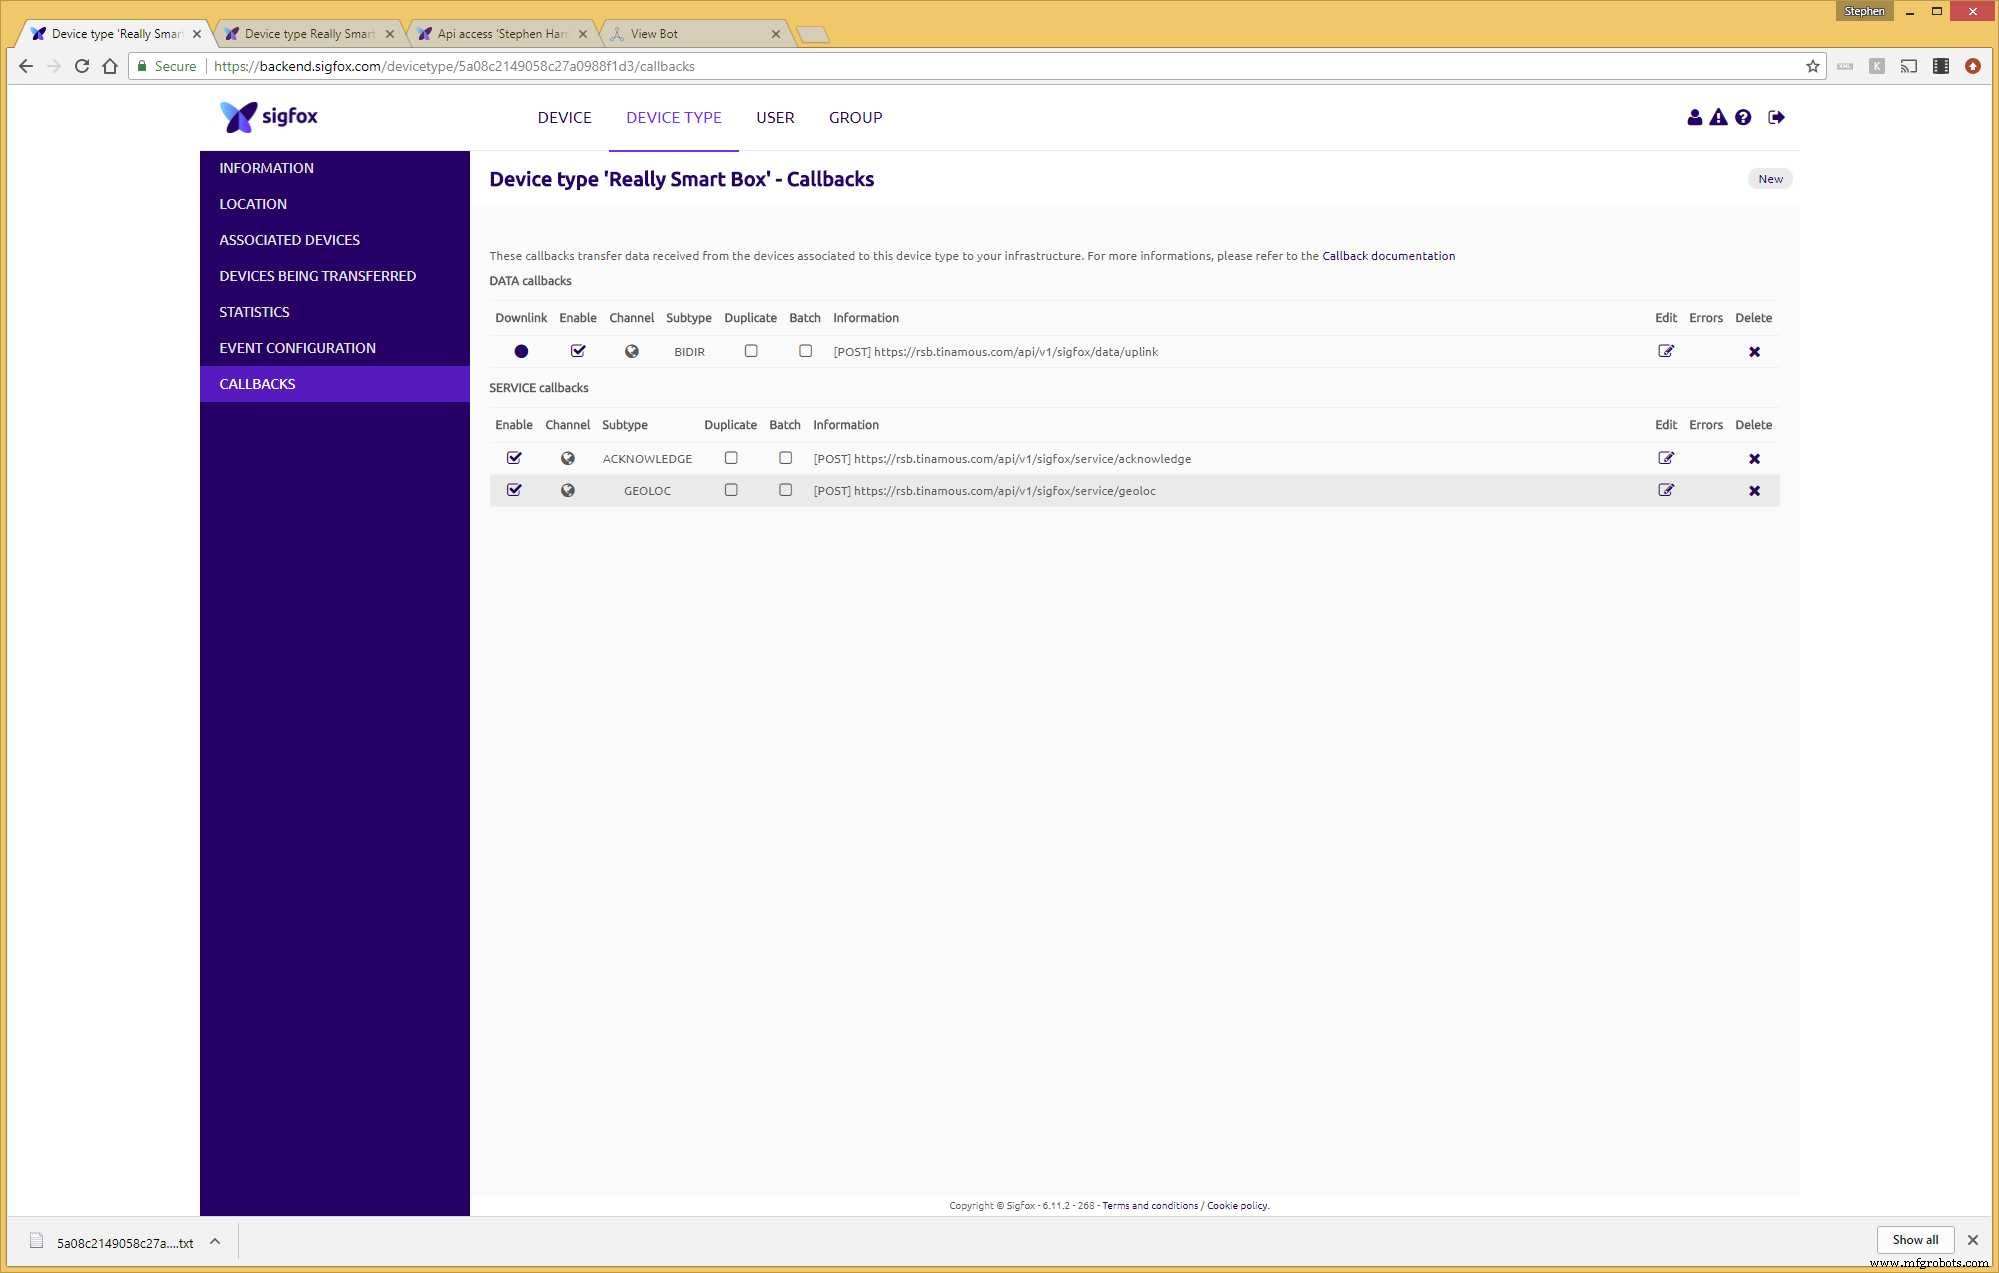

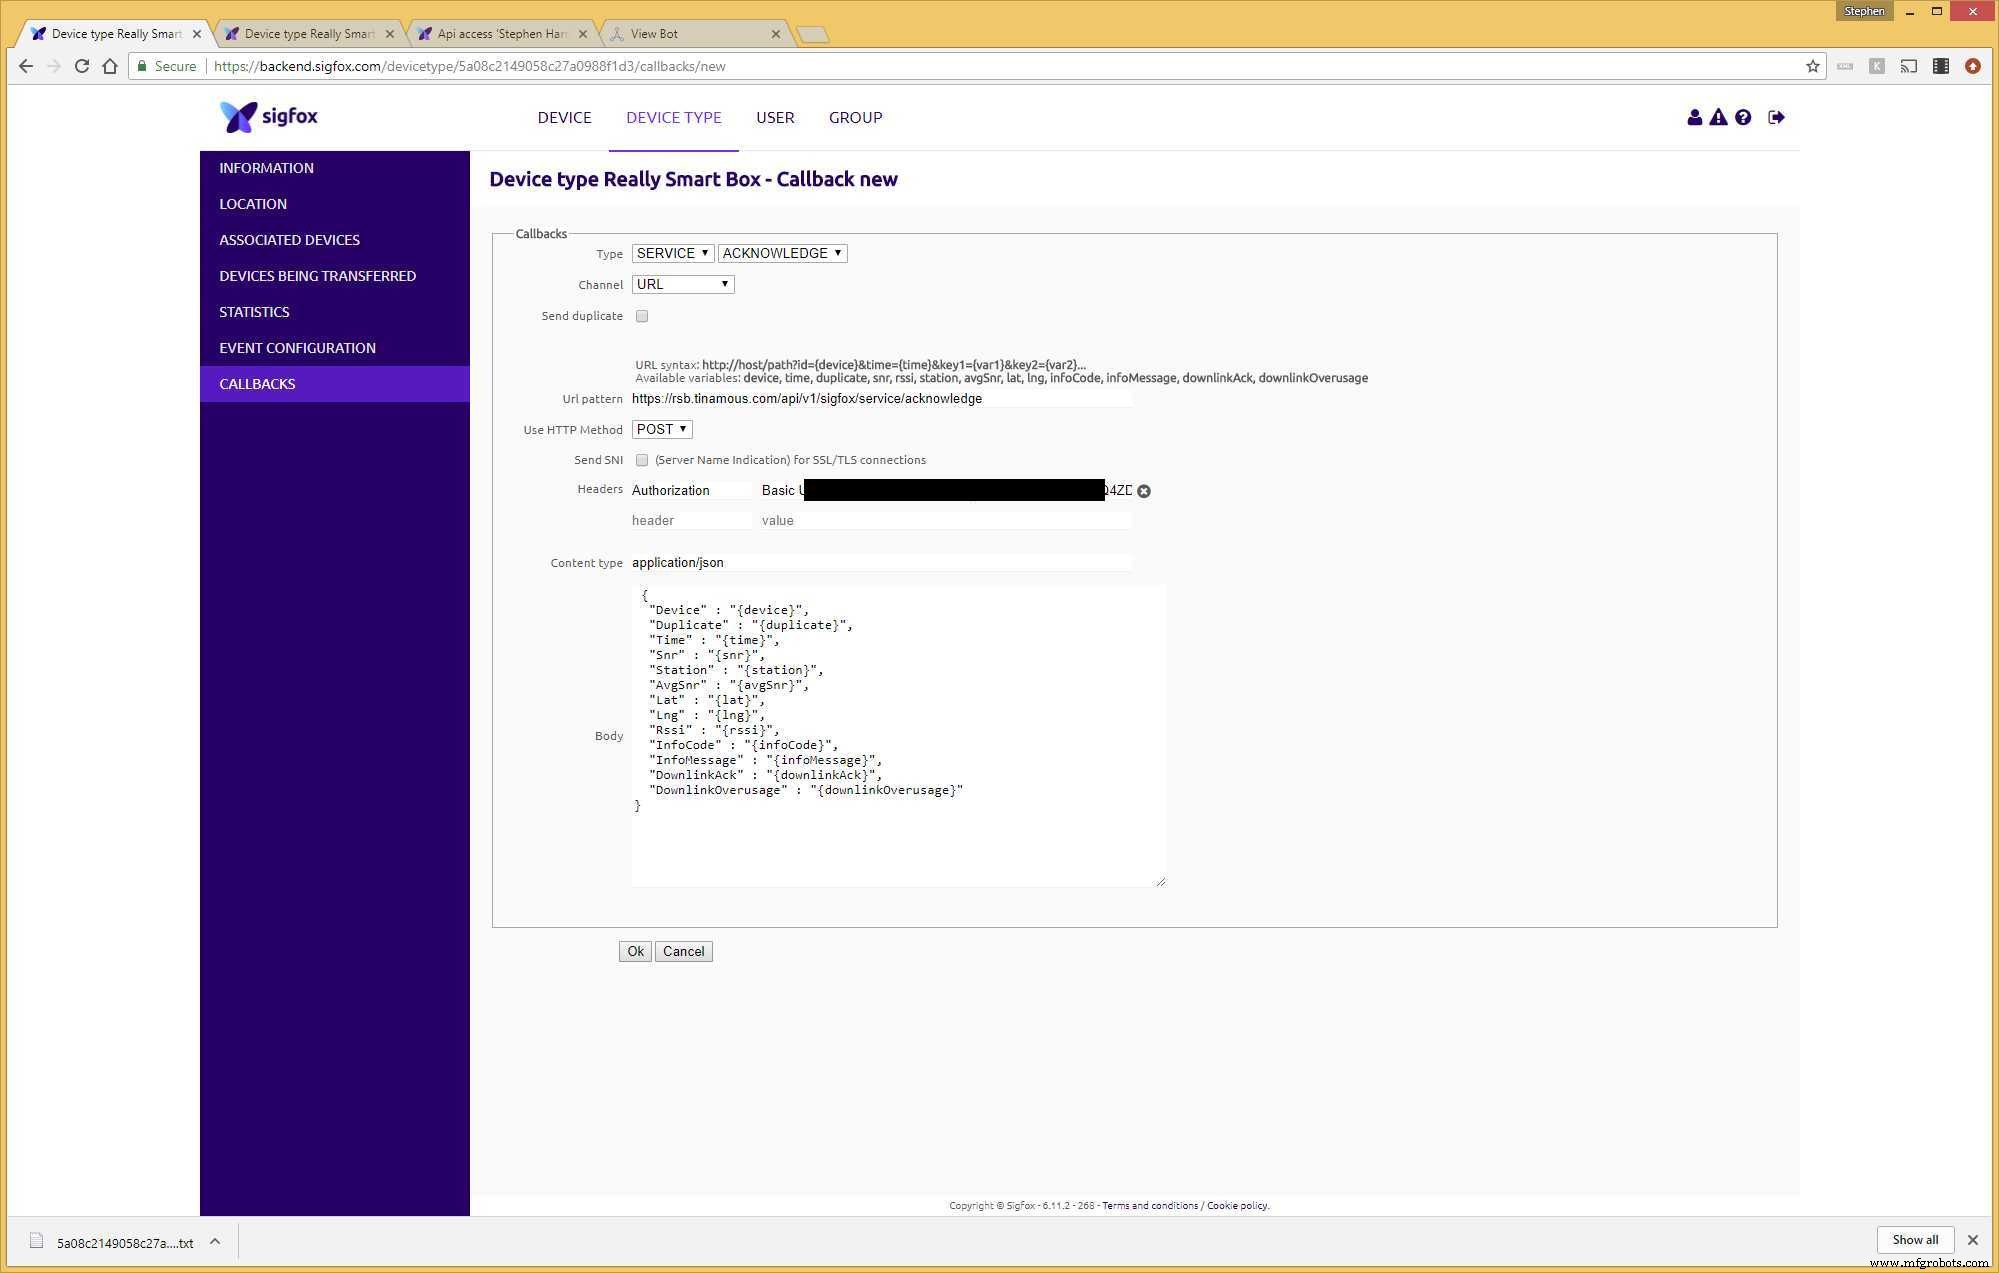
다운링크 콜백을 사용하면 SERVICE -> ACKNOWLEDGE 콜백을 지정하여 장치가 다운링크 데이터를 수신했음을 알 수도 있습니다. Tinamous 다른 콜백 구성이 표시되는 Sigfox 봇을 클릭하면 ACKNOWLEDGE 및 GEOLOC 콜백에 대한 지침을 따르십시오.
첫 번째 업링크/bidir 콜백에서 인증 헤더를 복사해야 합니다. 이는 Tinamous에서 단방향 암호화된 비밀번호이므로 더 이상 표시할 수 없습니다.
콜백이 준비되면 이제 장치에서 게시한 데이터가 Tinamous로 전송되어야 합니다. 또한 Sigfox에서 이메일 콜백을 추가하여 데이터가 수신되는지 확인하는 데 도움이 될 수 있습니다(그러나 매우 빠르게 시끄러울 수 있음).
Tinamous 장치 구성:
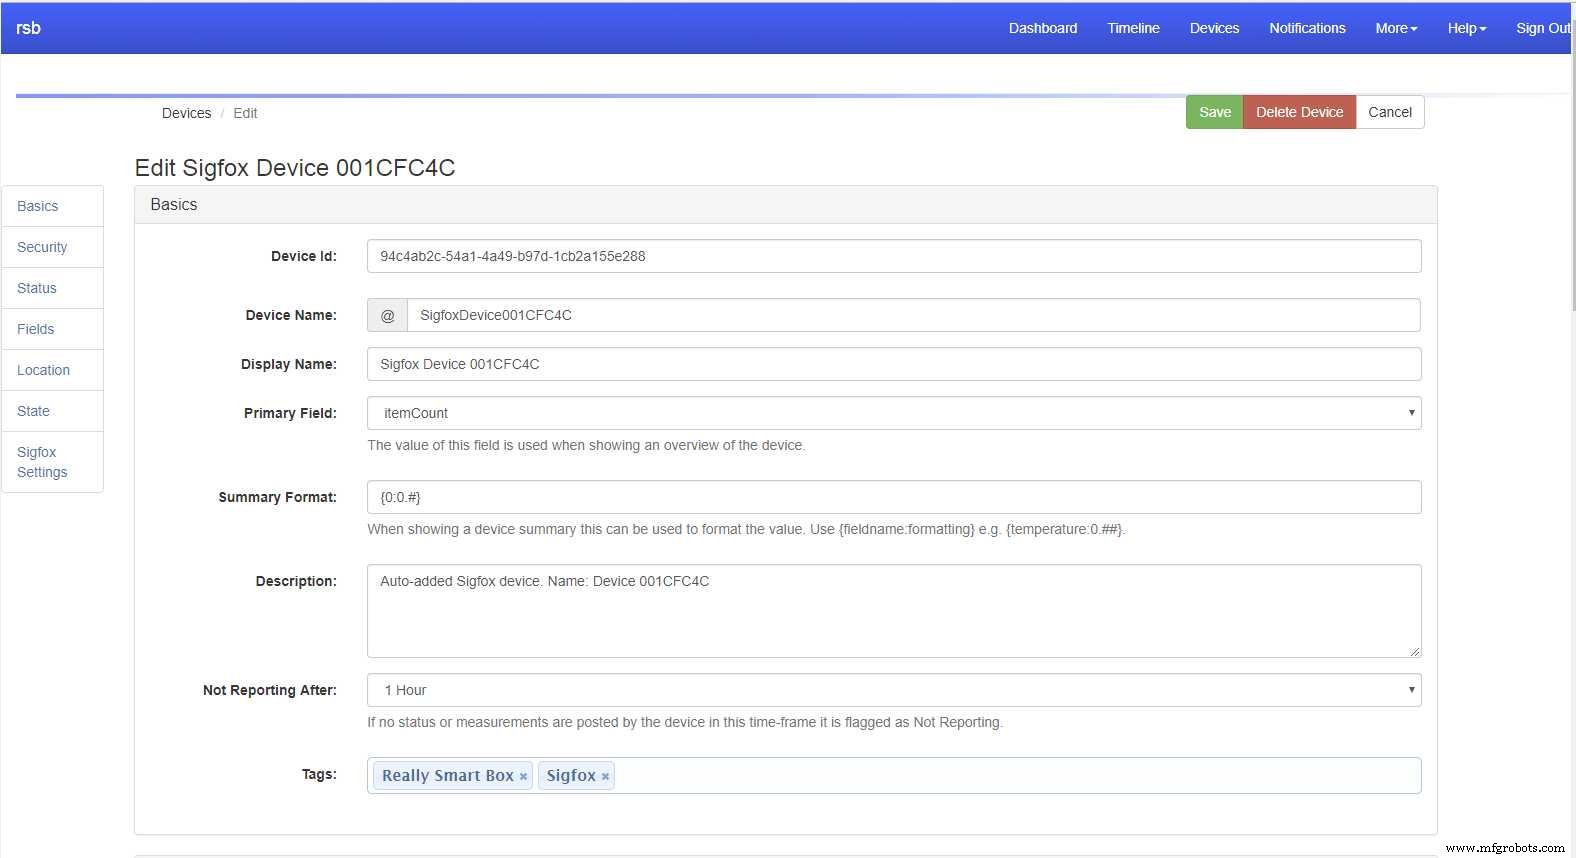
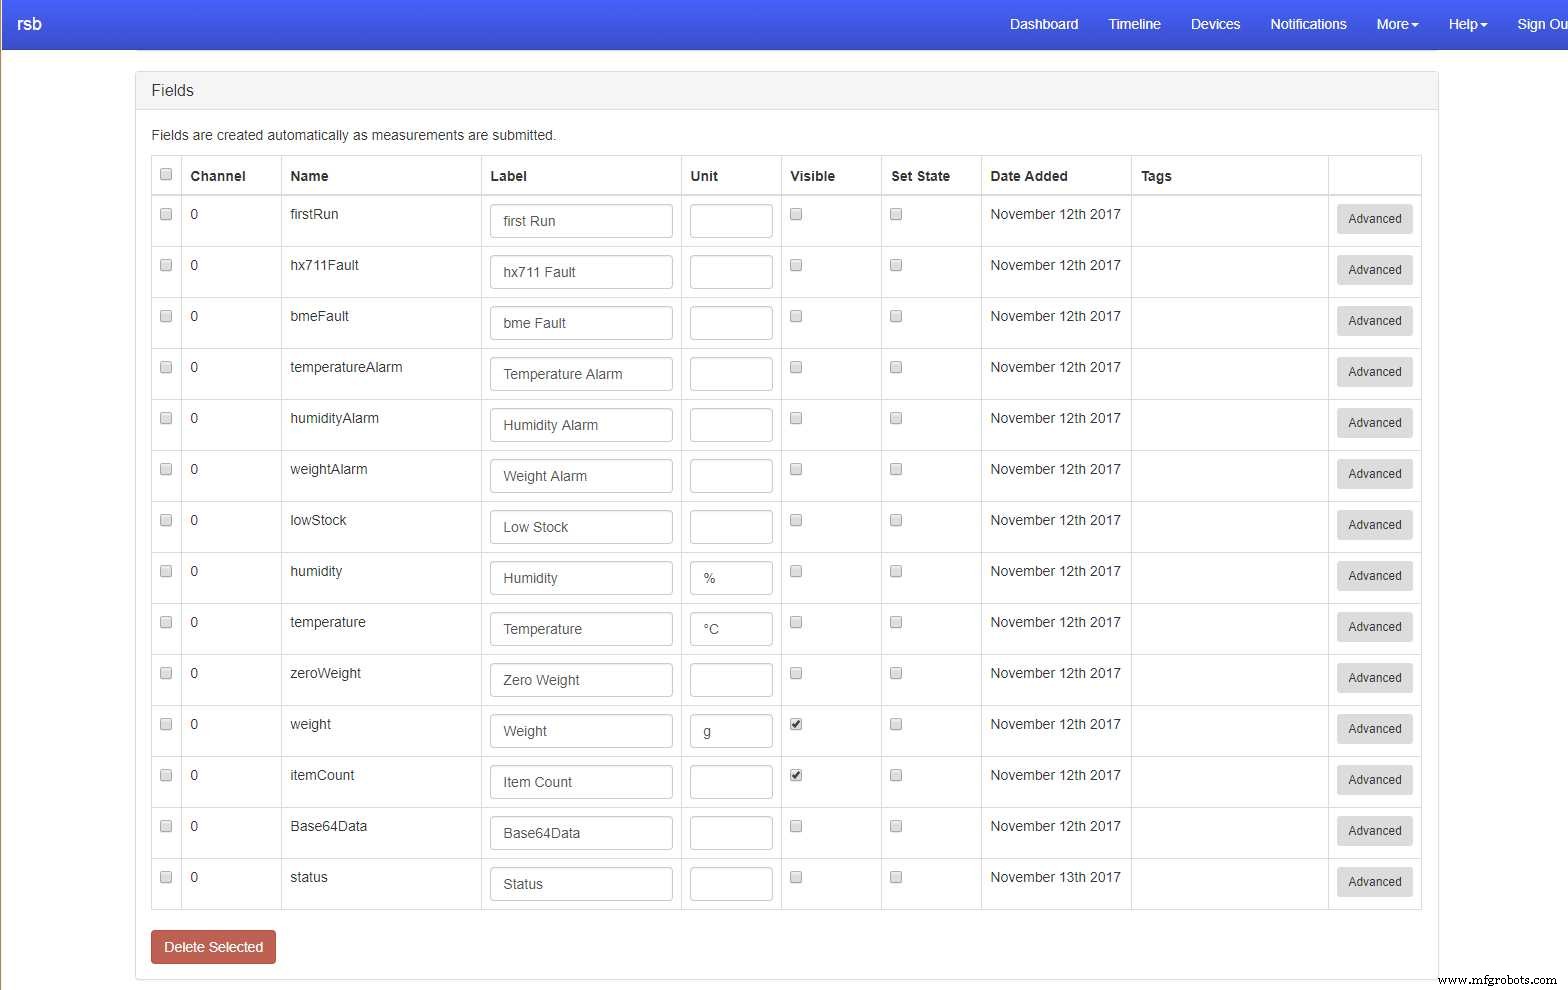
Tinamous에서 Sigfox 장치가 보이면(api 조회 또는 콜백을 통해) 장치 페이지에 표시되며 여기에서 속성을 편집할 수 있습니다. 필드는 Sigfox 콜백에서 올 때 자동으로 추가되므로 장치가 데이터를 게시할 때까지 기다리는 것이 가장 좋습니다.
나는 "다음 이후에 보고하지 않음" 시간을 1시간으로 설정했습니다(현재 15분마다 게시). 그러면 장치가 고장났는지 알 수 있고 선택적으로 이에 대한 알림을 받을 수 있습니다.
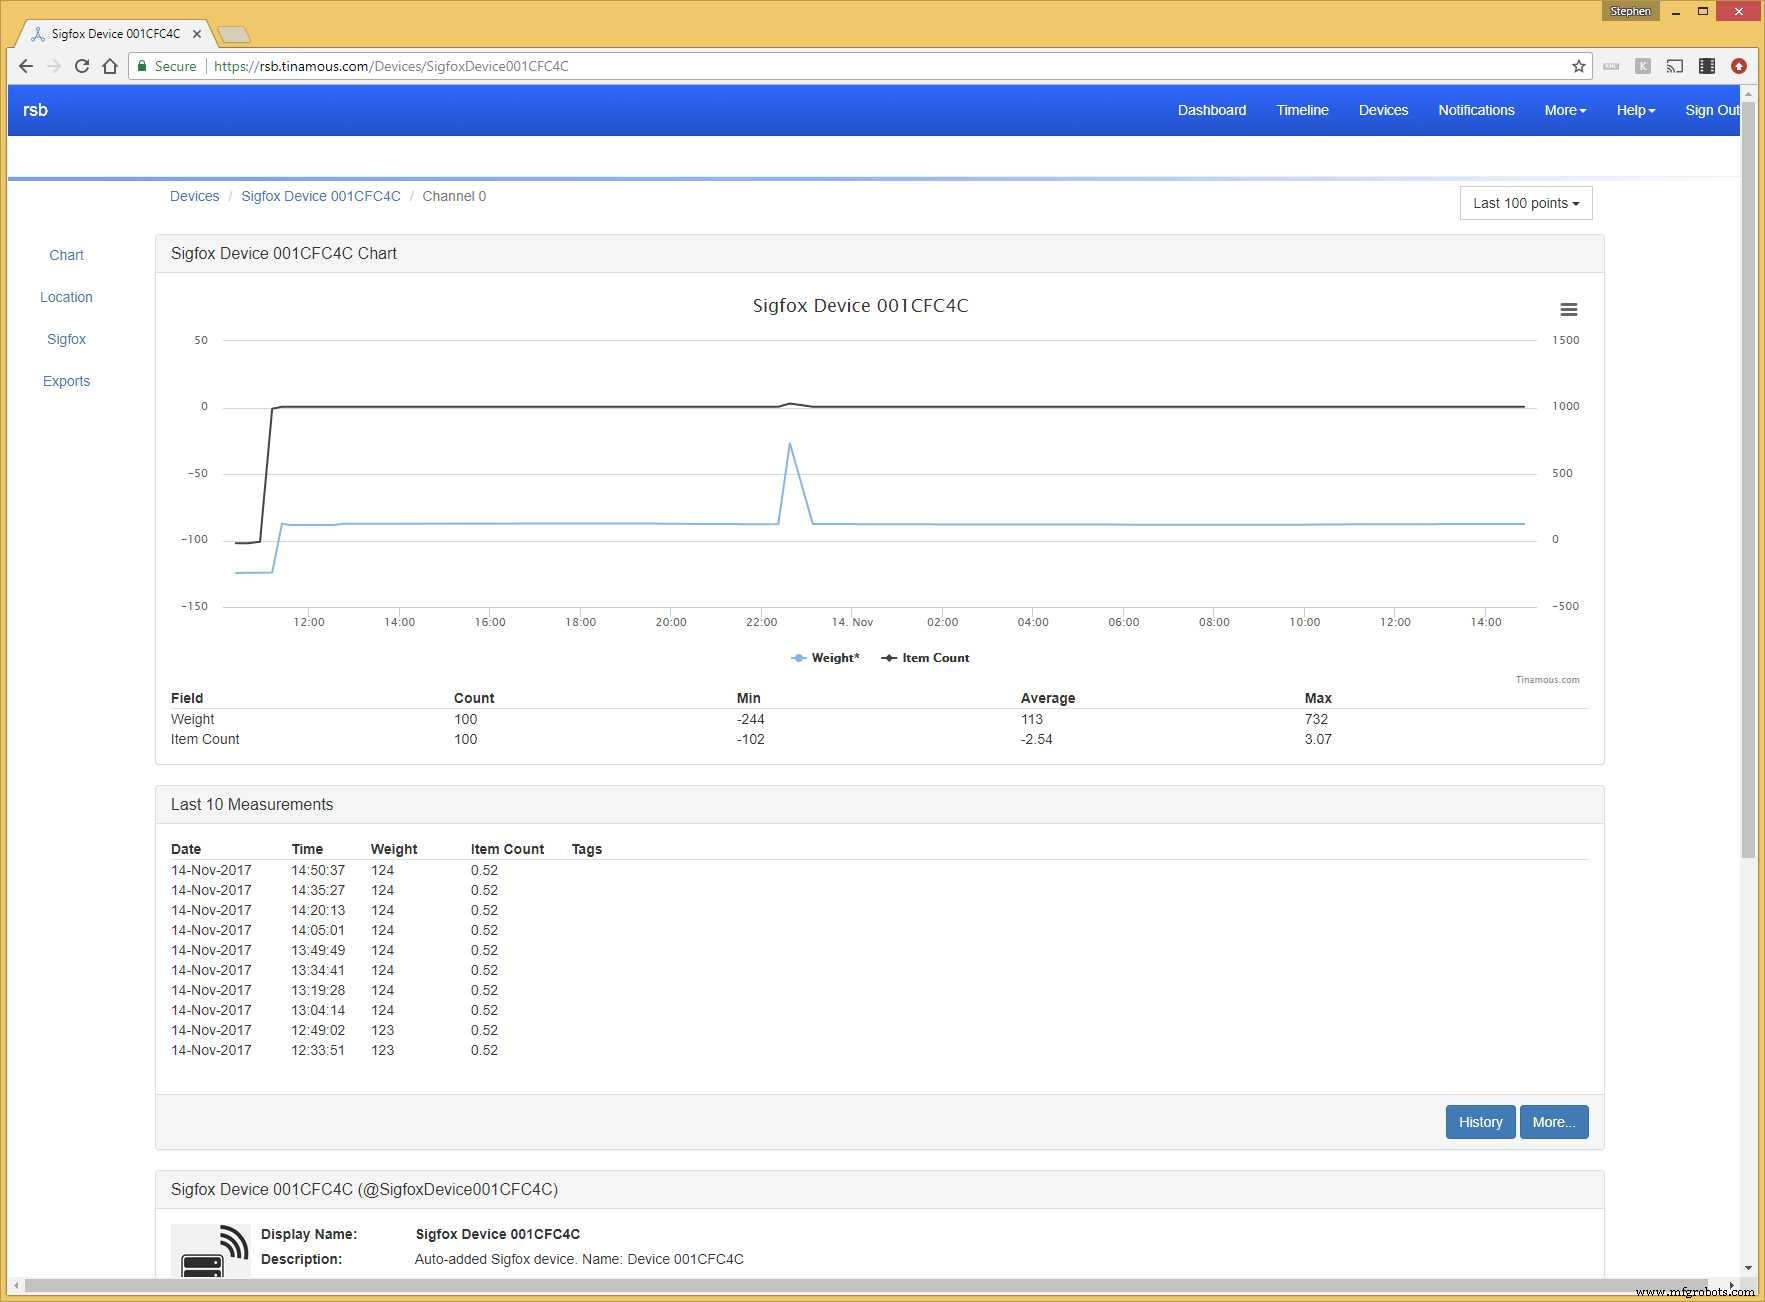
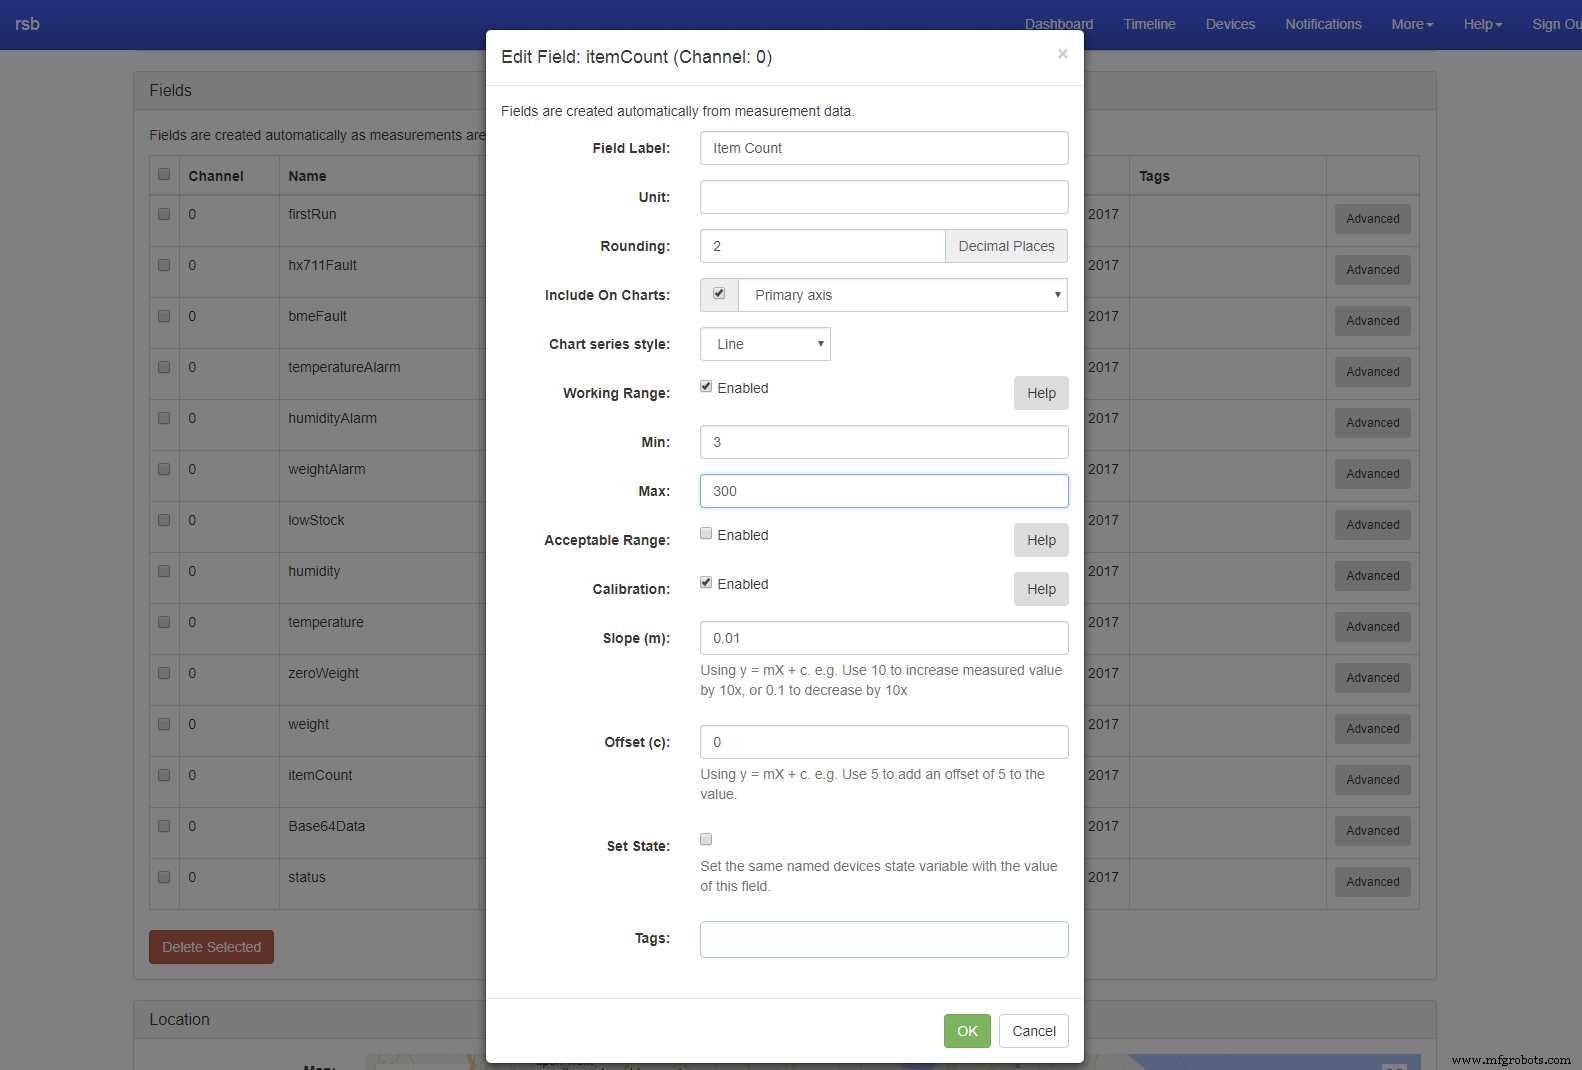
차트/세부 정보 페이지에서 장치가 보낸 모든 필드를 보고 싶지 않았기 때문에(모든 플래그를 포함하면 많은 필드가 있음) Tinamous는 무게와 항목 수만 표시하도록 구성되었습니다. 여기에도 인간 친화적인 라벨과 단위가 적용되었습니다.
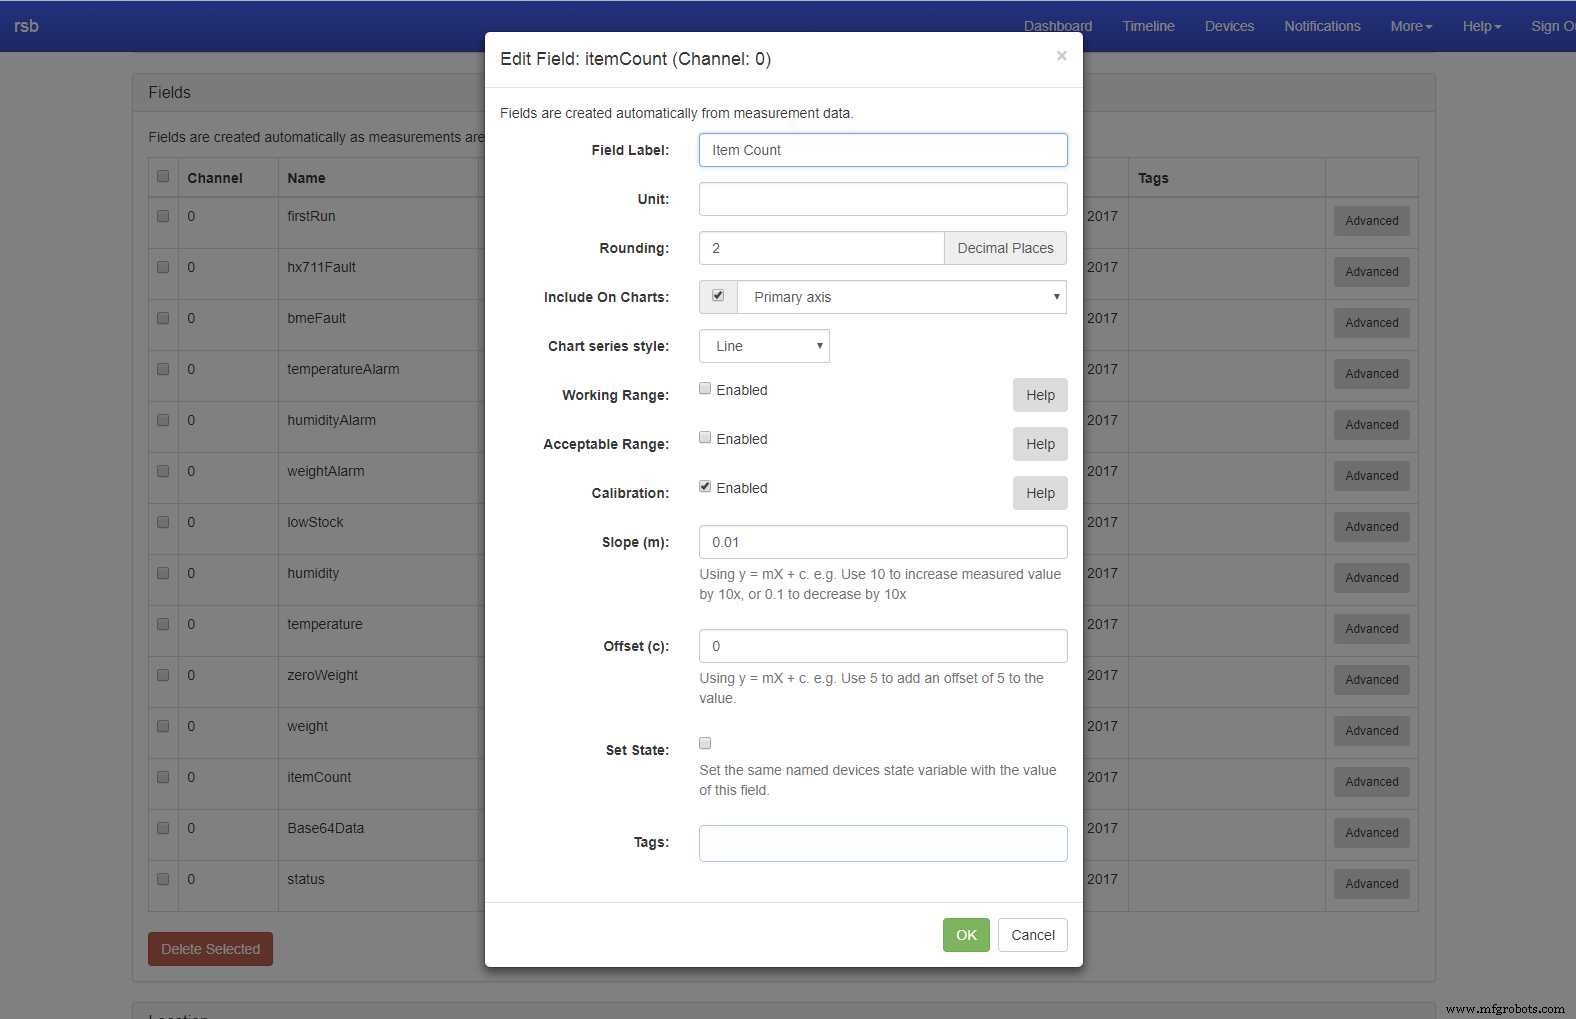
아이템 개수 필드는 실제 아이템 개수의 100배이므로 100배로 줄이기 위해 해당 필드에 보정이 적용됩니다.
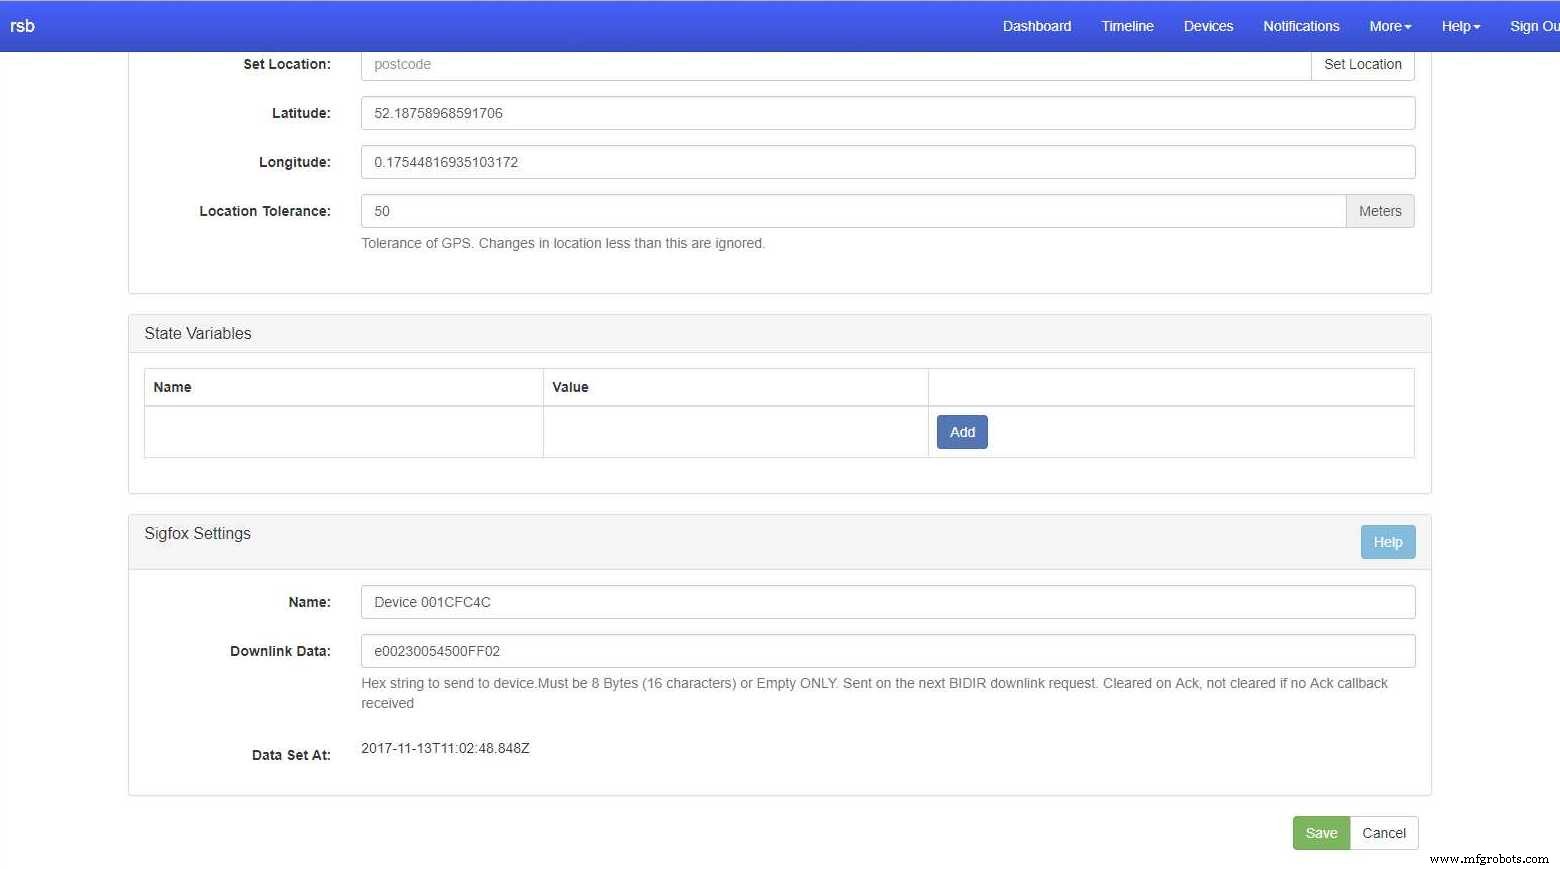
다음으로 다운링크 메시지를 요청할 때(전원을 켠 후 2분, 12시간에 한 번)Really Smart Box를 0으로 만들고 온도 및 습도 범위 제한을 적용하는 일부 다운링크 데이터가 설정됩니다.
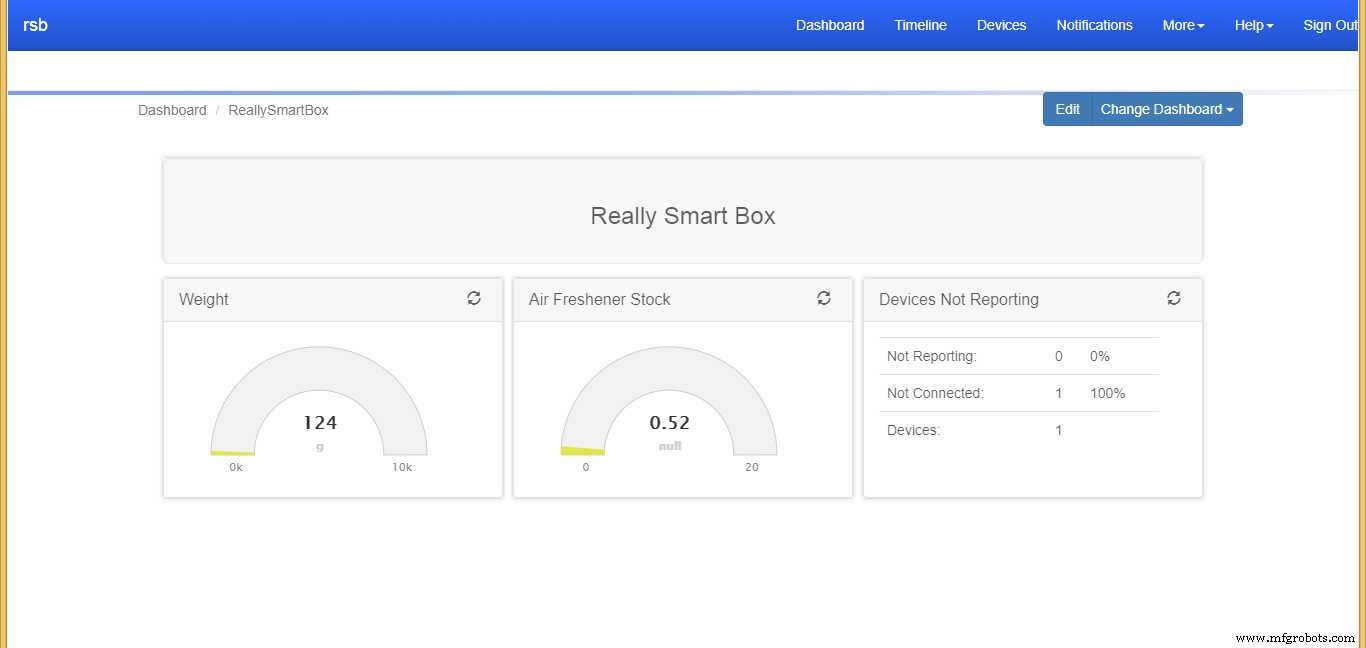
정말 똑똑한 상자 정보 보기:
이제 장치 필드가 구성되어 장치 세부 정보 페이지를 통해 모니터링할 수 있습니다(참고로 저는 지금 플랫폼을 0으로 설정하지 않았으므로 1/2 단위가 있다고 생각합니다. 또한 아크릴 상단을 5mm로 교체했습니다. 더 무겁지만 프린터 필라멘트를 더 잘 처리하는 버전).
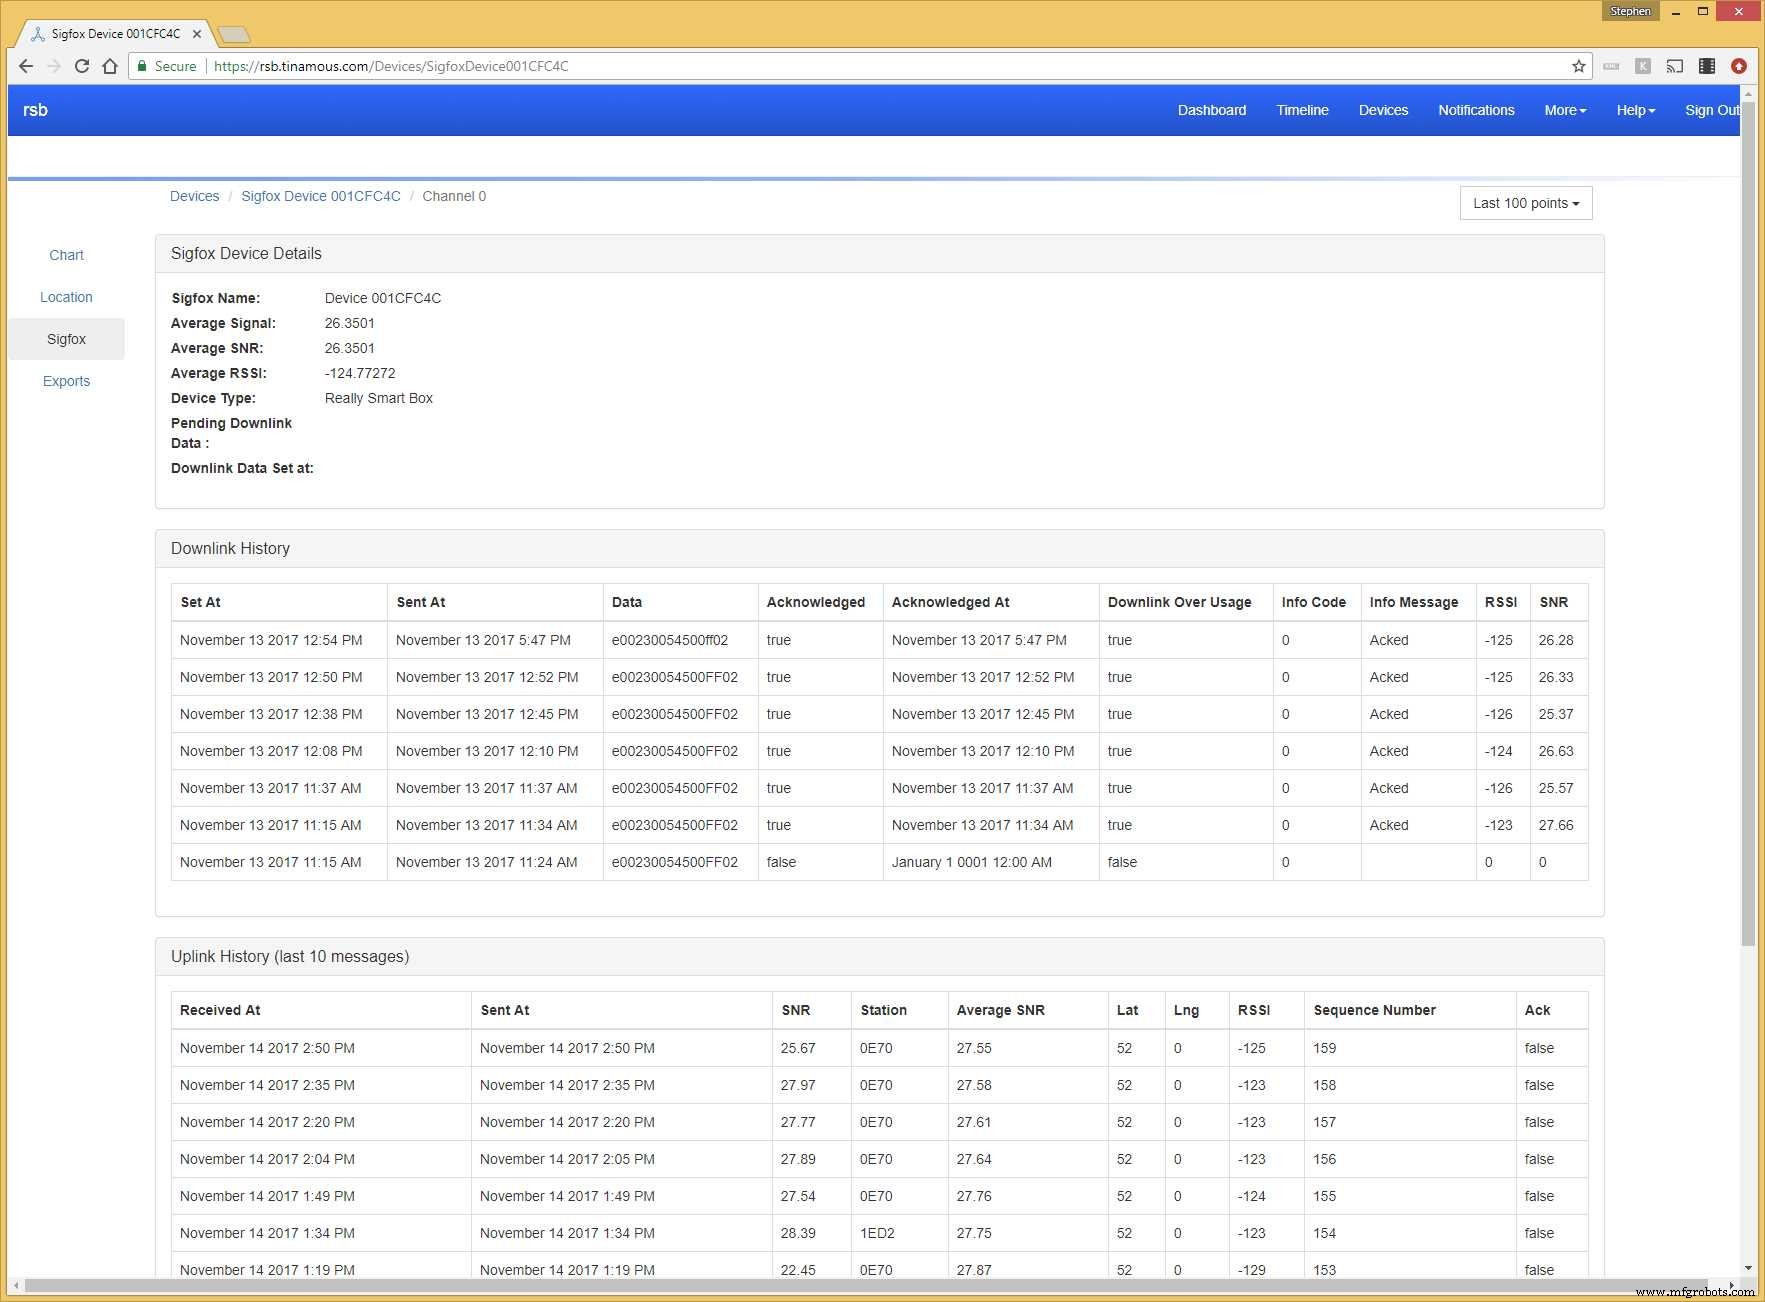
Sigfox 섹션에서 Sigfox 콜백 상호 작용을 볼 수도 있습니다. 여기에서 다운링크 데이터가 전송되고 확인되지만 Arduino가 오류를 보고하고 있음을 주목하십시오. 마지막에 자세히 설명합니다.
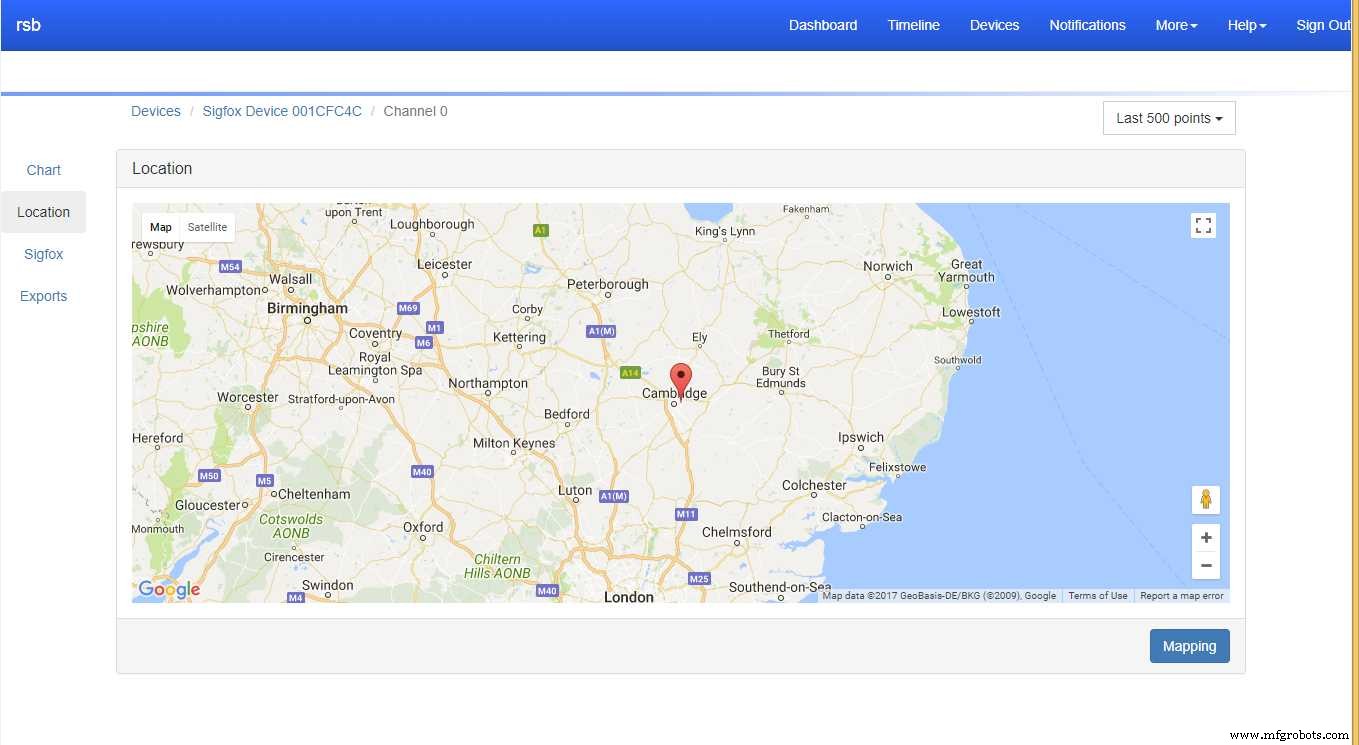
위치 탭에서 당사의 실제 스마트 상자가 어디에 있는지 확인할 수도 있습니다. 이는 고객이 누구인지 잊어버렸거나 밴 안에 있는 경우에 유용할 수 있습니다.
그리고 당연히 우리는 정말 스마트한 상자의 멋진 대시보드 보기를 원합니다. 아래는 상자 내용물 무게, 예상 단위, 보고되지 않는 장치 수를 보여주기 때문에 하나가 고장났는지 알 수 있습니다.
Tinamous로 알림 수신:
다음으로 아이템 수가 적을 때 이메일과 SMS를 보내도록 Tinamous를 설정했습니다. 항목 수 필드에 대해 3 - 300의 작업 범위를 지정하여 이 작업을 수행했습니다. 값이 이 범위를 벗어나면 범위를 벗어난 측정값도 올라갑니다.
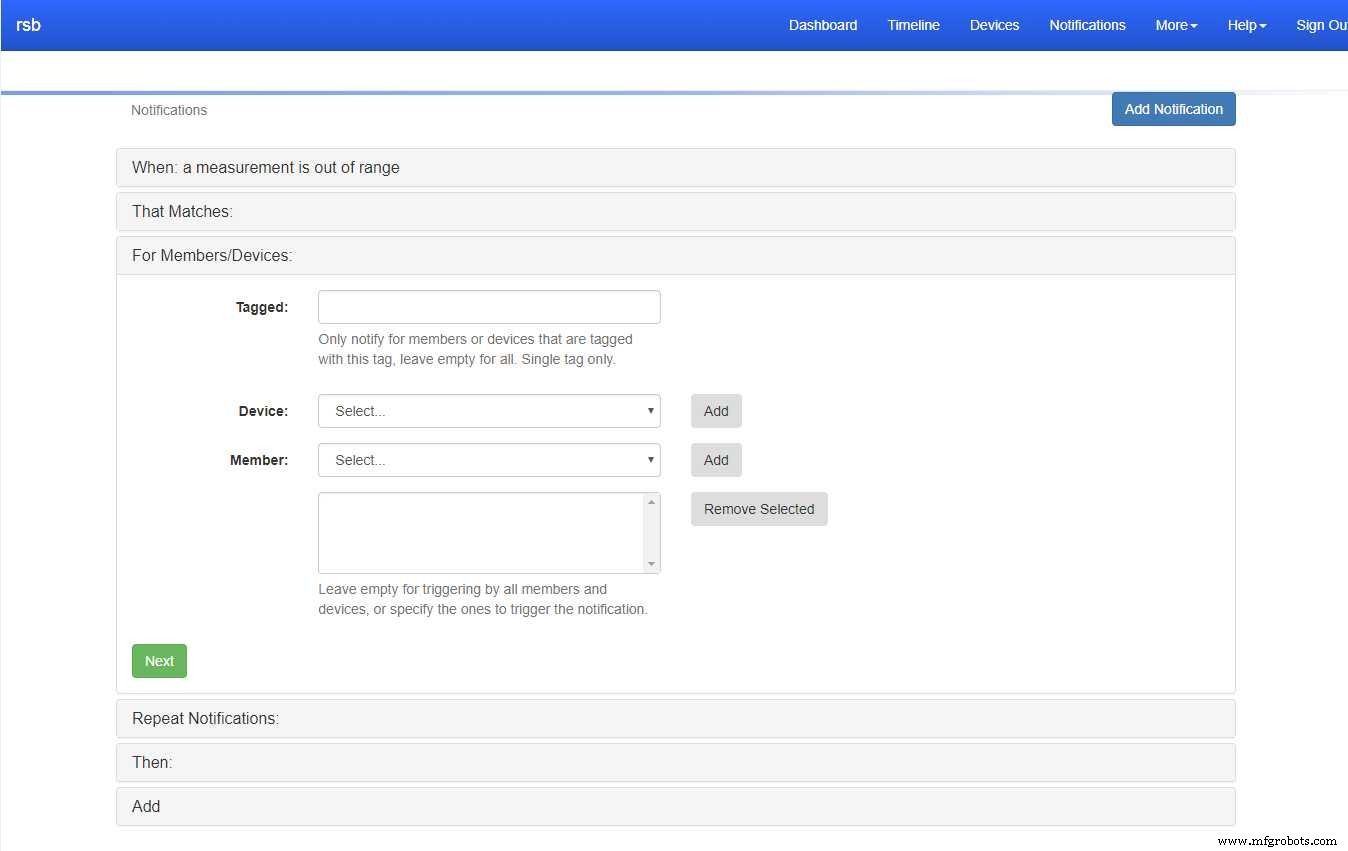
Tinamous에 알림을 추가하면 이러한 일이 발생할 때 알림을 받을 수 있습니다.
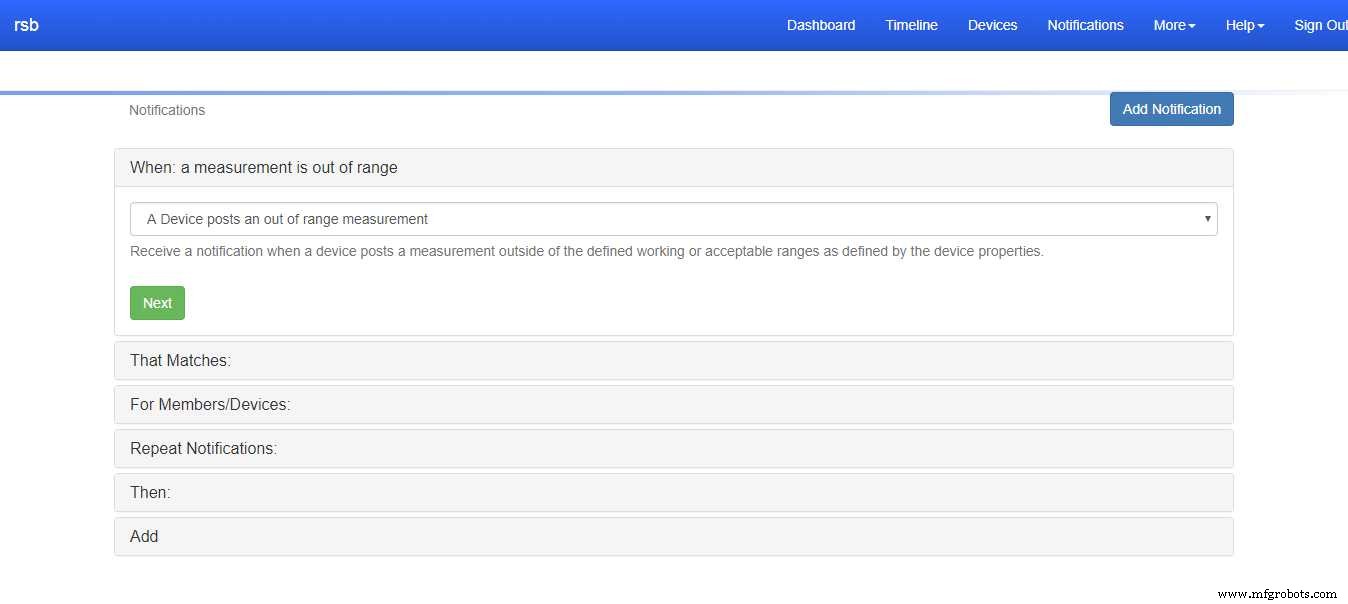
관심 있는 필드만 지정할 수 있지만 이 필드를 비워두면 범위를 벗어난 필드에 대한 알림이 제공됩니다.
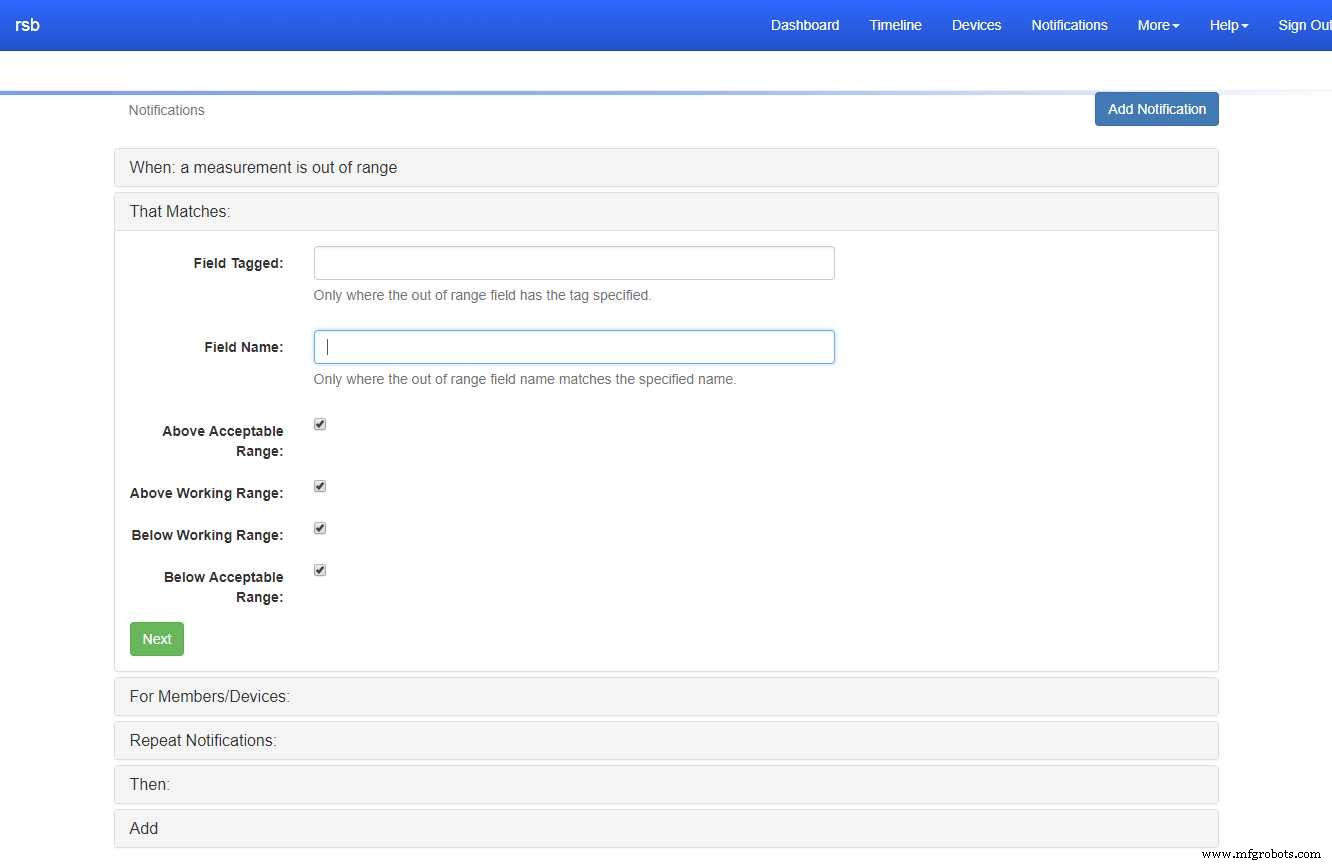
장치의 경우와 마찬가지로 모든 장치에 대해 공백으로 두십시오(즉, 현재 우리가 가지고 있는 유일한 장치입니다!)
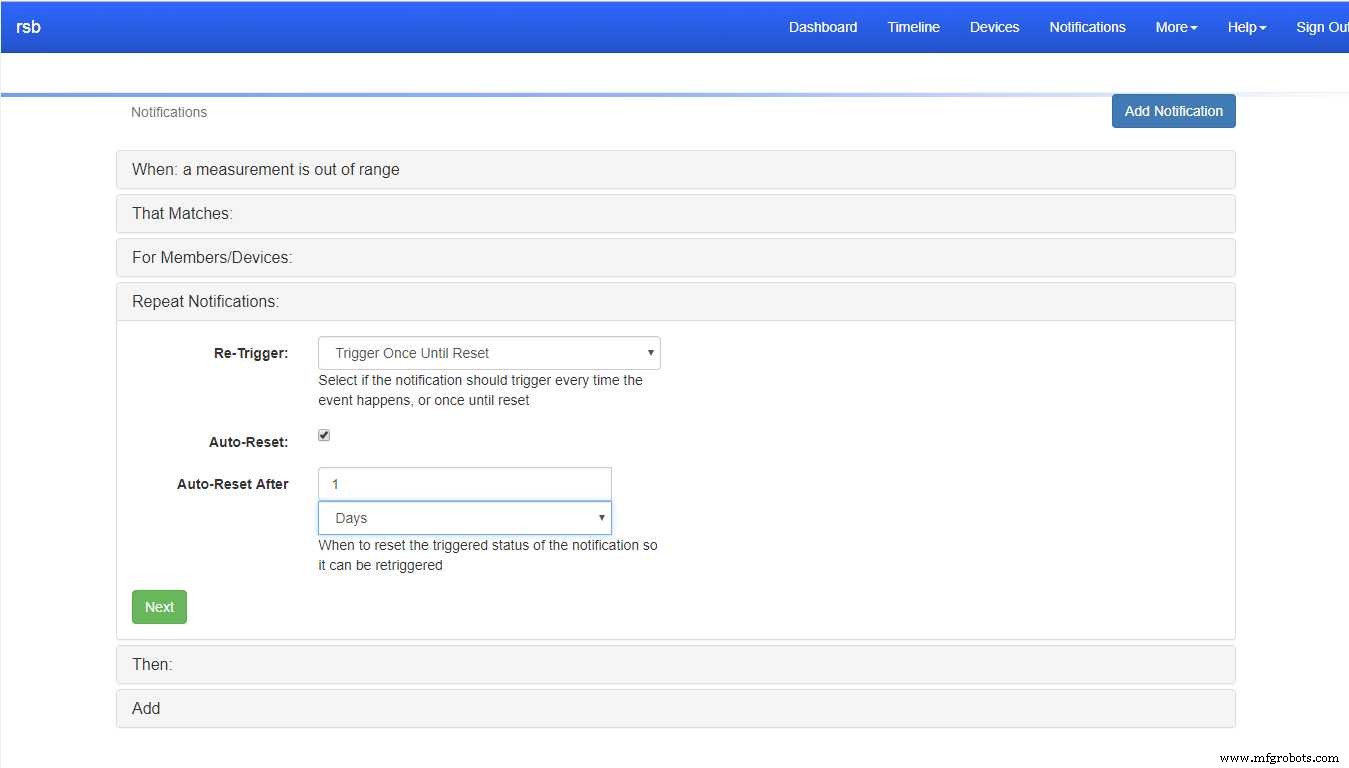
반복 알림이 재설정될 때까지 한 번만 트리거되도록 설정합니다(매일). 그렇지 않으면 15분마다 알림이 매우 빠르게 성가시게 됩니다!
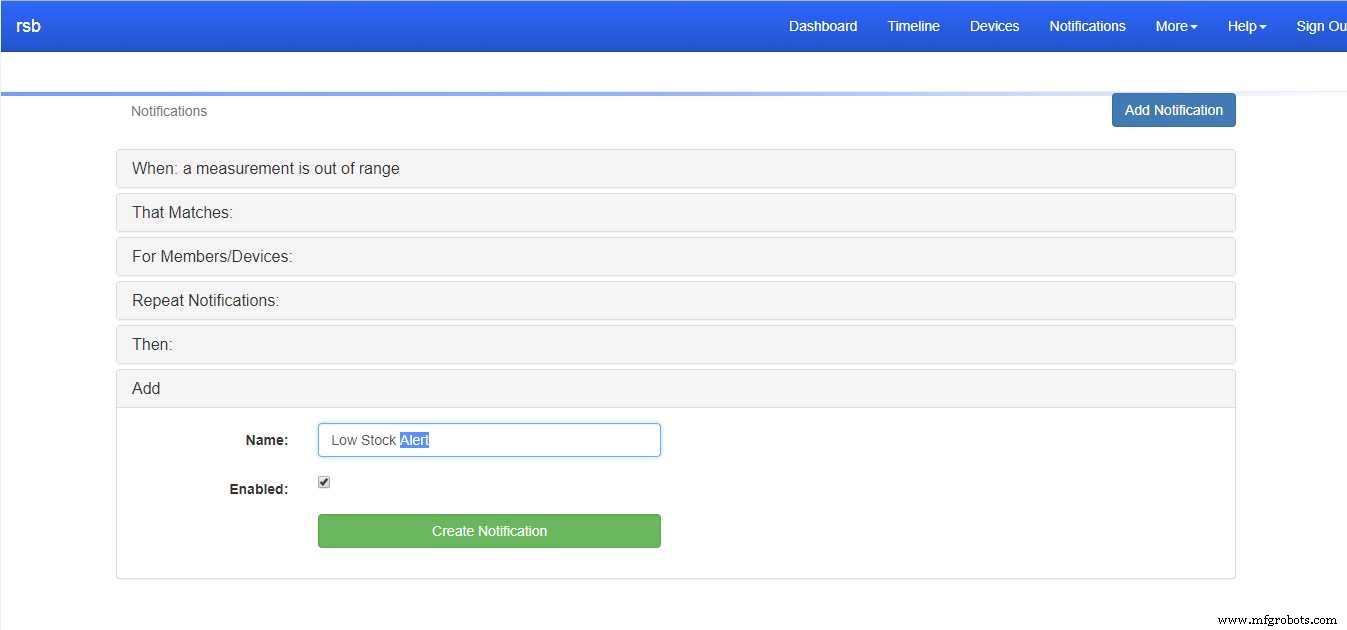
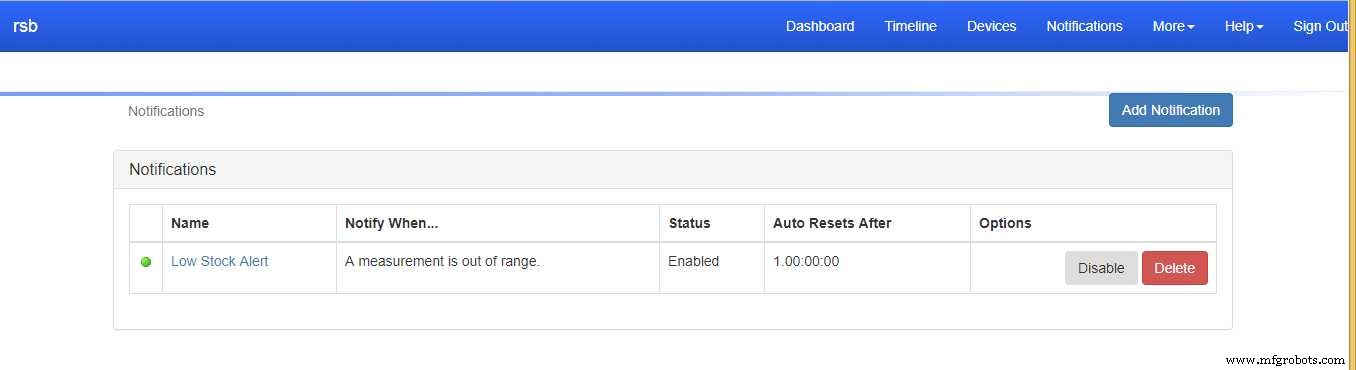
그런 다음 알림 방법을 선택하고 이메일과 SMS로 설정한 다음 알림을 생성합니다.
결론:
이제 정말로 Smart Box를 배포할 수 있고 (잘하면) 잊어버릴 수 있습니다. 재고 수준이 낮아지면 알림을 받고 대시보드에서 어떻게 되는지 확인할 수 있습니다. Sigfox를 사용하면 가끔 배터리를 교체하는 것 외에는 장치에 전원을 공급하는 것에 대해 걱정할 필요가 없으며 현장에서 WiFi를 설정할 필요가 없으므로 배포가 매우 간단합니다.
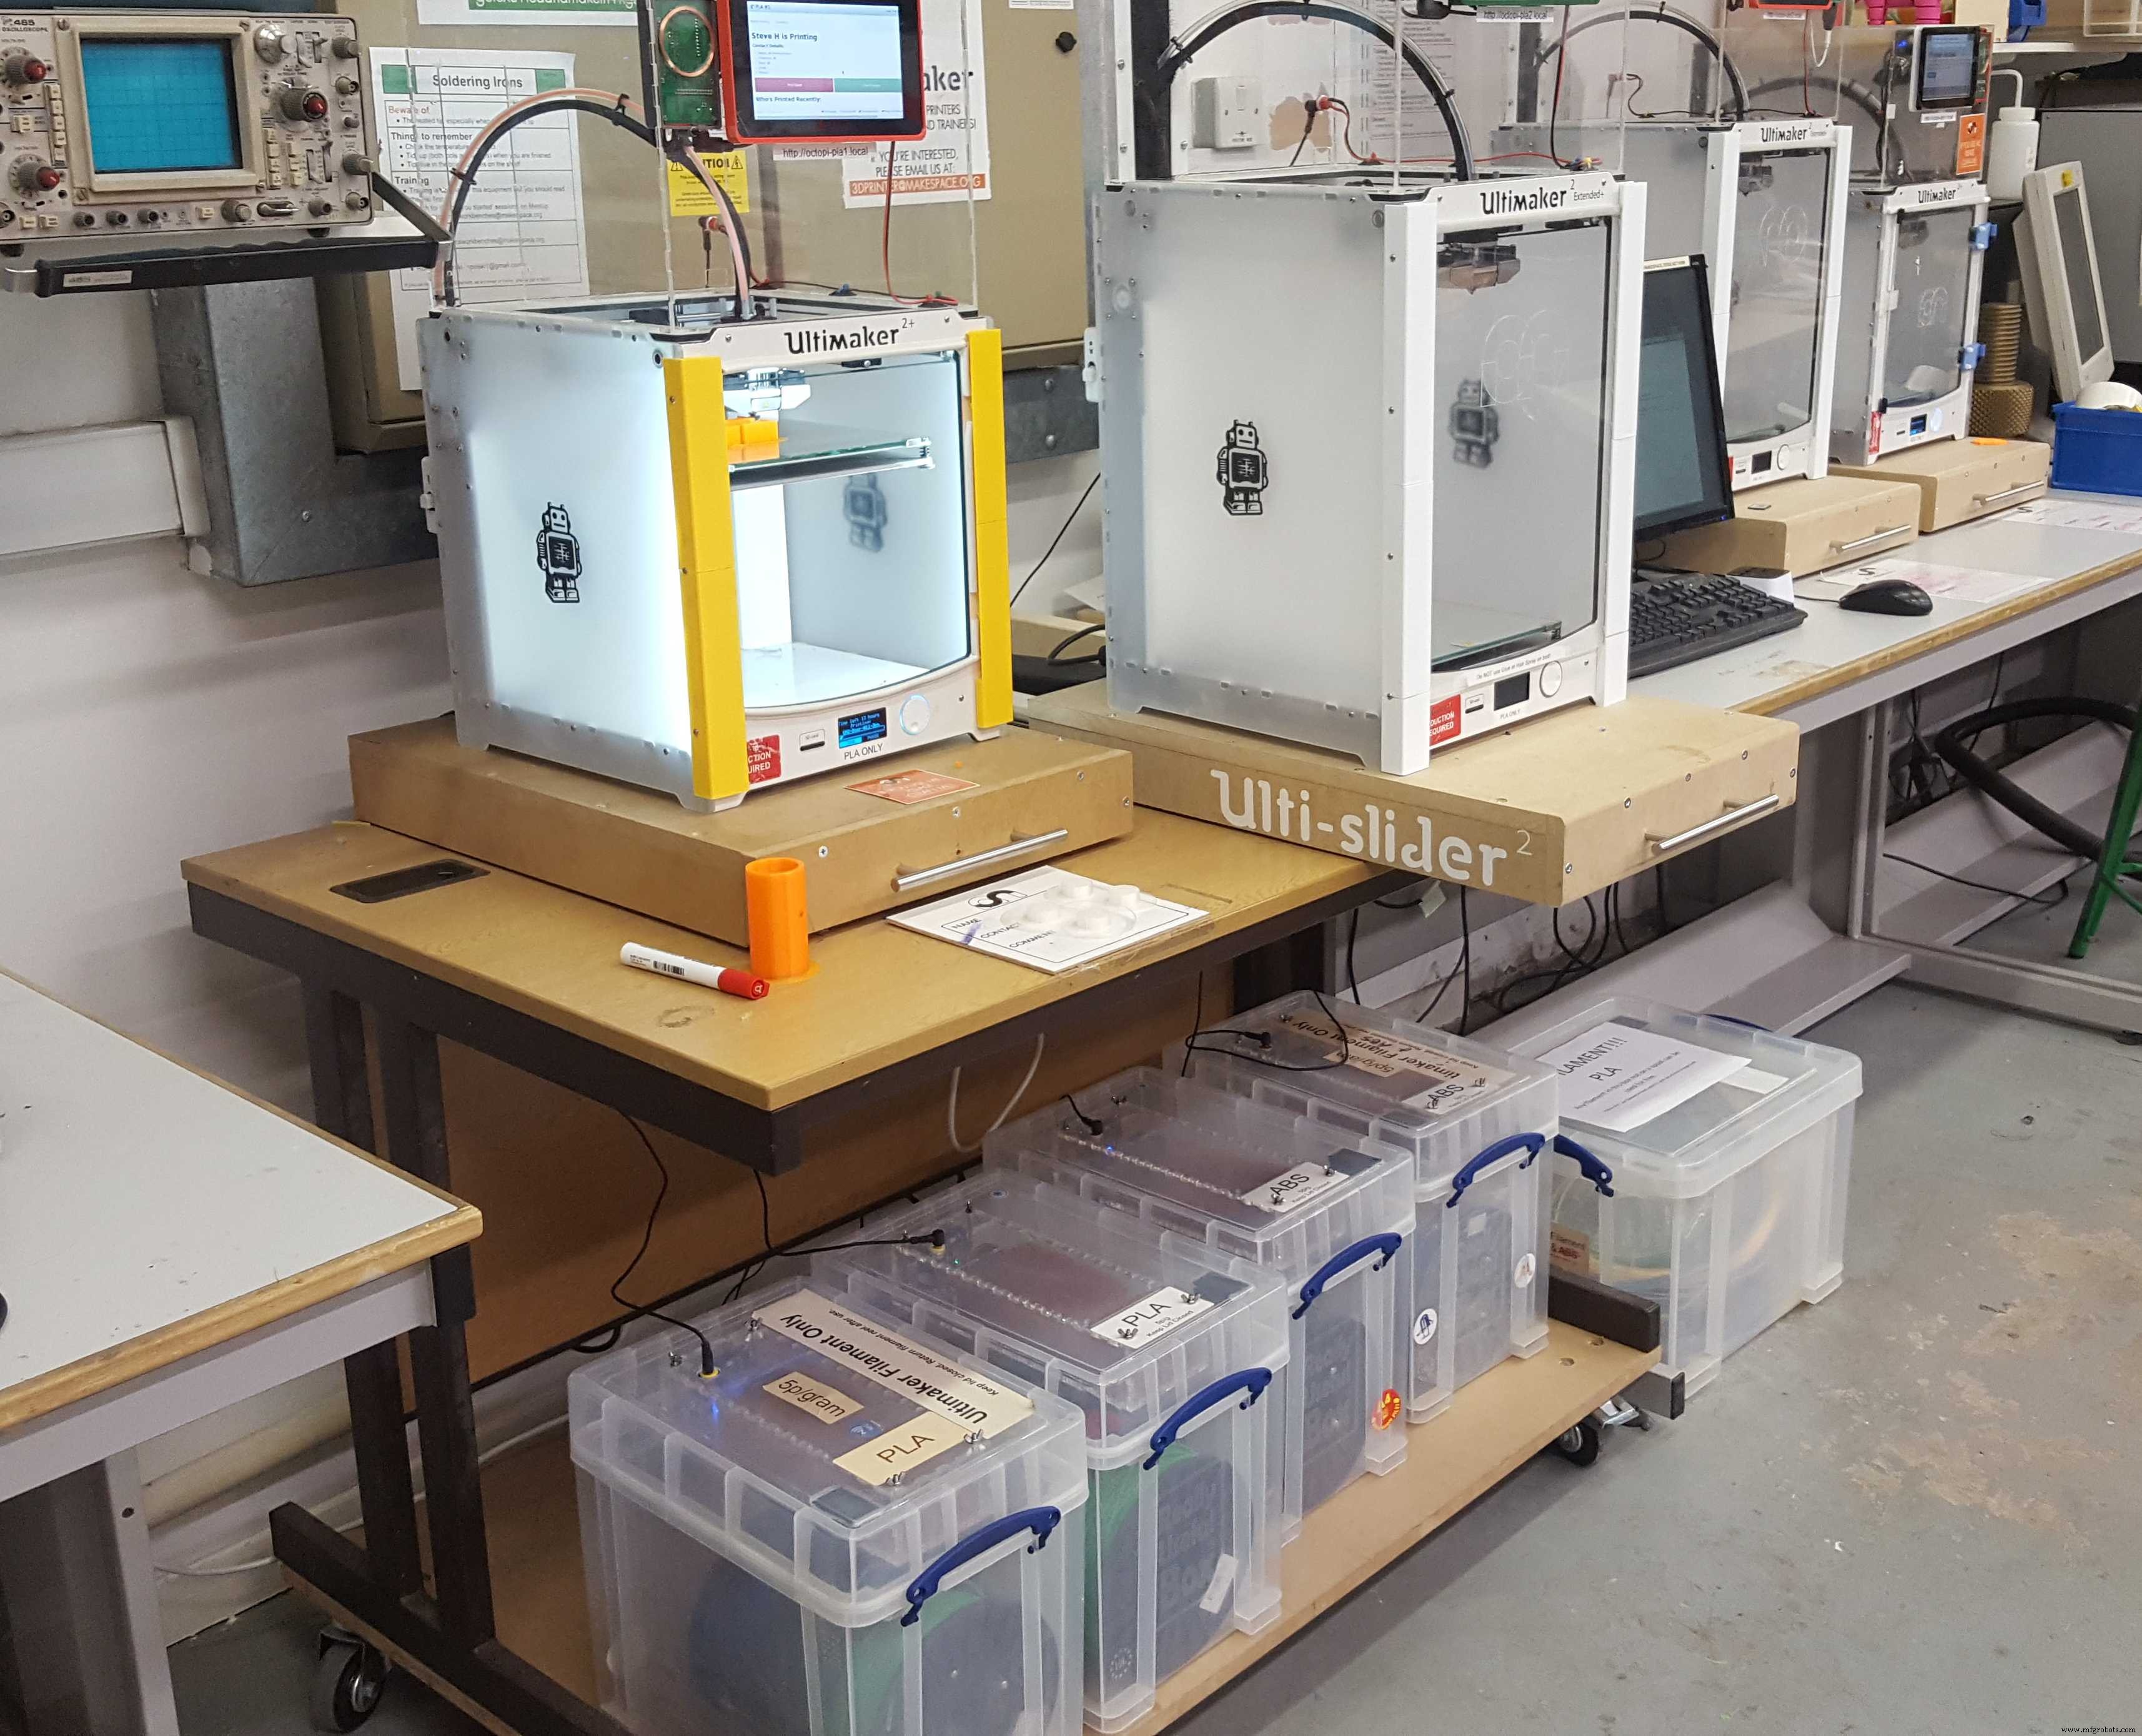
저는 이 장치를 Cambridge Makespace의 필라멘트 보관 상자 중 하나에 배치하여 필라멘트 재고 수준을 모니터링할 계획입니다.
해결해야 할 문제:
말할 필요도 없이 이것이 완성된 프로덕션 품질의 프로젝트가 아니며 몇 가지 문제가 여전히 해결되어야 합니다.
Sigfox 다운링크:
Sigfox는 업링크 메시지에 대한 응답으로 하루에 4개의 메시지를 보낼 수 있습니다. Really Smart Box는 이를 사용하여 저울을 다시 영점화하고 상한 및 하한 온도 및 습도 범위와 품목 무게를 설정할 수 있습니다. 그러나 이것을 작동시키려고 하는 동안 다운링크 메시지가 전송되고 승인되는 것처럼 보이지만(Sigfox 백엔드에 표시됨) Arduino는 62의 상태 오류를 보고하고 있으며 이는 오류 플래그에 매핑되지 않습니다. ATA8520 칩에 대해 나열된 조건에서 드라이버를 파고드는 명령은 데이터 시트에도 나열되지 않은 다운링크 요청을 사용하므로 더 많은 조사가 필요합니다.
디버그 전용:
디버그를 비활성화한 상태에서 Sigfox 통신을 실행하면 Arduino의 저전력 설정이 활성화되고 USB 직렬 포트가 종료됩니다.
저전력 모드:
Sigfox 디버그 설정에 대해 설명한 대로 Arduino의 저전력 라이브러리를 사용하면 USB 직렬이 끊어지므로 현재 활성화되지 않습니다.
드리프트:
드리프트에 대한 보상이 추가되지 않았으며, 로드 셀이 일정한 하중을 받는 경우 의심할 여지 없이 드리프트가 발생할 것입니다.
노이즈/비수직 측정:
진짜 스마트 상자는 밴 뒤에 있을 수 있습니다(예:이동식 청소기, 목수, 배관공 등). 플랫폼에 가속도계를 추가하고 상자가 안정적이지 않을 때 측정 주기를 건너뛰는 것이 좋을 것입니다. 마찬가지로 상자가 수직이 아니면 무게가 예상대로 로드 셀을 통과하지 않을 것입니다.
<섹션 클래스="섹션 컨테이너 섹션 축소 가능" id="코드"> 코드
<울> 정말 스마트한 상자 Arduino 코드
정말 스마트한 상자 Arduino 코드Arduino
Arduino MKR FOX 1200, HX711, AdaFruit BME280, Arduino 저전력용 라이브러리를 추가합니다. Arduino IDE를 사용하여 평소와 같이 프로그래밍합니다.<사전>// 정말 똑똑한 상자// 정말 똑똑한 상자의 내용물의 무게를 측정// 두 장의 아크릴 시트로 만들어지고 그 사이에 2개의 로드 셀이 // 정말 smart box.// 또한 상자 내부의 온도와 압력을 측정하는 BME280이 포함되어 있습니다.// 저자:Stephen Harrison// 라이선스:MIT#include #include #include #include #include // ---------------------------------- ----// I2C 포트의 BME280.Adafruit_BME280 bme; // --------------------------------------// HX711 로드셀 증폭기.// 0 :D0 - DOUT// 1:D1 - CLK// 초기 이득 128.HX711 scales(0, 1, 128);// 로드셀용 어레이. Index 0 ==Channel A, Index 1 ==Channel B.float gain[] ={128,32};// Calibration factor.// 우리는 y =mx + c(c =offset, m =scaleFactor)를 사용합니다./ / 측정된 값을 무게로 변환합니다.// 로드셀에서 보고한 오프셋으로 설정합니다.// 무게가 없는 상태에서.float offset[] ={0,54940}; // 무게가 저울에 놓일 때 계산된 요소로 설정 weight.// scaleFactor =측정값 사용 / weight.float scaleFactor[] ={378.f,260.9f};// ---------------------- ----------------// Sigfox// 이것은 우리가 Sigfox에 게시하는 데이터 구조입니다.// 첫 번째 상태 바이트에서 bool 플래그로 비트를 분할하지만 바이트는 여전히 필요합니다. to be // included otherwise humidity becomes the status// firstRun::bool:7 hx711Fault::bool:6 bmeFault::bool:5 temperatureAlarm::bool:4 humidityAlarm::bool:3 weightAlarm::bool:2 lowStock::bool:1 b0::bool:0// status::int:8 humidity::int:8 temperature::int:8 zeroWeight::int:16:little-endian weight::int:16:little-endian itemCount::int:16:little-endiantypedef struct __attribute__ ((packed)) sigfox_message { uint8_t status; // status::uint:8 -> Split to 8 bits // B7 - First run, B6 - HX711 fault, B5 BME280 fault, B4 Temperature alarm, B3 - Humidity alarm, B2 - weight alarm, B1 - Low stock, B0 - spare int8_t humidity; // humidity::int:8 (yes some sensors (HTU21D read -ve humidity) int8_t temperature; // temperature::int:8 (no decimal places). int16_t zeroWeight; // zeroWeight::int:16:little-endian int16_t weight; // weight::int:16:little-endian int16_t itemCount; // itemCount::int:16:little-endian (100x actual item count to allow for 2.01 (as weight won't match exactly) int8_t driftCorrection; // Drift Correction for changes in zero weight applied to the scales. int8_t filler; int8_t lastStatus; // Last sigfox status} SigfoxMessage;// Time the last Sigfox message was published atlong lastPublish =0;// Time the last Sigfox downlink was requested.// Allowed max 4 per day of these.long lastDownlink =0;uint8_t lastSigfoxStatus =0;// --------------------------------------// Application/state// If the fist cycle (after a reset) for the measure/publish// cycle (this is used to request a downlink message from Sigfox).// Note that only 4 of them are allowed per day so becareful// when deploying code.bool isFirstCycle =true;// Application mode// 0:Normal// 1:Calibrationint mode =0;// Which channel should be read during calibration.int calibrate_channel =0;// The last average value measured for each channel.float lastAverage[] ={0,0};// The current weight of the contents of the boxfloat currentWeight =0;// The weight of the units the box will hold.// Updatable via Sigfox downlink message.float unitWeight =238;// Different to tare as it would be a manual// zero'd at a set reading from scales// This will most likely change with drift (time/temperature/etc)// and should be set once the scale is in place but not loaded.// Updatable via Sigfox downlink message.float zeroWeight =0;bool bmeOk =true;bool hx711Ok =true;// Alarms and alarm rangesfloat minTemperature =5.f;float maxTemperature =60.f;float minHumidity =0.f;float maxHumidity =60.f;float maxWeight =10000; // 10kgbool temperatureAlarm =false;bool humidityAlarm =false;bool weightAlarm =false;float currentTemperature =0;float currentHumidity =0;float stockLevel =0;bool lowStock =false;float minStock =5;// Setup the Arduino.void setup() { pinMode(LED_BUILTIN, OUTPUT); //Initialize serial:Serial.begin(9600); // NB:The sensor I'm using (from random eBay seller) // does not use the default address. bmeOk =bme.begin(0x76); if (!bmeOk) { Serial.println("Could not find a valid BME280 sensor!"); } // Delay for USB Serial connect and for the BME's first reading. 지연(5000); Serial.println("Really Smart Box..."); printHeader();}int delayCounter =0;void loop() { switch (mode) { case 0:measureAndPublish(); //Sleep for 1 minutes // Causing problems with USB connected. //LowPower.sleep(1 * 60 * 1000); delay(60 * 1000); 부서지다; case 1:calibrate(); 지연(1000); 부서지다; } // Check for user input via the serial port. checkSerial(); // measure is done on RTC timer tick (once per minute) delay(100);}void measureAndPublish() { // turn the LED on to indicate measuring. digitalWrite(LED_BUILTIN, HIGH); printBmeValues(); measureTemperatureAndHumidity(); measureWeight(true); // Weight, temperature and humidity are read every minute // however we only publish occasionally. if (shouldPublish()) { publishMeasurements(); } digitalWrite(LED_BUILTIN, LOW); }// Main measurement loop. Reads the weight from the load cells// and stores if no noise from the previous read.void measureWeight(bool printDetails) { scales.power_up(); 지연(500); float delta =readDelta(printDetails); if (printDetails) { Serial.print("\t"); Serial.print(delta, 2); } // If the delta is between -1 and 1 (i.e. no noise) // update the change in overall weight and units contained // otherwise ignore and try again later on. // This ensures we use only stable readings when both channels have not changed for // two sets of measurements. if (delta <1.f &&delta> -1.f) { // Remember the previous measured weight so we can get a delta. float lastWeight =currentWeight; // Compute the weight. Take the weight of both load cells // added together then subtract the zero'd weight. currentWeight =lastAverage[0] + lastAverage[1] - zeroWeight; // Compute the difference in weight of the items in the box // compated to the last time we had a stable reading. float itemsWeightDelta =currentWeight - lastWeight; updateStockLevels(); if (printDetails) { Serial.print("\t"); Serial.print("\t"); Serial.print(currentWeight, 2); Serial.print("\t"); // divide by unit weight to estimate the stock level in the box Serial.print(currentWeight / unitWeight, 2); Serial.print("\t"); // the change in weight, (i.e. the weight if the items added) Serial.print(itemsWeightDelta, 2); Serial.print("\t"); // divide by unit weight to estimate the units removed/added Serial.print(itemsWeightDelta / unitWeight, 2); } } checkWeightLimits(); if (printDetails) { Serial.println(); } // put the ADC in sleep mode and switch // off the LED now we're done measuring. scales.power_down(); }void updateStockLevels() { stockLevel =currentWeight / unitWeight; // Unlike other alarms the low stock level // is reset if the stock is re-stocked. lowStock =stockLevel maxWeight ) { weightAlarm =true; } if (lastAverage[0]> (maxWeight /2)) { weightAlarm =true; } if (lastAverage[1]> (maxWeight /2)) { weightAlarm =true; }}// Read the difference in weight from the last // average to this time across both load cells.// average value is stored in the lastAverage array.float readDelta(bool printDetails) { float aDelta =readChannel(0, true); if (printDetails) { Serial.print("\t"); } float bDelta =readChannel(1, true); return aDelta + bDelta;}// Read the weight from a channel. Stores the measured value in // the lastAverage array and retuns the delta of the measured value// from the previous lastAverage. This allows us to know if the weight// has changed.// channel 0 =A// channel 1 =Bfloat readChannel(int channel, bool printDetails) { // Gain:// Channel A supports 128 or 64. Default 128 // Channel B supports 32 // Select Channel B by using gain of 32. scales.set_gain(gain[channel]); // HX711 library only has one set of offset/scale factors // which won't work for use as we use both channels and they // have different gains, so each needs to have it's offset/scale set // before reading the value. scales.set_offset(offset[channel]); scales.set_scale(scaleFactor[channel]); // force read to switch to gain. scales.read(); scales.read(); float singleRead =scales.get_units(); float average =scales.get_units(10); float delta =average - lastAverage[channel]; if (printDetails) { Serial.print(singleRead, 1); Serial.print("\t"); Serial.print(average, 1); Serial.print("\t"); Serial.print(delta, 1); Serial.print("\t"); } lastAverage[channel] =average; return delta;}// print the header for the debug data pushed out when measuring.void printHeader() { Serial.print("BME280\t\t\t\t\t"); Serial.print("Channel A\t\t\t"); Serial.print("Channel B\t\t\t"); Serial.print("\t\t"); Serial.print("Totals \t\t\t"); Serial.println(""); Serial.print("Temp\t"); Serial.print("Pressure\t"); Serial.print("Humidity\t"); Serial.print("read\t"); Serial.print("average\t"); Serial.print("delta\t"); Serial.print("\t"); Serial.print("read\t"); Serial.print("average\t"); Serial.print("delta\t"); Serial.print("\t"); Serial.print("sum\t"); Serial.print("\t"); Serial.print("weight\t"); Serial.print("items\t"); Serial.print("change\t"); Serial.print("items added"); Serial.println("");}// Calibration - reads/prints selected channel values.void calibrate() { digitalWrite(LED_BUILTIN, HIGH); // turn the LED on (HIGH is the voltage level) scales.set_gain(gain[calibrate_channel]); scales.set_offset(offset[calibrate_channel]); scales.set_scale(scaleFactor[calibrate_channel]); // force read to switch to gain Serial.print("\t|CH:\t"); Serial.print(calibrate_channel,1); Serial.print("\traw:\t"); Serial.print(scales.read(),1); Serial.print("\t| raw:\t"); Serial.print(scales.read(),1); Serial.print("\t| units:\t"); Serial.print(scales.get_units(), 1); Serial.print("\t| gain:\t"); Serial.print(gain[calibrate_channel], 1); Serial.print("\t| factor:\t"); Serial.println(scaleFactor[calibrate_channel], 1); digitalWrite(LED_BUILTIN, LOW);}// check the serial port for input from a console to allow us to alter // the device mode etc.void checkSerial() { if(Serial.available()) { char instruction =Serial.read(); switch (instruction) { case '0':calibrate_channel =0; Serial.println("Channel 0 (A) Selected"); 부서지다; case '1':calibrate_channel =1; Serial.println("Channel 1 (B) Selected"); 부서지다; case 'm':// Measurement mode mode =0; Serial.println("Measurement Mode"); printHeader(); 부서지다; case 'c':// Calibration mode mode =1; Serial.println("Calibration Mode"); 부서지다; case 't':// Tare. Teset the scale to 0 Serial.println("Taring"); scales.power_up(); 지연(500); scales.tare(5); // Need to do this for each channel // and update our stored offset. Serial.println("Not properly Tared!"); 부서지다; case 'h':printHeader(); 부서지다; case 'z':zeroScales(); 부서지다; case 's':printSigfoxModelDetails(); 부서지다; default:Serial.println("Unknown instruction. Select:0, 1, m, c, t, h, z, or s"); Serial.println("m - measurement mode"); Serial.println("c - Calibration mode"); Serial.println("0 - Channel 0 (A) Calibration"); Serial.println("1 - Channel 1 (B) Calibration"); Serial.println("t - Tare (scale)"); Serial.println("z - Zero (Weight)"); Serial.println("h - print Header"); Serial.println("s - print Sigfox model details"); 부서지다; } }}// Measure (and record) the temperature and humidity levels// Sets alarms if out of rage (we can't use limits on Internet service side// as the messages may only be sent a few times a day and a brief (maybe hours)// out of range temperature/humidity could easily be missed between// message publishing.void measureTemperatureAndHumidity() { if (!bmeOk) { return; } currentTemperature =bme.readTemperature(); if (currentTemperature maxTemperature) { temperatureAlarm =true; } currentHumidity =bme.readHumidity(); if (currentHumidity maxHumidity) { humidityAlarm =true; }}// Print the values read from the BME280 sensorvoid printBmeValues() { //Serial.print("Temperature ="); Serial.print(bme.readTemperature(), 1); Serial.print("\t"); Serial.print(bme.readPressure() / 100.0F, 0); Serial.print("\t\t"); Serial.print(bme.readHumidity(),1); Serial.print("\t\t ");}// =============================================================// Sigfox handing// =============================================================// Determine if we should publish the Sigfox message.// We may also wish to publish if the stock level has// changed (or a significant weight level has changed)// but we would need to be careful of exceeding the // 140 messages per day for a noisy system.bool shouldPublish() { // Publish every 15 minutes // this doesn't really need to be this often // but whilst developing it helps keep an eye on the system. int messageIntervalMinutes =15; // On first run after reset // allow a 2 minute delay for the platform to be placed into // the box and stabalise before doing first publish // which is also expected to include a check for zeroing the platform. if (isFirstCycle) { messageIntervalMinutes =2; Serial.println("First cycle"); } // How long ago we last publish a Sigfox message long millisAgo =millis() - lastPublish; return millisAgo> (messageIntervalMinutes * 60 * 1000);}// Publish our measurements (weight, temperature, humidity etc)// to Sigfox.void publishMeasurements() { Serial.println("Sending via Sigfox..."); bool useDownlink =shouldUseDownlink(); if (useDownlink) { Serial.println("Using Sigfox downlink..."); } // stub for message which will be sent SigfoxMessage msg =buildMessage(); SigFox.begin(); SigFox.debug(); // Wait at least 30mS after first configuration (100mS before) delay(100); // Clears all pending interrupts SigFox.status(); delay(1); SigFox.beginPacket(); SigFox.write((uint8_t*)&msg, 12); // endPacket actually sends the data. uint8_t statusCode =SigFox.endPacket(useDownlink); printSigfoxStatus(statusCode); // Status =0 for a successful send, otherwise indicates // a failure. // Store when we last published a Sigfox message // to allow for timed message sending. if (statusCode ==0) { resetAlarms(); } // Update the last publish/downlink times // even if an error resonse was received to prevent // repeated publishing lastPublish =millis(); isFirstCycle =false; if (useDownlink) { parseDownlinkData(statusCode); lastDownlink =lastPublish; } // Store the status value lastSigfoxStatus =statusCode; SigFox.end();}void printSigfoxStatus(uint8_t statusCode) { Serial.print("Response status code :0x"); Serial.println(statusCode, HEX); if (statusCode !=0) { Serial.print("Sigfox Status:"); Serial1.println(SigFox.status(SIGFOX)); Serial1.println(); Serial.print("Atmel Status:"); Serial1.println(SigFox.status(ATMEL)); Serial1.println(); }}// Create the message to be publish to Sigfox.SigfoxMessage buildMessage() { SigfoxMessage message; message.status =getStatusFlags(); message.humidity =(int8_t )currentHumidity; message.temperature =(int8_t)currentTemperature; message.zeroWeight =(int16_t)zeroWeight; message.weight =(int16_t)currentWeight; message.itemCount =(int16_t)(stockLevel * 100); message.driftCorrection =0; // TODO message.filler =0; message.lastStatus =lastSigfoxStatus; return message;}// Get the status flags for the Sigfox message.byte getStatusFlags() { byte status =0; // B7 - First run, // B6 - HX711 fault // B5 - BME280 fault // B4 - Temperature alarm // B3 - Humidity alarm // B2 - weight alarm // B1 - Low stock // B0 - spare // Upper Nibble (Charging/Battery) // Battery flat if (isFirstCycle) { status |=0x80; // 1000 0000 } // HX711 fault. // we don't have a way to check this yet. if (!hx711Ok) { status |=0x40; // 0100 0000 } // BME280 fault if (!bmeOk) { status |=0x20; // 0010 0000 } // Over/Under temperature alarm if (temperatureAlarm> 0) { status |=0x10; // 0001 0000 } // Over/Under humidity alarm if (humidityAlarm) { status |=0x08; // 0000 1000 } // Over/under? weight alarm if (weightAlarm) { status |=0x04; // 0000 0100 } // if computed stock level low. if (lowStock) { status |=0x02; // 0000 0010 } return status;}// Determine if we are requesting a downlink message.bool shouldUseDownlink() { // When debugging uncomment this so as to not keep requesting // downlink //return false; // On first run we want to request a downlink // message to help with zero'ing and setup. if (isFirstCycle) { return true; } // How long ago we last did a downlink message. long millisAgo =millis() - lastDownlink; // try every 12 hours, this keeps us under the // maximum 4 per day. return millisAgo> (12 * 60 * 60 * 1000);}// Parse downlinked data.void parseDownlinkData(uint8_t statusMessage) { if (statusMessage> 0) { Serial.println("No transmission. Status:" + String(statusMessage)); 반품; } // Max response size is 8 bytes // set-up a empty buffer to store this. (0x00 ==no action for us.) uint8_t response[] ={0x00, 0x00, 0x00, 0x00, 0x00, 0x00, 0x00, 0x00 }; // Expect... // Byte 0:Flags // B7:Zero scales // B6:Set Temperature range (ignore min/max temp if 0) // B5:Set Humidity range (ignore min/max humidity if 0) // B4:Set tolerance? // B3:Set ??? // B2:Update unit weight (ignore update if 0) // B1:// B0:// Byte 1:Min T // Byte 2:Max T // Byte 3:Min Humidity // byte 4:Max Humidity // byte 5:Read tolerence??? (+/- x) // byte 6 &7:Unit weight // Parse the response packet from Sigfox if (SigFox.parsePacket()) { Serial.println("Response from server:"); // Move the response into local buffer. int i =0; while (SigFox.available()) { Serial.print("0x"); int readValue =SigFox.read(); Serial.println(readValue, HEX); response[i] =(uint8_t)readValue; i++; } // byte 0 - flags. // 0b 1000 0000 if (response[0] &0x80 ==0x80) { zeroScales(); } // 0b 0100 0000 if (response[0] &0x40 ==0x40) { updateTemperatureAlarm(response[1], response[2]); } // 0b 0010 0000 if (response[0] &0x20 ==0x20) { updateHumidityAlarm(response[3], response[4]); } // 0b 0000 0100 if (response[0] &0x04 ==0x04) { // Little Endian format. (ff dd -> 0xddff uint16_t weight =response[7] <<8 &response[6]; updateUnitWeight(weight); } } else { Serial.println("No response from server"); } Serial.println();}void printSigfoxModelDetails() { if (!SigFox.begin()) { Serial.println("Shield error or not present!"); return; } // Output the ID and PAC needed to register the // device at the Sigfox backend. String version =SigFox.SigVersion(); String ID =SigFox.ID(); String PAC =SigFox.PAC(); // Display module informations Serial.println("MKRFox1200 Sigfox configuration"); Serial.println("SigFox FW version " + version); Serial.println("ID =" + ID); Serial.println("PAC =" + PAC); Serial.println(""); Serial.print("Module temperature:"); Serial.println(SigFox.internalTemperature()); Serial.println("Register your board on https://backend.sigfox.com/activate with provided ID and PAC"); delay(100); // Send the module to the deepest sleep SigFox.end();}// =============================================================// General helper methods// =============================================================// Reset the alarms after they have been published.void resetAlarms() { temperatureAlarm =false; humidityAlarm =false; weightAlarm =false;}void zeroScales() { zeroWeight =lastAverage[0] + lastAverage[1]; Serial.print("Zero'd:"); Serial.print(zeroWeight, 1); Serial.println();}void updateTemperatureAlarm(int8_t lower, int8_t upper) { Serial.print("Setting temperature alarm. Min:"); Serial.print(lower); Serial.print(", Max:"); Serial.println(upper); minTemperature =lower; maxTemperature =upper;}void updateHumidityAlarm(int8_t lower, int8_t upper) { Serial.print("Setting humidity alarm. Min:"); Serial.print(lower); Serial.print(", Max:"); Serial.println(upper); minHumidity =lower; maxHumidity =upper;}void updateUnitWeight(uint16_t weight) { Serial.print("Setting unit weight:"); Serial.println(weight); unitWeight =weight;} Really Smart Box Github Repository
https://github.com/Tinamous/ReallySmartBox