

java

산업 제조
이 자습서에서는 예제를 통해 Java BufferedInputStream 및 해당 메서드에 대해 알아봅니다.
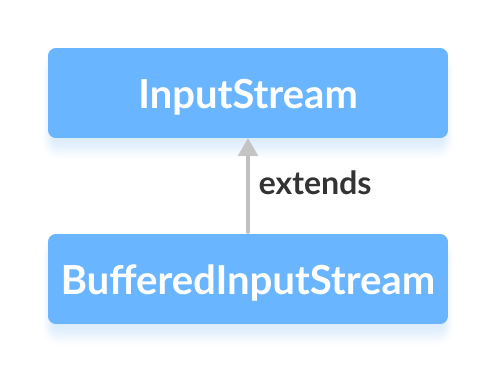
BufferedInputStream java.io 클래스 패키지는 데이터(바이트 단위)를 보다 효율적으로 읽기 위해 다른 입력 스트림과 함께 사용됩니다.
InputStream 확장 추상 클래스.
BufferedInputStream 내부 8192바이트의 버퍼를 유지합니다. .
BufferedInputStream의 읽기 작업 중 , 바이트 청크는 디스크에서 읽고 내부 버퍼에 저장됩니다. 그리고 내부 버퍼에서 바이트를 개별적으로 읽습니다.
따라서 디스크에 대한 통신 수가 줄어듭니다. 이것이 BufferedInputStream을 사용하여 바이트 읽기가 더 빠른 이유입니다. .
BufferedInputStream를 생성하려면 , java.io.BufferedInputStream를 가져와야 합니다. 먼저 패키지. 여기에서 패키지를 가져오면 입력 스트림을 생성할 수 있습니다.
// Creates a FileInputStream
FileInputStream file = new FileInputStream(String path);

// Creates a BufferedInputStream
BufferedInputStream buffer = new BufferInputStream(file);
위의 예에서는 BufferdInputStream을 생성했습니다. 버퍼라는 이름의 FileInputStream 명명된 파일 .
여기서 내부 버퍼의 기본 크기는 8192바이트입니다. 그러나 내부 버퍼의 크기도 지정할 수 있습니다.
// Creates a BufferedInputStream with specified size internal buffer
BufferedInputStream buffer = new BufferInputStream(file, int size);
버퍼 파일에서 바이트를 더 빨리 읽는 데 도움이 됩니다.
<시간>
BufferedInputStream 클래스는 InputStream에 있는 다양한 메서드에 대한 구현을 제공합니다. 수업.
read() - 입력 스트림에서 단일 바이트를 읽습니다.read(byte[] arr) - 스트림에서 바이트를 읽고 지정된 배열에 저장합니다.read(byte[] arr, int start, int length) - length와 같은 바이트 수를 읽습니다. 스트림에서 start 위치에서 시작하여 지정된 배열에 저장 input.txt라는 파일이 있다고 가정합니다. 다음 내용으로.
This is a line of text inside the file.
BufferedInputStream을 사용하여 파일을 읽어봅시다. .
import java.io.BufferedInputStream;
import java.io.FileInputStream;

class Main {
    public static void main(String[] args) {
        try {

            // Creates a FileInputStream
            FileInputStream file = new FileInputStream("input.txt");

            // Creates a BufferedInputStream
            BufferedInputStream input = new BufferedInputStream(file);

            // Reads first byte from file
            int i = input .read();

            while (i != -1) {
                System.out.print((char) i);

                // Reads next byte from the file
                i = input.read();
            }
            input.close();
        }

        catch (Exception e) {
            e.getStackTrace();
        }
    }
}
출력
This is a line of text inside the file.
위의 예에서 buffer라는 버퍼링된 입력 스트림을 만들었습니다. FileInputStream와 함께 . 입력 스트림은 input.txt 파일과 연결됩니다. .
FileInputStream file = new FileInputStream("input.txt");
BufferedInputStream buffer = new BufferedInputStream(file);
여기서는 read()을 사용했습니다. 버퍼링된 리더의 내부 버퍼에서 바이트 배열을 읽는 방법입니다.
입력 스트림에서 사용 가능한 바이트 수를 얻으려면 available()을 사용할 수 있습니다. 방법. 예를 들어,
import java.io.FileInputStream;
import java.io.BufferedInputStream;

public class Main {

   public static void main(String args[]) {

      try {

         // Suppose, the input.txt file contains the following text
         // This is a line of text inside the file.
         FileInputStream file = new FileInputStream("input.txt");

         // Creates a BufferedInputStream
         BufferedInputStream buffer = new BufferedInputStream(file);

         // Returns the available number of bytes
         System.out.println("Available bytes at the beginning: " + buffer.available());

         // Reads bytes from the file
         buffer.read();
         buffer.read();
         buffer.read();

         // Returns the available number of bytes
         System.out.println("Available bytes at the end: " + buffer.available());

         buffer.close();
      }

      catch (Exception e) {
         e.getStackTrace();
      }
   }
}
출력
Available bytes at the beginning: 39
Available bytes at the end: 36
위의 예에서
available()을 사용합니다. 입력 스트림에서 사용 가능한 바이트 수를 확인하는 메서드입니다.read() 메소드를 3번 사용하여 입력 스트림에서 3바이트를 읽습니다.
지정된 바이트 수를 버리고 건너뛰려면 skip()을 사용할 수 있습니다. 방법. 예를 들어,
import java.io.FileInputStream;
import java.io.BufferedInputStream;

public class Main {

   public static void main(String args[]) {

      try {
         // Suppose, the input.txt file contains the following text
         // This is a line of text inside the file.
         FileInputStream file = new FileInputStream("input.txt");

         // Creates a BufferedInputStream
         BufferedInputStream buffer = new BufferedInputStream(file);

         // Skips the 5 bytes
         buffer.skip(5);
         System.out.println("Input stream after skipping 5 bytes:");

         // Reads the first byte from input stream
         int i = buffer.read();
         while (i != -1) {
            System.out.print((char) i);

            // Reads next byte from the input stream
            i = buffer.read();
         }

         // Closes the input stream
         buffer.close();
      }

      catch (Exception e) {
         e.getStackTrace();
      }
   }
}
출력
Input stream after skipping 5 bytes: is a line of text inside the file.
위의 예에서는 skip()을 사용했습니다. 파일 입력 스트림에서 5바이트를 건너뛰는 방법입니다. 따라서 바이트 'T' , 'h' , 'i' , 's' 및 ' ' 입력 스트림에서 건너뜁니다.
버퍼링된 입력 스트림을 닫으려면 close()을 사용할 수 있습니다. 방법. close() 메소드가 호출되면 입력 스트림을 사용하여 데이터를 읽을 수 없습니다.
| 메소드 | 설명 |
|---|---|
mark() | 입력 스트림에서 데이터를 읽은 위치 표시 |
reset() | 표시가 설정된 입력 스트림의 지점으로 컨트롤을 반환합니다. |
자세한 내용은 Java BufferdInputStream(공식 Java 설명서)을 참조하십시오.
java
자바 FileWriter 클래스 이 자습서에서는 예제를 통해 Java FileWriter 및 해당 메서드에 대해 알아봅니다. FileWriter java.io 클래스 패키지는 데이터(문자)를 파일에 쓰는 데 사용할 수 있습니다. OutputStreamWriter 확장 수업. FileWriter에 대해 자세히 알아보기 전에 , Java 파일에 대해 알고 있는지 확인하십시오. FileWriter 만들기 파일 작성기를 만들려면 Java.io.FileWriter을 가져와야 합니다. 먼저 패키지. 패키지를 가져온 후 파일 작성기
Java BufferedWriter 클래스 이 자습서에서는 예제를 통해 Java BufferedWriter 및 해당 메서드에 대해 알아봅니다. BufferedWriter java.io 클래스 패키지는 데이터(문자)를 보다 효율적으로 쓰기 위해 다른 작성자와 함께 사용할 수 있습니다. 추상 클래스 Writer를 확장합니다. . BufferedWriter 작업 BufferedWriter 내부 8192자의 버퍼를 유지합니다. . 쓰기 작업 중에 문자는 디스크 대신 내부 버퍼에 기록됩니다. 버퍼가 채워지거나 기록기가 닫히면 버