소진 수지를 사용한 3D 인쇄 부품의 미세융합
마이크로퓨전 또는 로스트 왁스 캐스팅 보석 산업에서 가장 널리 사용되는 제조 방법 중 하나입니다. 알려진 가장 오래된 주조 공정입니다.
주조를 통해 전통적으로 왁스로 모델링한 프로토타입으로 만든 주형을 통해 금속 복제품을 얻을 수 있습니다. 이 경우 번아웃 레진으로 3D 프린팅된 부품이 왁스 모델을 대체하는 데 사용됩니다.
보석은 금, 백금, 은, 황동 등 다양한 금속으로 만들 수 있습니다. , 주조 공정을 사용합니다. 아래에서 소진된 레진으로 3D 프린팅된 조각에서 보석을 위한 미세융합 과정을 볼 수 있습니다.
1- 부품의 3D 프린팅
CAD 소프트웨어를 사용하여 만든 디자인을 기반으로 원하는 모델을 3D로 인쇄해야 합니다. 현재 다양한 제조업체에서 사용할 수 있는 하소 가능한 수지가 많이 있습니다. 하나 또는 다른 재료의 사용은 사용된 3D 프린터와 부품에 필요한 특성에 따라 다릅니다.
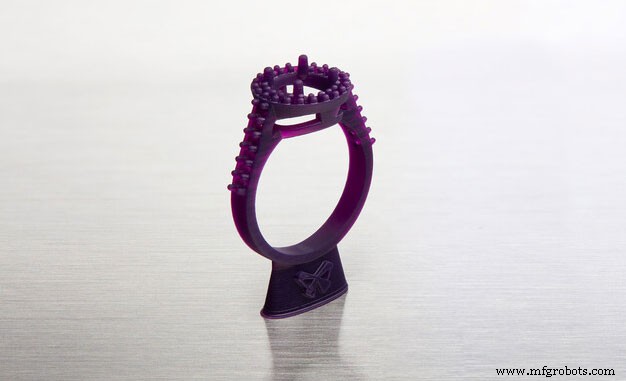
이미지 1:FormLabs 번아웃 레진으로 3D 프린팅된 링. 출처:FormLabs.
보석 부문에서 가장 인기 있는 3D 프린터 중 하나는 유명한 제조업체인 FormLabs의 Form3입니다. 이 3D 프린터는 고급 기술 지식이 필요하지 않으므로 어려움 없이 사용할 수 있습니다 . Form3 3D 프린터는 제조업체에서 개발한 지원 자료만 사용하도록 제한합니다. 이는 설정이 필요하지 않고 재료 유형과 몇 가지 기본 매개변수만 선택하여 구성 매개변수와 수정 가능한 값이 최소로 줄어들기 때문에 이점이 될 수 있습니다. 이렇게 하면 오차 범위가 최소화됩니다.
다음 표는 가장 널리 사용되는 일부 가연성 레진과 3D 프린터와의 호환성을 보여줍니다.
| 수지 | 제조업체 | 기술 | 호환성 |
|---|
| 캐스터블 왁스 | FormLab | SLA | 양식 2, 양식 3, 양식 3L, 양식 3+ |
| 캐스터블 왁스 40 | FormLab | SLA | 양식 2, 양식 3, 양식 3L, 양식 3+ |
| zWax 앰버 | UniZ | LCD | Slash, Slash 2, Slash 2 Plus, Slash 2 Pro |
| zWax Purple | UniZ | LCD | Slash, Slash 2, Slash 2 Plus, Slash 2 Pro |
| Bluecast original | Zortrax | LCD | UniZ, WANHAO, zortrax, ANYCUBIC, ASIGA, B9 Creator, FLASH FORGE Moon Ray, Prusa. |
| Bluecast X5 | Zortrax | LCD | UniZ, WANHAO, zortrax, ANYCUBIC, ASIGA, B9 Creator, FLASH FORGE Moon Ray, Prusa. |
| Bluecast X10 | Zortrax | LCD | UniZ, WANHAO, zortrax, ANYCUBIC, ASIGA, B9 Creator, FLASH FORGE Moon Ray, Prusa. |
| Dental Cast | Harz Labs | LCD | Formlabs, PEOPOLY, UniZ, WANHAO, zortrax, ANYCUBIC, ASIGA, B9 Creator, FLASH FORGE Moon Ray, Prusa. |
Table 1:Burn-out resins and compatibility. Source:Filament2print.
Each material has different properties and requires different parameters. However, they all have a common characteristic:they have been developed to replace wax parts in the microfusion process, with a composition that achieves castings free of residues that could affect the final result of the parts.
Once the parts have been printed, they must be cured if the material requires it. This depends on the composition of the resin and the manufacturer's advice should always be followed to achieve an optimum result.
2- Wax tree
Once the parts are cured (in cases where this step is required), the removal of the backing can be carried out, always with great care. Sandpaper (400 grit or higher) or even a rotary tool with a polishing attachment can be used to achieve total removal of the support and a perfect finish.
To create the wax tree, a wax base is taken and attached to a rubber cover of the sprue. Small cylindrical wax rods are welded to the wax base using a heat tool. The 3D printed parts are welded to the other end of the bars.
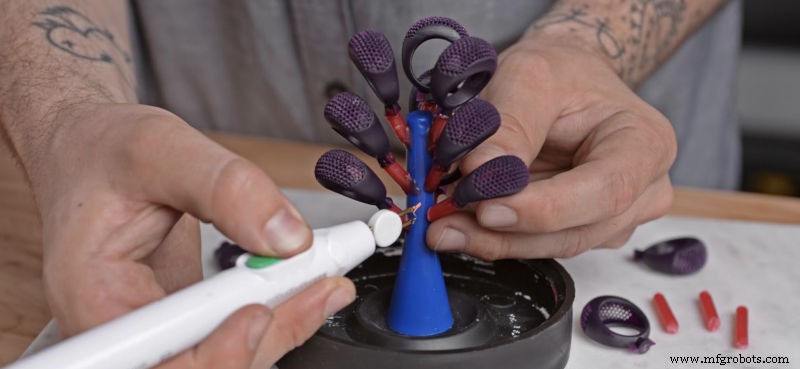
Image 2:Casting wax tree. Source:FormLabs.
This process is similar to that carried out in microfusion when casting traditionally carved wax pieces.
3- Mould preparation
The wax tree with the 3D printed parts in burn-out resin is to be placed inside a refractory steel cylinder, which is to be fitted into the rubber cylinder cover. In case the refractory steel cylinder has holes, these should be covered by wrapping the cylinder in adhesive tape.
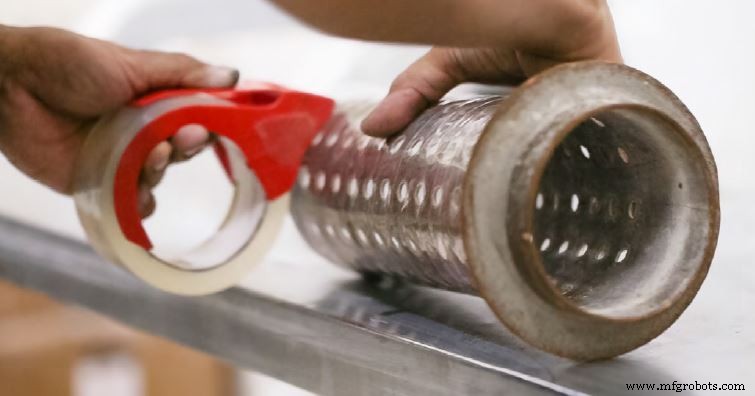
Image 3:Refractory steel cylinder shell. Source:Formlabs.
The casting must then be poured slowly, always from the side of the cylinder to avoid damaging the tree with the parts 3D printed with calcineable resin.
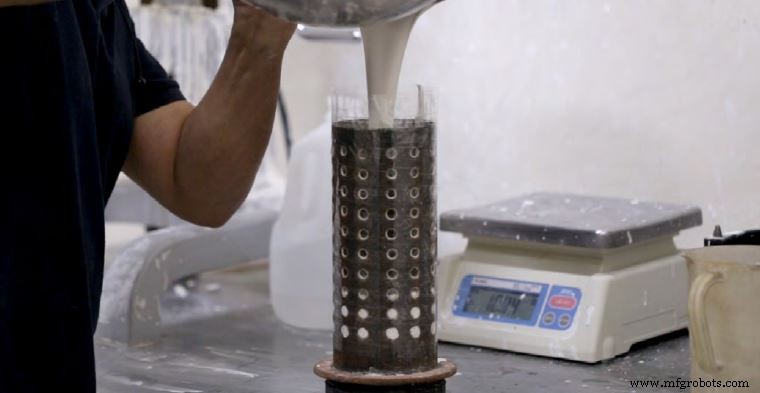
Image 4:Pouring of the casting into a refractory steel cylinder. Source:Formlabs.
When pouring the casting, it is possible that small air pockets may remain which can affect the quality of the final parts. For this reason, it is very important to carry out the degassing process in a vacuum chamber.
4- Burnout
The cylinder is placed in the oven following the time and temperature instructions recommended by the manufacturer. During this time, the wax will burn out without leaving residues, leaving the mould ready.
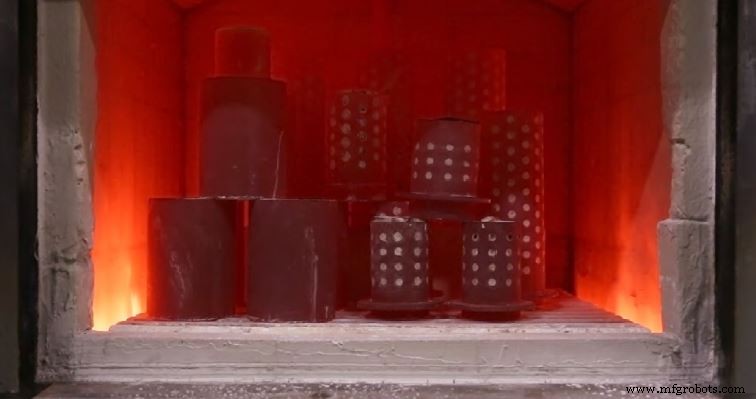
Image 5:Burnout process. Source:Formlabs.
The desired metal must then be poured into the mould to produce the final parts.
5- Washing and polishing
After casting, the mould is carefully removed from the furnace and immersed in water using tongs. During this process, the casting will melt, leaving the metal parts visible. Once washed, the metal parts are separated from the tree, polished and polished until the desired finish is achieved.
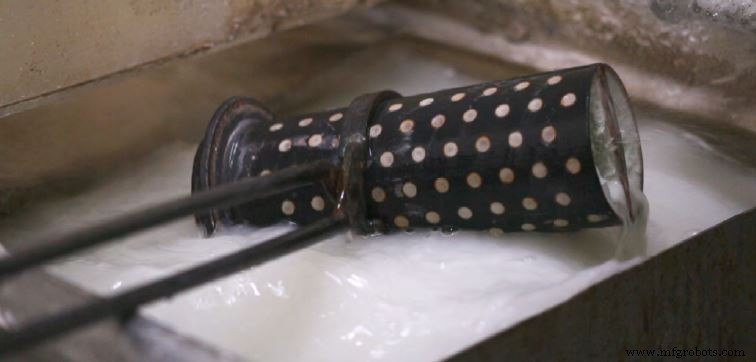
Image 6:Washing process. Source:Formlabs.
Once washed, the metal parts are separated from the tree, polished and polished to the desired finish.
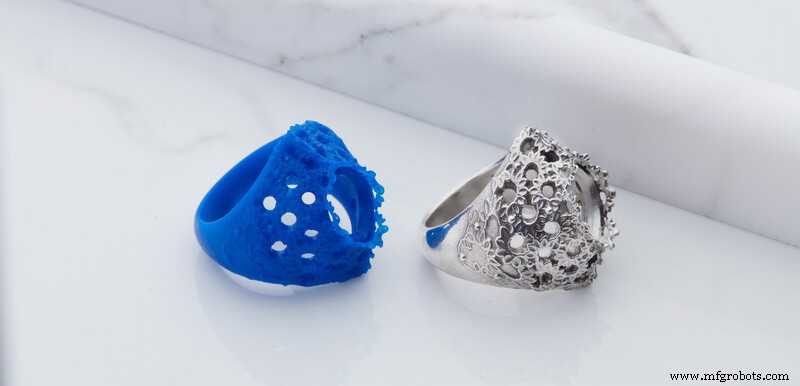
Image 7:3D printed ring with burn-out resin and silver ring after the microfusion process. Source:Formlabs.
The use of castable resins in the jewellery sector offers numerous advantages . Among others, it allows you to 3D print as many models as you want, quickly and with extreme precision . This results in a significant reduction in costs and production times.


